Welcome to the ultimate guide on changing brightness on Windows 11! Whether you’ve squinted at your screen in a dark room or struggled to see anything on a sunny day, you understand the importance of adjusting your screen brightness. This article will walk you through various methods to change brightness on Windows 11, ensuring your screen is perfectly lit no matter the situation. Ready to become a brightness-adjusting expert? Let’s explore!
Table of Contents
1. How to Change Brightness on Windows 11 Using Windows Settings
Adjusting the brightness on your Windows 11 PC through the Windows settings is a simple process that offers precise control over your display. Here’s a detailed guide to help you change your screen brightness using Windows Settings.
Step 1: Click on the Start Menu (the Windows icon in the taskbar) to bring up the main menu. Search “settings” and tap on it. Alternatively, press Windows + I on your keyboard to directly open the Settings app.

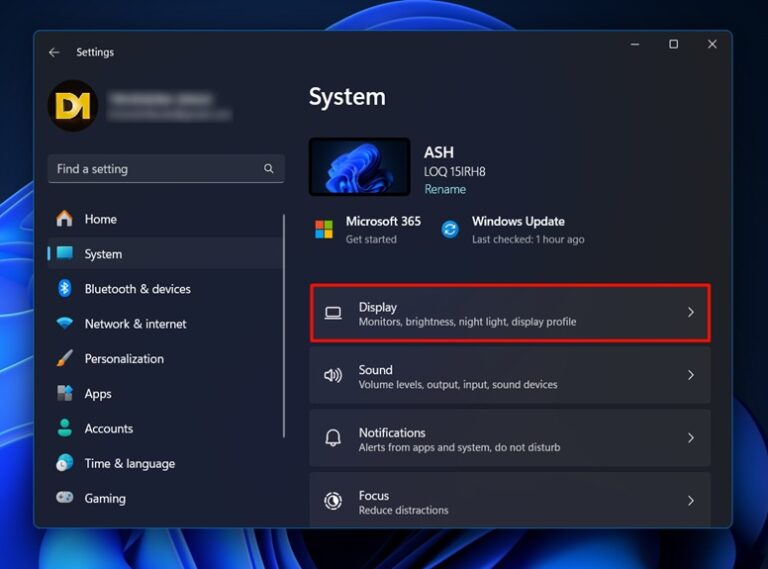
Step 2: In the Settings window, look for the System option, which is typically the first option and is represented by a computer monitor icon. Click on it.

Step 3: In the System menu, click on Display located on the left sidebar. This section manages all the settings related to your screen.
Step 4: Under the Brightness and Color section, you will find a slider labeled Change brightness. Move the slider to the left to decrease the brightness or to the right to increase it.
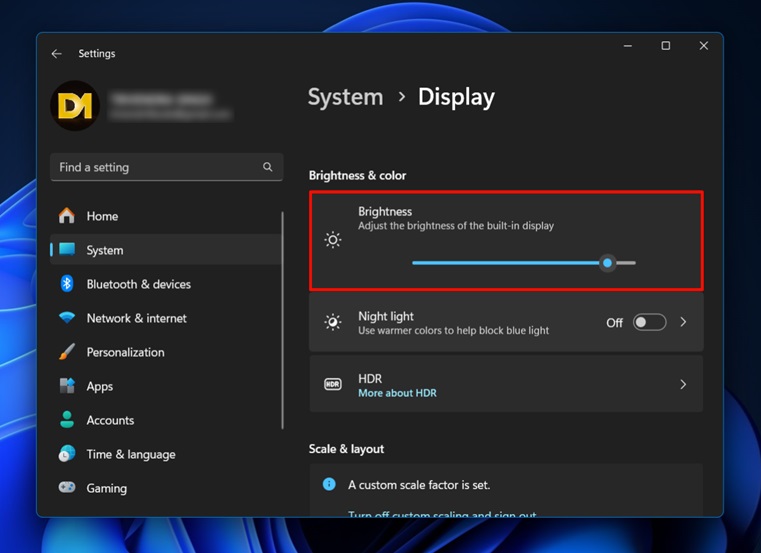
Your screen brightness will adjust immediately, allowing you to achieve the desired brightness level quickly and efficiently.
2. How to Change Brightness on Windows 11 Using Quick Settings
If you’re looking for a quick and easy way to adjust the brightness on your Windows 11 PC, the Quick Settings menu is your best bet. This method is incredibly convenient for making swift changes without diving deep into settings menus. Here’s how to change the brightness using Quick Settings:
Step 1: In the bottom right corner of your taskbar, you’ll see a cluster of network, volume, and battery icons. Clicking any of these icons will open the Quick Settings menu. You can also press Windows + A on your keyboard to open the Quick Settings menu instantly.

Step 2: At the bottom of the Quick Settings menu, you’ll see a slider labeled Brightness. Click and hold the slider, then drag it left to decrease the brightness or right to increase it. The changes will take effect immediately, allowing you to find the perfect brightness level for your environment quickly.

This method is perfect for on-the-fly adjustments, making it easy to adapt your screen brightness to different lighting conditions quickly.
3. How to Change Brightness on Windows 11 Using the Function Keys
Adjusting the brightness on your Windows 11 device can be easily accomplished using the function keys on your keyboard. This method is especially useful for those who prefer quick, tactile adjustments without delving into software menus. Here’s a step-by-step guide on how to change brightness using the function keys:
Step 1: Look for keys on your keyboard that have a sun icon. These icons usually depict a bright sun for increasing brightness and a dim sun for decreasing brightness. These keys are typically located on the top row of the keyboard and might be labeled as F2 and F3, in some of the keyboard it may be F6 and F7 etc.
Step 2: Press the key with dim sun icon to decrease brightness and bright sun icon to increase the brightness. For example, in below snap F3 has the bright sun icon, pressing F3 will make your screen brighter.

Step 3: On some keyboards, especially laptops, you may need to hold down the Fn (Function) key while pressing the brightness keys. The Fn key is usually located in the bottom-left corner of the keyboard. Hold down Fn and then press the appropriate brightness key. c vbnm,

Using the function keys to adjust brightness is incredibly convenient and efficient. It allows you to make quick changes without navigating multiple menus or settings. This is particularly useful when adjusting brightness frequently, such as when moving between different lighting environments.
4. How to Change Brightness on Windows 11 using The Mobility Center
The Windows Mobility Center is a convenient tool for adjusting screen brightness, particularly useful for laptop users. This utility centralizes various settings, including brightness, making it easy to manage your display. Follow these steps to adjust your screen brightness using the Mobility Center.
Step 1: Open the Windows Power User Menu by pressing the Windows + X and then select Mobility Center from the list. This method provides quick access to the Mobility Center.

If you prefer using the Start Menu, click the Start button and type Mobility Center in the search bar. Click on the Windows Mobility Center application from the search results.

Step 2: Once the Windows Mobility Center is open, locate the Display brightness slider. This slider is typically found at the top of the window, labeled clearly for ease of use. Click and drag the slider left to decrease or right to increase the brightness. The changes will take effect immediately, allowing you to see the adjustment in real time.
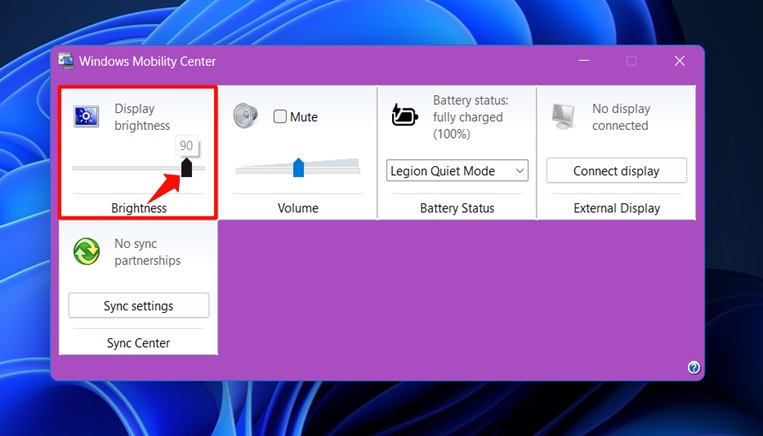
The Mobility Center is an excellent tool for accessing several settings in one place, making it ideal for quick adjustments.
5. How to Change Brightness on Windows 11 Using PowerShell
PowerShell offers a way for tech-savvy users to change brightness using command-line instructions. This method provides precise control over brightness settings and is ideal for those who prefer using a command-line interface. Here’s a detailed guide to help you through the process.
Step 1: Press the Windows key on your keyboard. This opens the start menu, which provides quick access to various system settings, including the search feature. Search for Windows PowerShell. This opens the search results along with the Windows PowerShell tool in the right pane. Locate and click on “Run as administrator” to run PowerShell with administrative privileges.

Step 2: In the PowerShell window, type the following command. This command sets the brightness to a specific level. Replace 50 with your desired brightness percentage (0 to 100):
(Get-WmiObject -Namespace root/wmi -Class WmiMonitorBrightnessMethods).WmiSetBrightness(1,50)
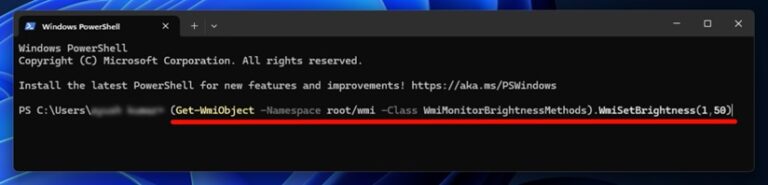
Step 3: Press Enter to run the command. Your screen brightness will adjust to the specified level immediately.
PowerShell is a powerful tool for those who prefer a command-line interface and offers precise control over brightness settings.
6. How to Change Brightness on Windows 11 on an External Monitor Using Monitorian
External monitors often have their own brightness controls, but software like Monitorian can simplify the process significantly. Here’s a step-by-step guide to using Monitorian to adjust the brightness on your external monitors.
Download and Install Monitorian:
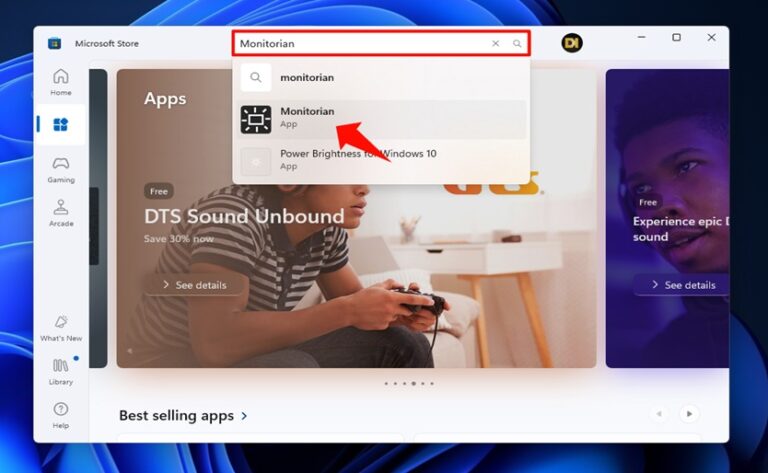
Step 1: Open the Microsoft Store on your Windows 11 PC. You can find it by clicking on the Start Menu and typing Microsoft Store in the search bar.

Step 2: In the Microsoft Store, use the search function to find Monitorian. It’s a free app designed to manage multiple monitors easily.
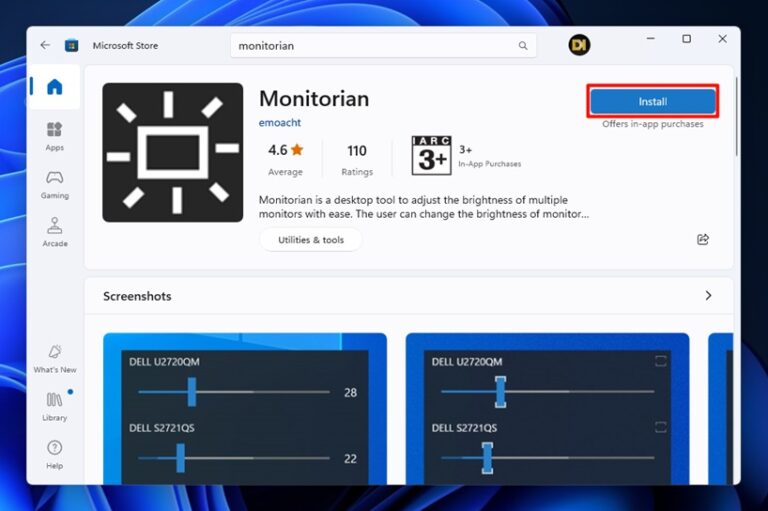
Step 3: Click on Monitorian in the search results, then click Install. The app will download and install automatically.
Open Monitorian:
Step 4: After installation, open Monitorian from the Start Menu. Simply click the Start button and type Monitorian to find and launch the app.

Step 5: Monitorian will display all connected monitors in a simple interface with sliders for each monitor. Use the sliders to adjust the brightness of each external monitor to your preference. Slide left to decrease brightness and right to increase it.

Conclusion
Changing the brightness on Windows 11 is essential for a comfortable viewing experience, and now you have several methods at your disposal. Whether you prefer using Windows settings, Quick Settings, function keys, the Mobility Center, PowerShell, or third-party software like Monitorian, you can easily find a method that suits your needs.
By following these guidelines, you can ensure your screen is always at the optimal brightness, enhancing your overall computing experience on Windows.
Frequently Asked Questions (FAQs)
Q1. Why can’t I adjust my brightness on Windows 11?
If you can’t adjust your brightness, it might be due to outdated drivers or incorrect settings. To resolve this, ensure that your graphics drivers are up to date. You can do this by going to the Device Manager, finding your display adapters, and updating the drivers. Additionally, check your power settings to make sure nothing is preventing you from changing the brightness.
Q2. How do I adjust brightness on a desktop monitor?
Most desktop monitors have physical buttons or a joystick for adjusting the brightness. These buttons are usually located on the bottom or side of the monitor. For a more convenient solution, you can use software like Monitorian, which allows you to adjust the brightness of external monitors directly from your desktop.
Q3. Can I set my brightness to adjust automatically?
Yes, Windows offers an option to adjust brightness automatically based on ambient light. To enable this feature, go to Settings > System > Display. Under the Brightness and Color section, toggle the option to Change brightness automatically when lighting changes. This setting uses your device’s sensors to adjust the screen brightness according to the surrounding light conditions.
Q4. Is there a shortcut to open Quick Settings?
Absolutely! You can quickly access the Quick Settings menu by pressing Windows + A on your keyboard. This shortcut brings up the Quick Settings panel, where you can adjust the brightness slider along with other settings like Wi-Fi, Bluetooth, and volume.
Q5. How do I reset my brightness settings to default?
To reset your brightness settings to default, you can restore your display settings in the display settings menu. Navigate to Settings > System > Display and look for an option to reset to default settings. Alternatively, if you’re using an external monitor, you can reset the brightness through the monitor’s on-screen display (OSD) settings, typically accessible via the physical buttons on the monitor.
