When you’re ready to upgrade to Windows 11 or install it on a new computer, the Media Creation Tool becomes your essential companion. I’ll guide you through using this official Microsoft utility that simplifies the Windows 11 installation process, whether you’re creating a bootable USB drive, downloading an ISO file, or performing an in-place upgrade. You’ll learn how to handle each step with confidence, from the initial download to the final installation.
Understanding the Media Creation Tool’s capabilities will save time and prevent common issues many users face. I’ll show you how to prepare your system properly, create installation media, and troubleshoot any problems that might arise. By the end of this guide, you’ll know exactly how to use this powerful tool to get Windows 11 up and running on your system while keeping your files and settings intact if you choose to do so.
If you’re interested in making your Windows 11 run faster, check out my comprehensive guide on “How to Speed Up Windows 11“
Table of Contents
What you Need to Use Windows 11 Media Creation Tool
System Requirements
- Log in with an Administrator account on your computer. Standard user accounts lack the necessary permissions to run the tool properly.
- Connect to a stable Internet connection, preferably broadband. The tool will download several gigabytes of data during operation.
- Free up at least 9GB of space on your system drive. This accommodates both the downloaded files and temporary files created during the process.
Media Creation Requirements
- Prepare a blank USB flash drive with at least 8GB of storage space. The drive will be formatted during the process, erasing all existing data.
- Insert a blank DVD into your computer’s DVD writer if you prefer disc-based media. This is an alternative to using a USB drive.
Target PC Requirements for Windows 11
- Confirm your target computer has a 64-bit processor with at least 2 cores. Windows 11 does not support 32-bit processors or single-core CPUs.
- Verify the presence of TPM version 2.0 in your system BIOS. This security feature is mandatory for Windows 11 installation.
- Enable UEFI and Secure Boot in your computer’s BIOS settings. Legacy BIOS systems are not compatible with Windows 11.
- Install at least 4GB of RAM in your target system. Applications may run slowly with less memory than this minimum requirement.
- Provide at least 64GB of available storage on the target device. This allows space for the operating system and future updates.
- Ensure your graphics card is DirectX 12 compatible with a WDDM 2.0 driver.
Recommended Additional Items
- Connect an external hard drive to back up your existing data. This prevents data loss in case of installation issues.
- Use an Ethernet connection instead of Wi-Fi for faster, more reliable downloads. This reduces the chance of interruptions during the download process.
- Locate your Product Key if you’re performing a clean installation. Upgrades from activated Windows 10 usually don’t require manual activation.
How to Download and Verify Windows 11 Media Creation Tool
Before we begin, ensure your computer is connected to a stable internet connection and that you have administrator rights. The download size is relatively small (around 20MB), but the tool will need to download additional files later.
Downloading Windows 11 Media Creation Tool from Official Source
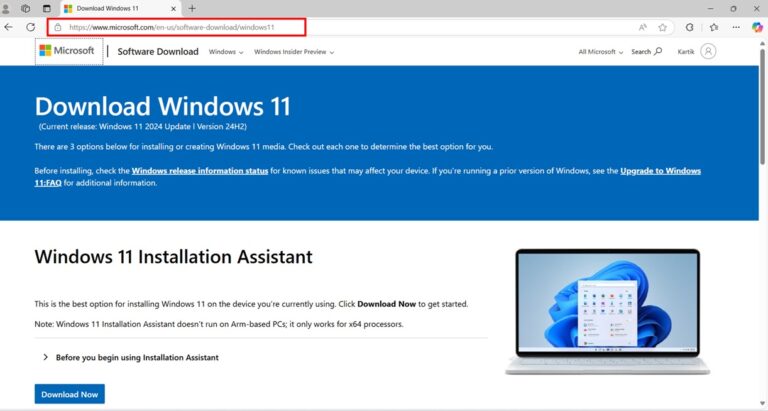
- Open your web browser and open the link: “https://www.microsoft.com/en-us/software-download/windows11”
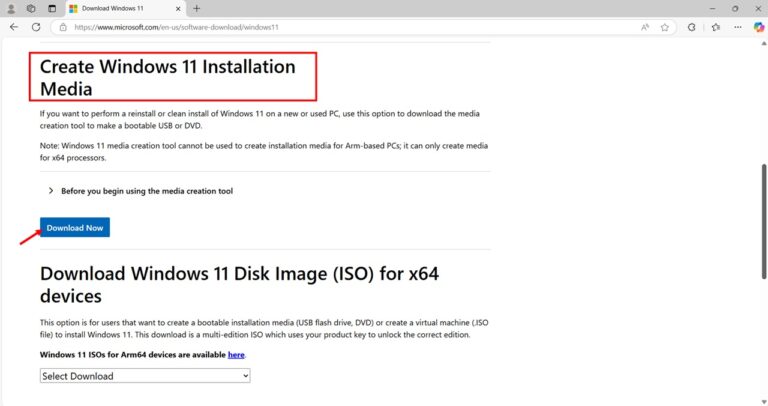
- On the open web page, scroll to the Create Windows 11 Installation Media section and click Download Now.
- Wait for the download to complete, which typically takes less than 5 minutes on most internet connections.
Verifying the Download
- Navigate to your Downloads folder, right-click on MediaCreationToolW11.exe, and select Properties.
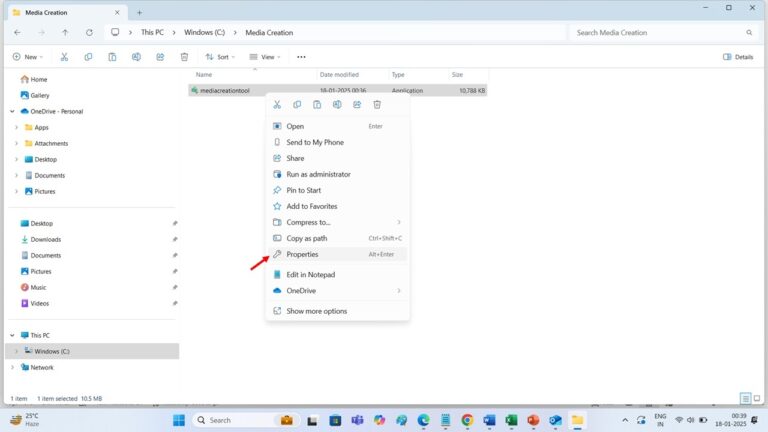
- Select the Digital Signatures tab, and verify that “Microsoft Corporation” appears as the signer.
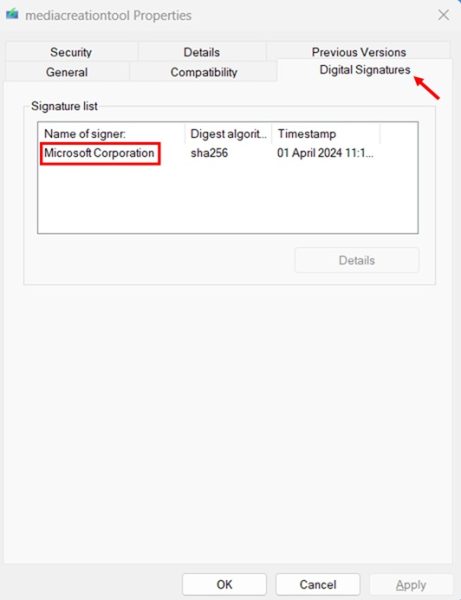
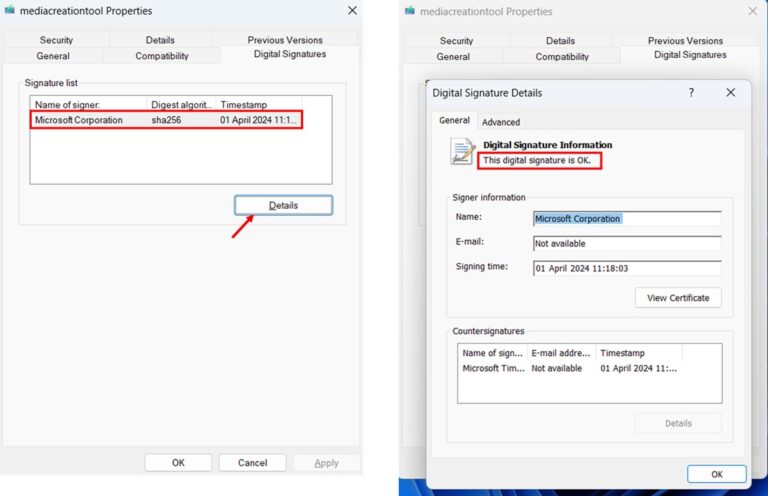
- Select the signer “Microsoft Corporation”, select Details, and confirm the signature is valid.
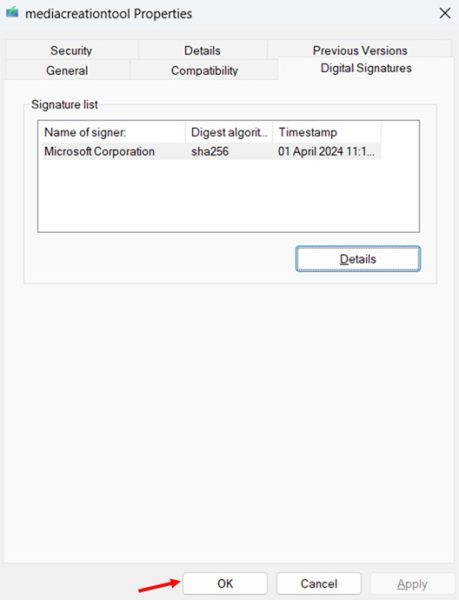
- Close the Properties window by selecting OK once verification is complete.
Use Windows 11 Media Creation Tool to Create Windows 11 Installation Media (USB Option)
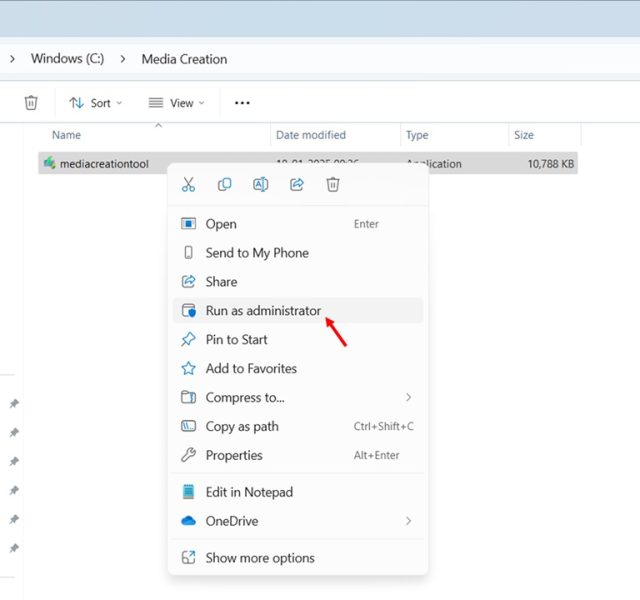
- Right-click on MediaCreationToolW11.exe, and select Run as administrator.
- Select Yes when the User Account Control prompt appears.
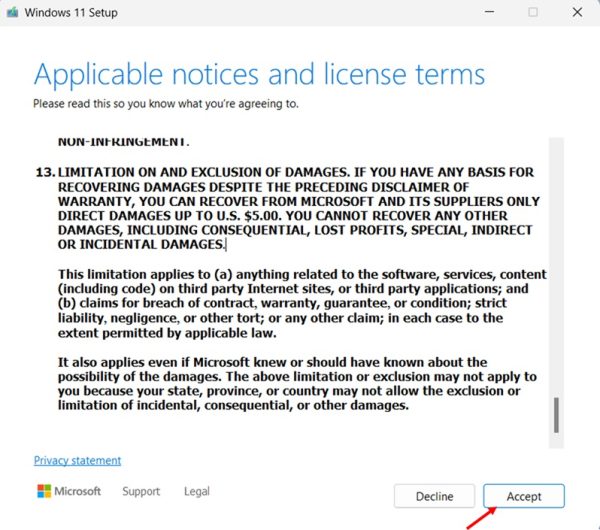
- Select Accept when presented with the applicable notices and license terms.
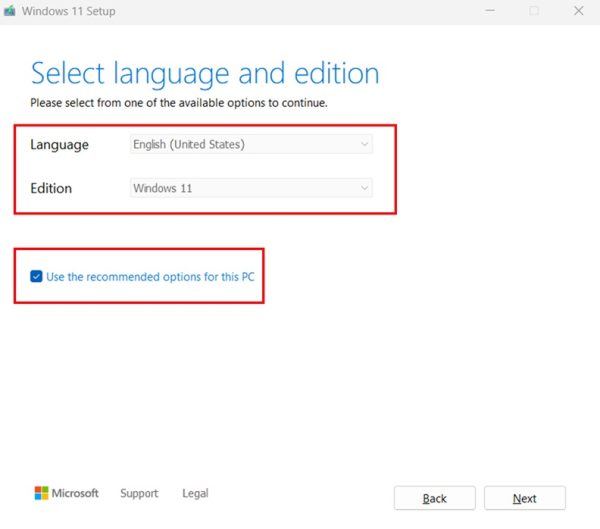
- Select the language and the edition manually or tick on use the recommended option for the PC so that it will be automatically selected as per the installed OS on the PC from where you are running MediaCreationToolW11.exe.
- Insert a blank USB drive with at least 8GB of space into your computer.
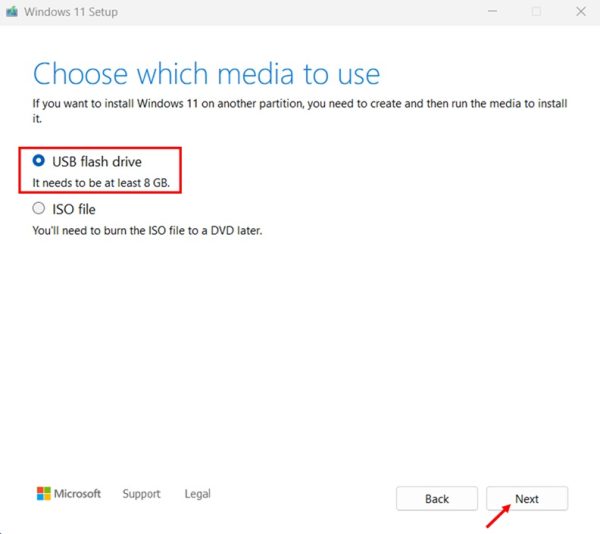
- In the next window, “Choose which media to use,” select USB flash drive
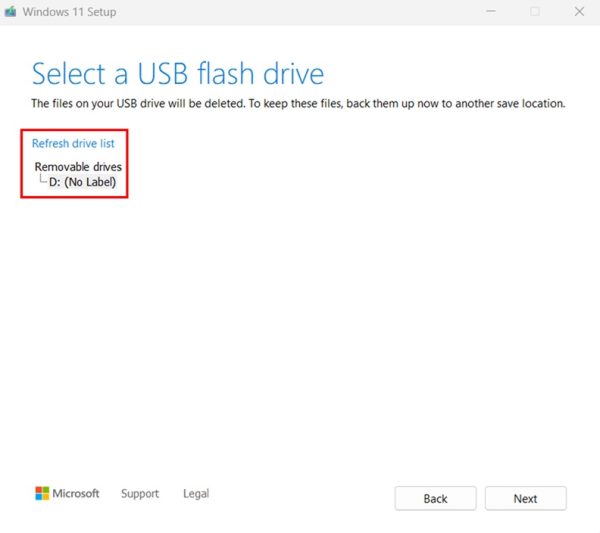
- Select your USB drive from the list of available drives and choose Next to continue.
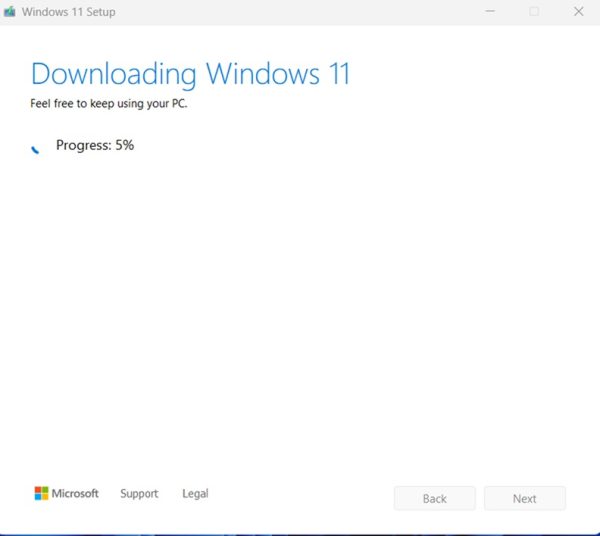
- The setup will now start downloading Windows 11
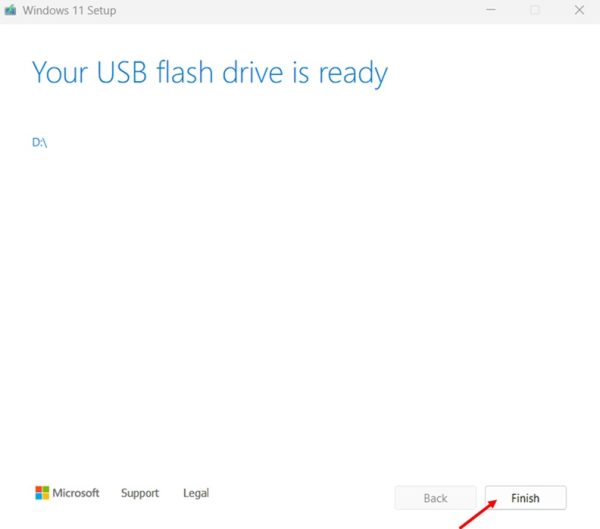
- Select Finish when the process completes, and safely remove your USB drive.
Use Windows 11 Media Creation Tool to Create Windows 11 Installation Media (ISO Option)
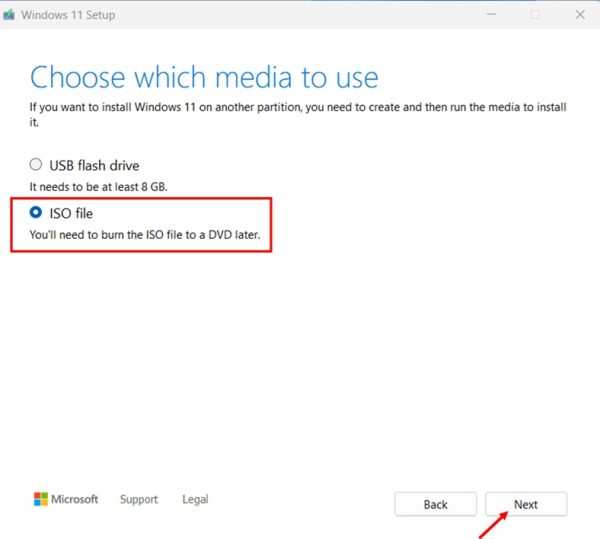
- Select the ISO file as your choice for media creation if you prefer this option.
- Choose a location to save the ISO file by selecting Browse and navigating to your preferred folder.
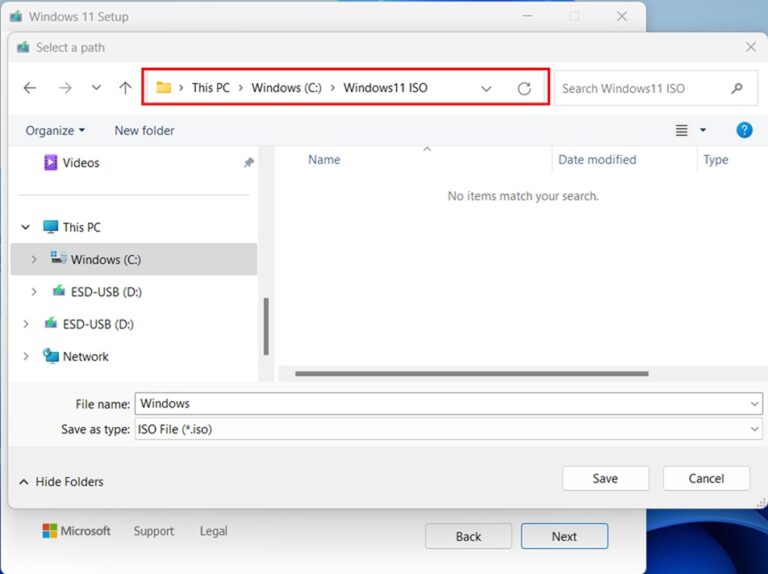
- Enter a name for your ISO file, and select Save to confirm the location.
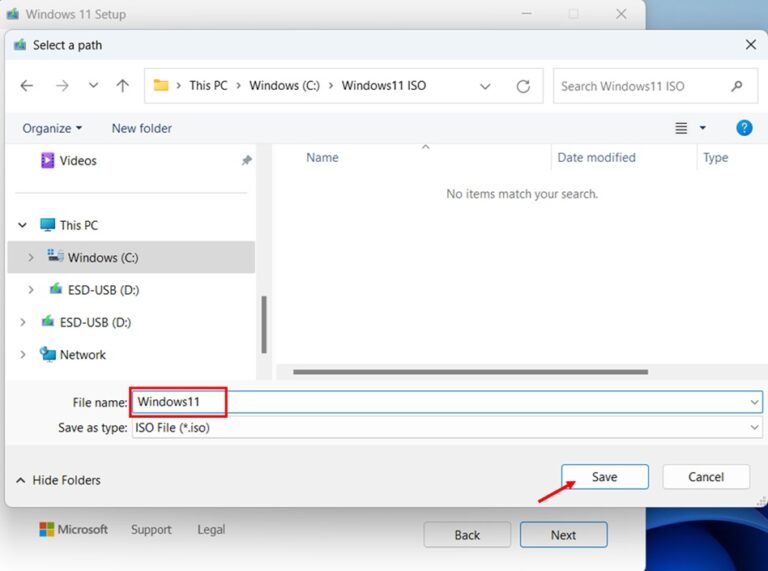
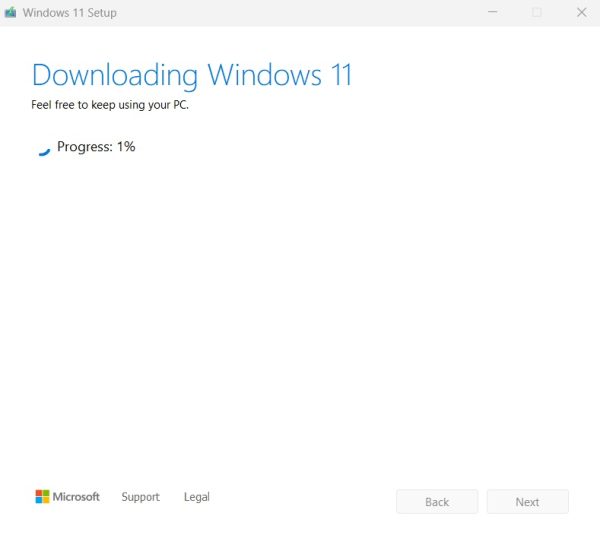
- Wait while the tool downloads Windows files and creates the ISO file.
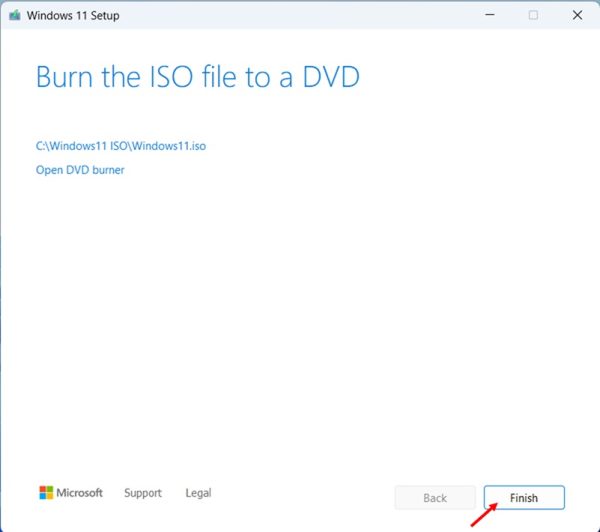
- Select Finish when the process completes, and find your ISO file in the chosen location.
Important Notes:
Remember that the Media Creation Tool requires:
- A stable internet connection throughout the process
- Administrator privileges on your computer
- At least 8GB of free space on the USB drive
- Approximately 45-60 minutes for the complete process
- The target PC must meet Windows 11 system requirements
If you encounter any errors during these steps, refer to the troubleshooting section of this guide for specific solutions.
Best Practices for Windows 11 Media Creation Tool
System Preparation
Before starting the installation process:
- Select Start, type Windows Update, and install all pending updates for your current system.
- Open Task Manager, select More Details, and close all unnecessary running applications.
- Select Start, type Disk Cleanup, and remove temporary files and previous Windows installations.
- Navigate to Control Panel, select Power Options, and set your PC to high performance mode.
Backup Procedures
Protect your data before proceeding:
- Select Start, type File History, and enable backup for your important folders.
- Connect an external drive, open File Explorer, and manually copy critical files as a second backup.
- Select Start, type Credential Manager, and export your saved passwords.
- Open your browser settings, select Bookmarks, and export your bookmarks file.
- Navigate to Documents, locate your Outlook data file (.pst), and back it up if you use Outlook.
Windows 11 Media Creation Tool Troubleshooting Guide
Resolving Error Code 0x80070002 (Missing System Files)
- Select Start, type Command Prompt, right-click on it, and select Run as administrator.
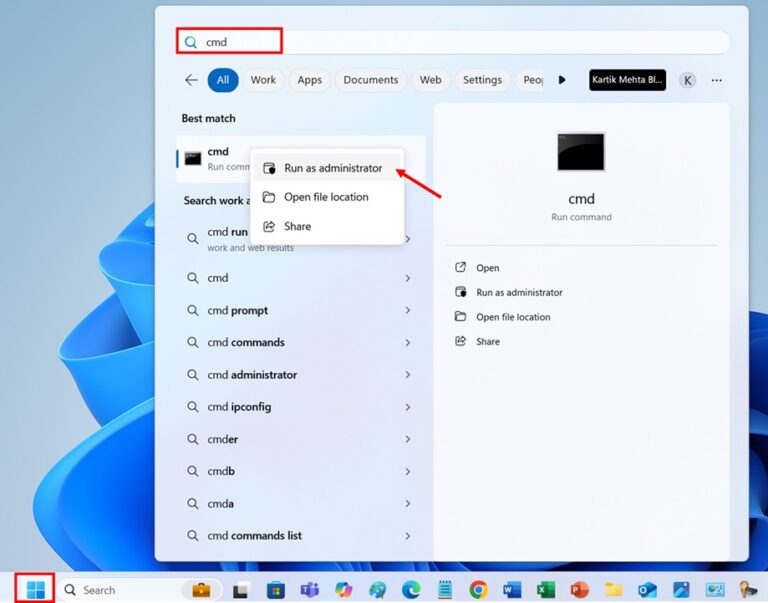
- Select Yes when the User Account Control prompt appears.
- Type DISM /Online /Cleanup-Image /RestoreHealth into the Command Prompt window, and press Enter.
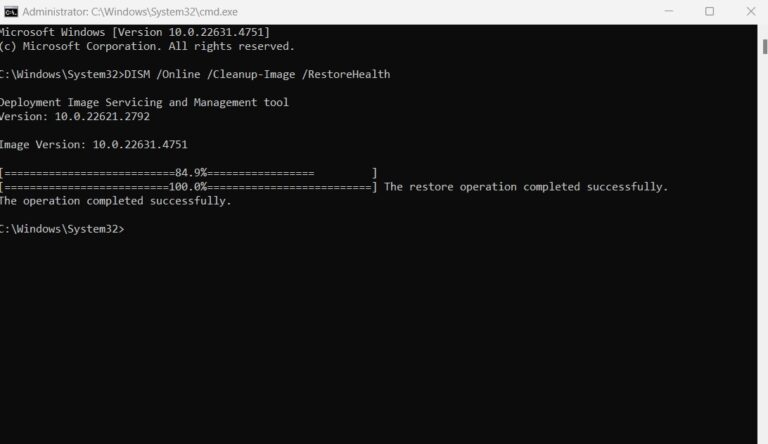
- Type sfc /scannow after the DISM process is complete, and press Enter.
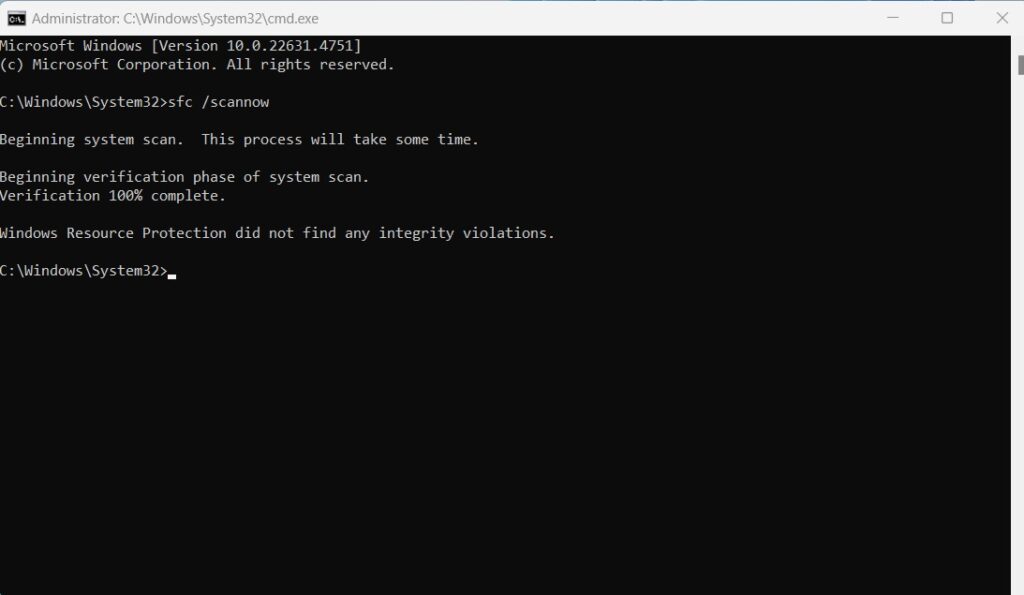
- Select Start, select Power, and choose Restart once the scan finishes.
To understand different methods to restart your Windows 11 you can refer to “How to Restart Windows 11“
Fixing Error Code 0x80070005 (Access Denied)
- Navigate to your Downloads folder, right-click on MediaCreationToolW11.exe, and select Properties.
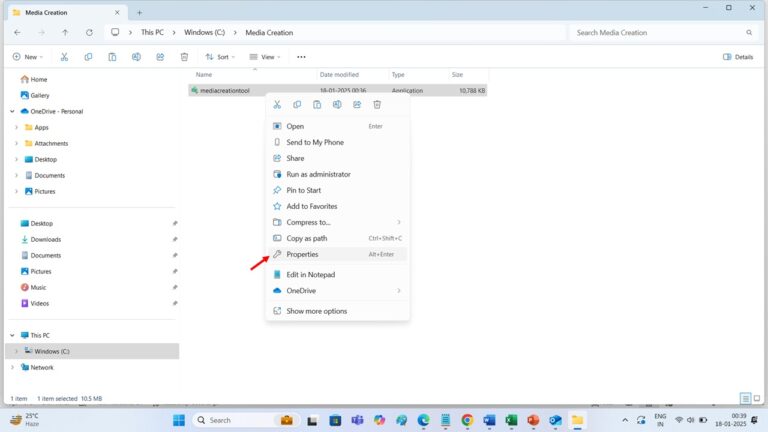
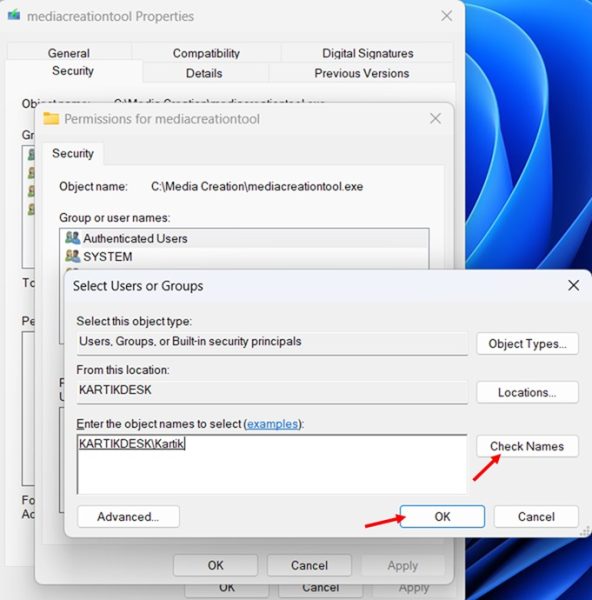
- Select the Security tab, select Edit, and then choose Add.
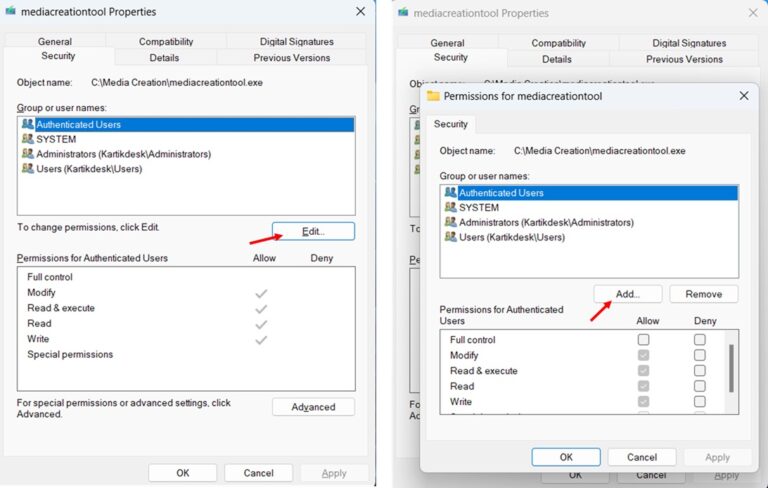
- Type your Windows username in the text box, select Check Names, and click OK.
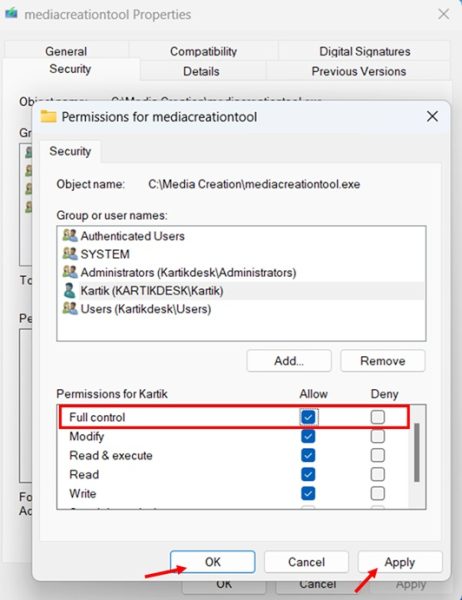
- Check the box next to Full Control, select Apply, and click OK.
Conclusion
The Windows 11 Media Creation Tool puts you in control of your operating system upgrade or installation. I’ve shown you how this versatile tool can help you create bootable USB drives, download ISO files, or perform direct upgrades while maintaining your personal files and applications. Whether upgrading a single computer or preparing installation media for multiple devices, you now have the knowledge to handle the process confidently.
Remember that while the tool streamlines the Windows 11 installation process, preparing your system and verifying compatibility will save you hours of troubleshooting later. If you encounter any issues along the way, refer back to the troubleshooting section of this guide, where you’ll find step-by-step solutions to common problems. Now you’re ready to begin your Windows 11 journey – good luck with your installation!
For a complete guide on multiple ways to get help in Windows 11, check out my detailed article “How to Get Help in Windows 11“
Frequently Asked Questions (FAQs)
Yes, you absolutely can! The tool offers two approaches for handling multiple upgrades. You can create a reusable installation media (either a USB drive or ISO file) that works on multiple computers, saving you from downloading Windows 11 separately for each machine. This is particularly useful when you have limited internet bandwidth. Alternatively, you could download the Media Creation Tool separately on each computer and perform direct upgrades. I recommend creating installation media if upgrading more than two computers, as it’s more efficient and allows you to keep a backup copy of the Windows 11 installation files.
While you can download and run the Windows 11 Media Creation Tool on Windows 7 or 8.1, you cannot directly upgrade these versions to Windows 11. You’ll need to perform a clean installation instead. I recommend first upgrading to Windows 10 using the Windows 10 Media Creation Tool and then to Windows 11. This path helps better preserve your files and settings than a direct clean installation. Remember that your hardware must meet Windows 11’s system requirements regardless of your upgrade path.
The Media Creation Tool includes a PC Health Check feature that runs automatically before beginning the upgrade process. If your system doesn’t meet the requirements (such as TPM 2.0, Secure Boot, or processor compatibility), the tool will notify you specifically which requirements aren’t met. While there are unofficial ways to bypass these checks, I don’t recommend them as they might lead to stability issues and security vulnerabilities. Instead, consider upgrading your hardware components or continue using Windows 10, which will receive support until October 2025. You can also check if your motherboard has TPM capability, which just needs to be enabled in BIOS settings.
Think of a USB drive as a ready-to-use installation package, while an ISO file is more like a digital blueprint that needs an extra step to use. When you create a bootable USB drive, it’s immediately ready to install Windows 11 on any compatible computer. The ISO file, on the other hand, gives you more flexibility. You can burn it to a DVD, mount it virtually, or create multiple USB drives from the same file. I typically recommend creating a USB drive for immediate use and an ISO file for backup purposes. The ISO file is also handy for virtual machines or when you need to keep a permanent copy of the installation media.
Unlike regular file downloads, the Media Creation Tool doesn’t support a traditional pause and resume function. If your download gets interrupted, you’ll need to start over from the beginning. This is because the tool verifies file integrity throughout the download process to ensure a clean installation. I recommend starting the download with a stable internet connection and enough time to complete it. If you frequently experience connection issues, connect directly to your router with an ethernet cable instead of Wi-Fi. Also, temporarily disable any VPN services, as they can sometimes cause connection instability.
