

Let me show you how Microsoft Word’s Find and Replace works and why it matters for efficient document editing. As someone who’s spent years helping professionals streamline their document workflows, I can tell you that mastering Find and Replace is one of the most effective ways to cut editing time in half while ensuring document consistency.
Whether you’re looking to update company names across hundreds of pages, standardize formatting throughout a document, or clean up inconsistencies in text, you’ll find all the tools you need in this guide. I’ll walk you through basic search operations, advanced pattern matching, formatting controls, and automation techniques that will transform how you edit documents.
Let’s begin with the fundamentals and build up to more powerful features that will give you complete control over your document editing process.
Table of Contents
Understanding Basic Find and Replace in Microsoft Word
Let me guide you through using Microsoft Word’s Find and Replace feature, a powerful tool that will transform how you edit documents. We’ll start with accessing the tool and progress through increasingly useful functions.
Opening Find and Replace
- Press Ctrl+H on your keyboard to open the Find and Replace dialog box.
- Click the Home tab in the ribbon if you prefer using the mouse.
- Select Replace in the Editing group on the far right of the ribbon.

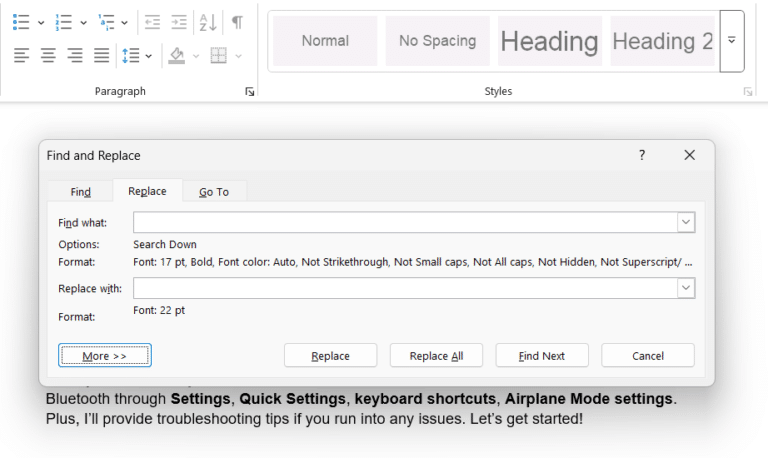
- Select “Replace” tab in the Find and Replace dialog to see both a Find what and Replace with field.
Performing Basic Text Replacement Using Find and Replace
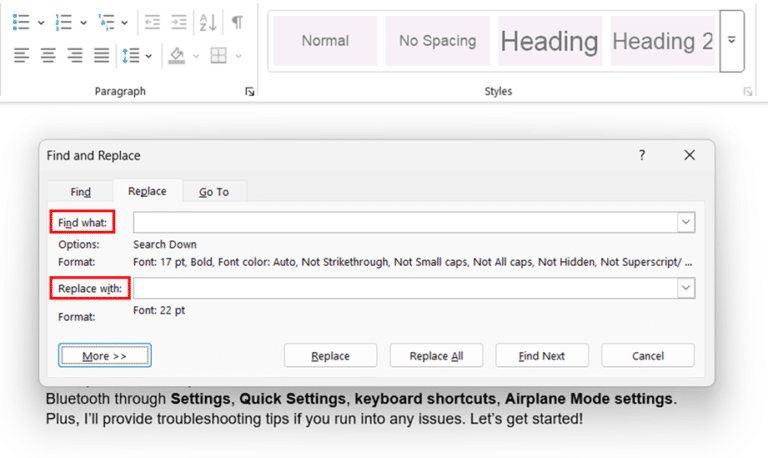
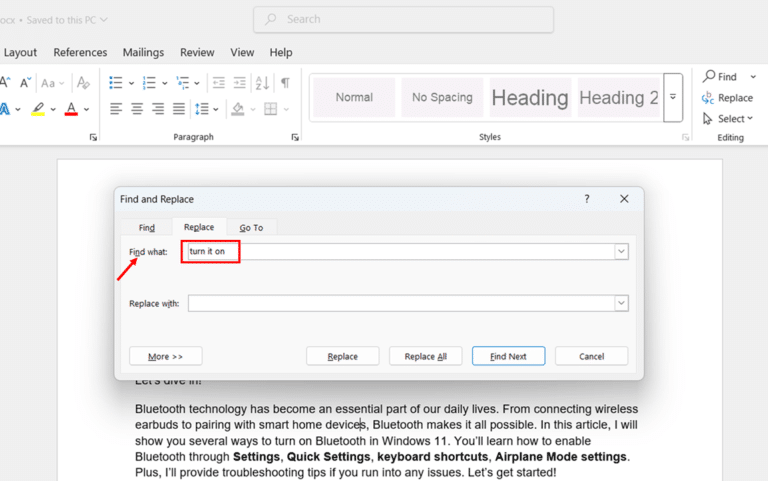
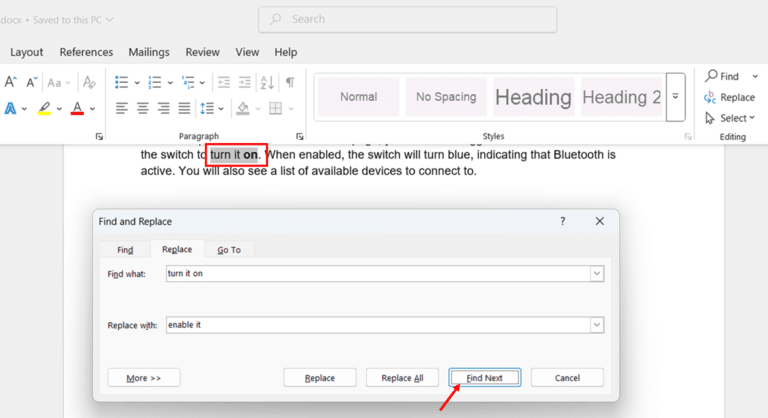
- Click inside the “Find what” field at the top of the Find and Replace dialog box. Type the text you want to search for in your document, making sure to enter it exactly as it appears in your content.
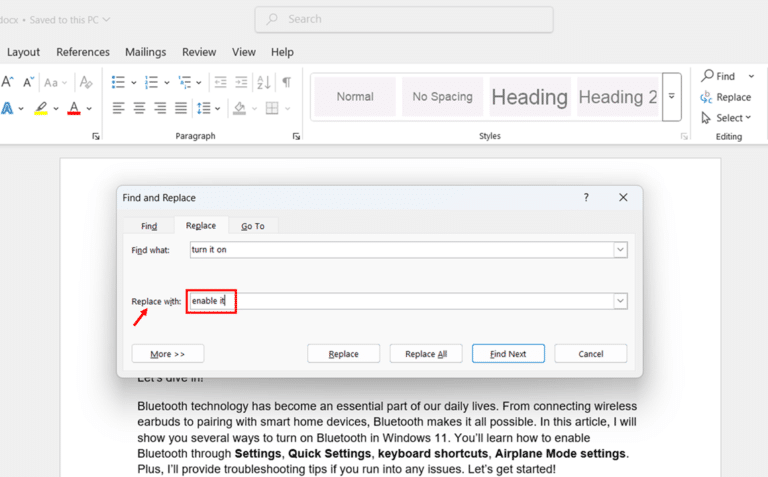
- Move to the “Replace with” field located directly below the Find what field. Enter the new text that you want to use as a replacement. Double-check your typing to ensure accuracy, as this is exactly how it will appear in your document.
- Locate and click the “Find Next” button on the right side of the dialog box. Word will highlight the first instance of your search text in the document, allowing you to verify it’s what you want to change.
- Review the highlighted text and click the “Replace” button if you want to change this specific instance. Word will make the replacement and automatically move to the next instance in your document.
- If you’re confident in your search and replace settings, click the “Replace All” button to change every instance. This will replace all occurrences of your search text throughout the entire document.
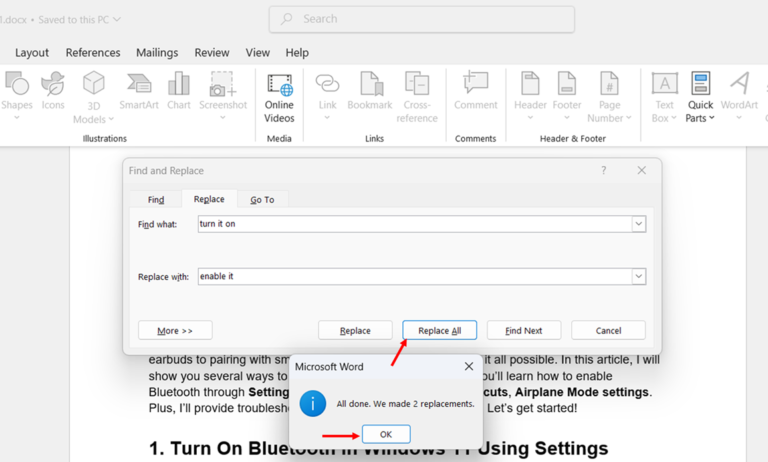
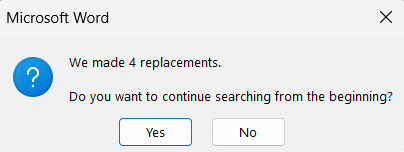
- When the replacement is complete, a message box will appear showing how many replacements were made. Click “OK” to acknowledge this message and continue with your work.
Exploring Search Options in Find and Replace
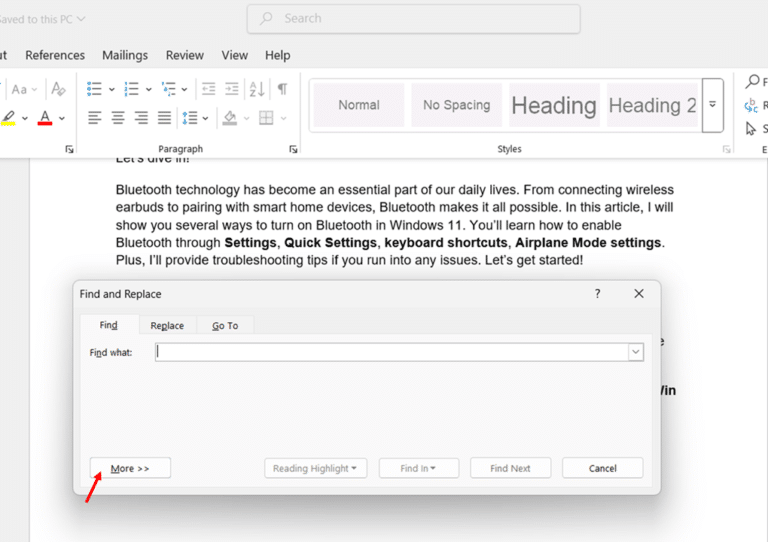
- Look for and click the “More” button located at the bottom of the “Find and Replace” dialog box. This will expand the dialog box to show additional search options that give you more control over your search.
- Find the “Match case” checkbox in the expanded options area. Select this option when you need Word to treat uppercase and lowercase letters as different characters. For example, with this option enabled, searching for “Report” won’t find instances of “report.”

- Locate the “Find whole words only” checkbox next to the Match case. Enable this option to prevent Word from finding your search text within larger words. For instance, when searching for “car”, Word won’t match words like “carpet” or “scarce”.

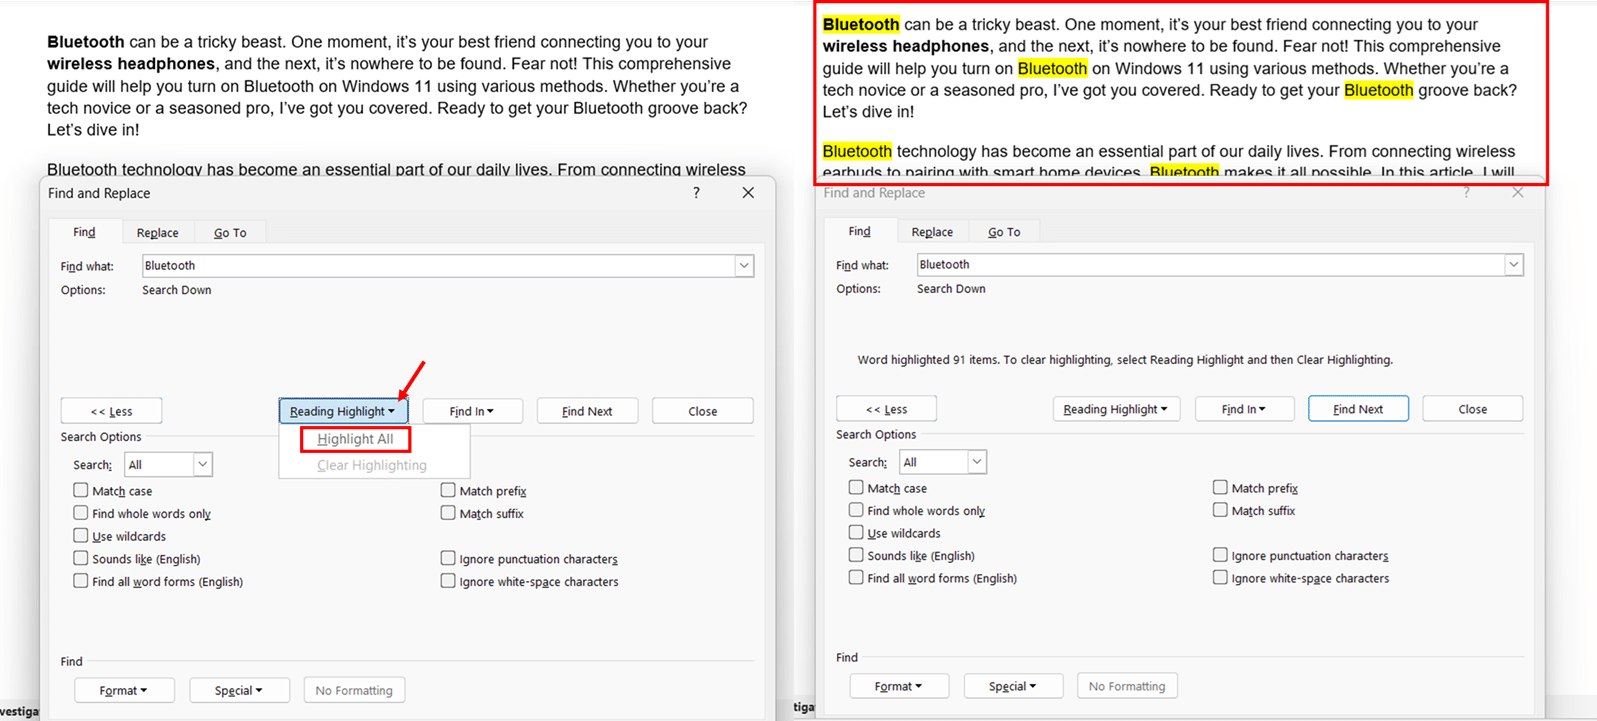
- Find the “Reading Highlight” option in the expanded dialog box. Select this option when you want Word to visually highlight all instances of your search term in the document at once, making it easier to see where each occurrence appears.
Using Advanced Search Features in Find and Replace
- Look for and click the “Format” button located at the bottom of the expanded “Find and Replace” dialog box. This allows you to search for text with specific formatting attributes like font style, size, or color.

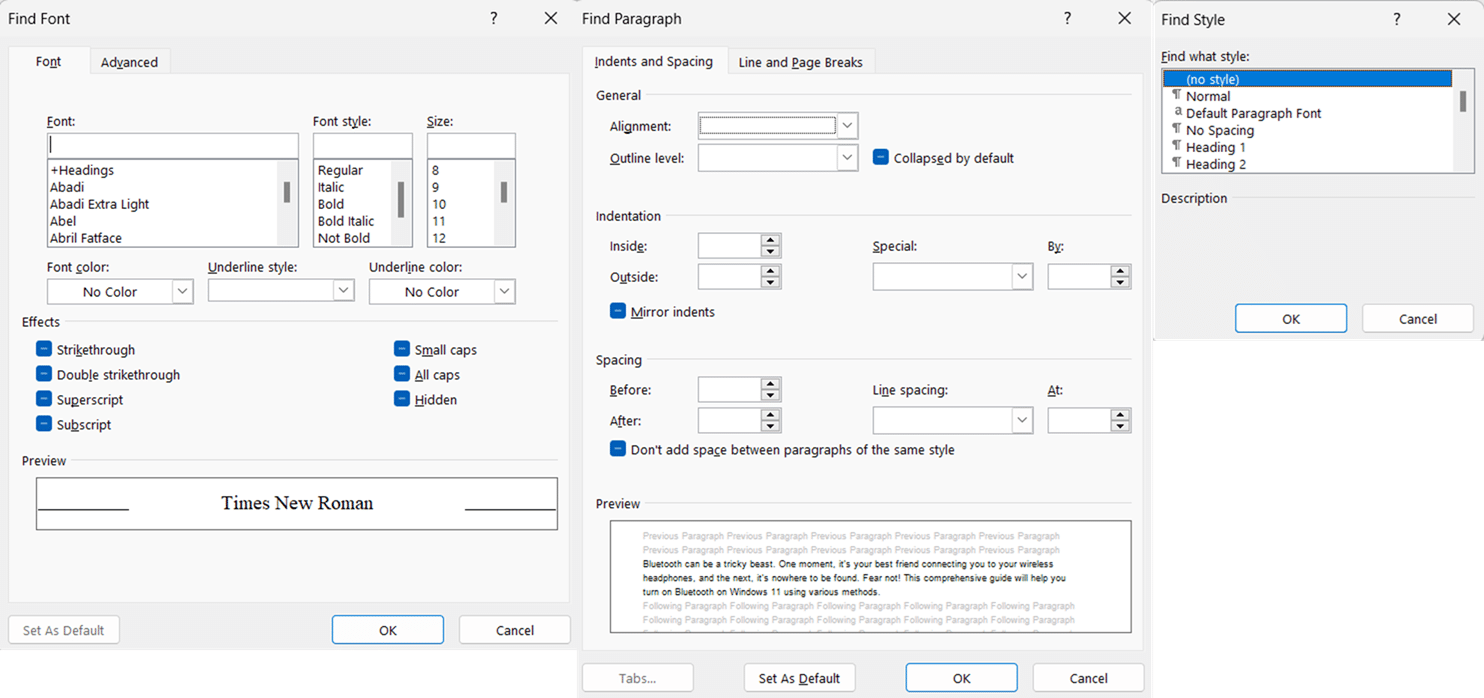
- Select “Font” from the dropdown menu that appears after clicking Format. This opens the “Find Font” dialog box where you can specify detailed font formatting criteria for your search.

- Click the “Paragraph” option under the “Format” button when you need to search for specific paragraph formatting. This is particularly useful when you want to find text with certain indentation, spacing, or alignment settings.

- Look for the “Special” button at the bottom of the expanded dialog box. Click this button to access a menu of special characters like paragraph marks, tab characters, or page breaks that you can include in your search etc.

- Select “No Formatting” at the bottom of the dialog box when you need to clear any previous formatting options. This ensures that any formatting criteria from previous searches won’t restrict your next search.

- Navigate to the “Search” dropdown menu in the expanded dialog box. Select options like “All,” “Down,” or “Up” to control the direction and scope of your search through the document.

- Look for the “Match prefix” and “Match suffix” checkboxes in the expanded options area. Select these when you want to find text that appears at the beginning or end of words, respectively.

- Locate the “Sounds like” checkbox in the options area when you want to find words that sound similar to your search term. This is useful when searching for possible misspellings based on phonetic similarity.

- Find and select the “Find all word forms” checkbox if you want to search for all variations of a word. For example, this will help you find “run,” “running,” and “ran” when searching for “run.”

Tips for Successful Find and Replace
- Click the “Find Next” button in the “Find and Replace” dialog box multiple times before using Replace All. This allows you to verify that your search finds exactly what you intend to change and helps prevent unintended replacements.
- Locate and review the “Match case” and “Find whole words only” checkboxes in the expanded options area before beginning each new search operation. These settings from previous searches might affect your current search results, so it’s important to verify they’re set correctly for your needs.
- Look for the “No Formatting” button at the bottom of the dialog box and click it before starting a new search. This clears any formatting criteria that might have been left over from previous searches, ensuring your new search isn’t restricted by unwanted formatting requirements.
- Select a small portion of your document by highlighting it with your mouse before testing complex search and replace operations. This creates a safer test environment where you can verify your search patterns work correctly before applying them to the entire document.
- Review your entire document carefully after using the “Replace All” button to verify that all changes were made correctly. Pay special attention to areas where the replaced text appears in different contexts, such as headers, footers, or tables, to ensure the changes maintain proper formatting and context.
Think of these steps as building blocks, each adding to your understanding of Find and Replace. Once you’ve mastered these basics, you’ll be ready to explore more advanced features like wildcards and formatting-only replacements.
Advanced Search Options and Wildcards in Microsoft Word
Think of wildcards as the Swiss Army knife of searching – they give you incredible flexibility to find patterns rather than just specific text. Let me guide you through these powerful tools that will revolutionize how you search and replace content in your documents.
Accessing Wildcard Search in Find and Replace
- Press the “Ctrl+H” keyboard shortcut on your keyboard to launch the “Find and Replace” dialog box. This is the quickest way to access the Find and replace functionality, though you can also find it under the Home tab in the ribbon.
- Look for the “More” button located at the bottom of the “Find and Replace” dialog box and click it. This expands the dialog box to reveal additional search options that give you more control over your wildcard search capabilities.
- Select the “Use wildcards” checkbox in the “Search Options” section of the expanded dialog box. This enables Word’s powerful wildcard functionality, allowing you to use special characters for pattern matching in your searches.

- Click the “No Formatting” button at the bottom of the expanded dialog box. This clears any formatting criteria from previous searches, preventing unwanted formatting restrictions from affecting your wildcard search.
Using Basic Wildcards
- Type the “?” symbol (question mark) into the “Find what” field of the Find and Replace dialog box. This special wildcard character tells Word to match any single character in that position, such as finding “cat,” “cot,” and “cut” with the pattern “c?t”.
- Enter the “*” symbol (asterisk) into the “Find what” field when you need to match any number of characters. This wildcard is particularly useful when you want to find variations of text regardless of length, such as using “pre*” to find “preset,” “prepare,” and “prevent.”
- Place characters between square brackets “[]” in the “Find what” field to match any single character from the set you specify. For example, typing “[aeiou]” will match any single vowel at that position in the text, letting you find words like “cat,” “cet,” and “cot”.
- Create a character range by typing a hyphen between two characters within square brackets “[a-z]” in the “Find what” field. This powerful wildcard combination matches any single character within the specified range, such as using “[a-m]” to match any lowercase letter from a through m.
- Insert an exclamation mark at the start of a character set “[!a-z]” in the “Find what” field to match any single character that is NOT in the specified range. This is useful when you want to find characters that fall outside a certain set, such as using “[!0-9]” to find any character that isn’t a number.
Creating Complex Search Patterns
- Position your cursor in the “Find what” field of the Find and Replace dialog box and type the “<” symbol (less-than sign). This special character acts as a boundary marker, telling Word only to match patterns that appear at the beginning of words.
For example, typing “<pro” will match words that begin with “pro” like “process” and “program”, but won’t match words like “approve” where “pro” appears in the middle.
- Place your cursor in the “Find what” field where you want to match Word endings and type the “>” symbol (greater-than sign). This boundary marker ensures that Word only matches text patterns that occur at the end of words, rather than finding those patterns anywhere in the text.
For instance, typing “ing>” will find words ending in “ing,” such as “running,” “walking,” and “typing,” but won’t match words like “ingredient” where “ing” appears at the beginning.
- Insert opening and closing “( )” parentheses in the “Find what” field to create groups within your search pattern. These grouping symbols allow Word to treat certain elements of your search as a single unit, which becomes especially important when you want to reference these groups in your replacements.
For example, typing “(pre)(view)” groups the word into two parts, allowing you to reference these groups in your replacement using \1 and \2 – useful when you want to manipulate parts of matched words separately
- Locate the position in your search pattern where you want to match multiple occurrences and type the “@” symbol. When placed before a character or group, this symbol instructs Word to find instances where that pattern appears one or more times consecutively.
For instance, typing “car@” will match “car,” “care,” “car,” and other variations where ‘r’ appears one or more times after “ca.”
- Add the “{n}” curly brace notation after any character or group in your search pattern, replacing “n” with a specific number. This precise counting modifier tells Word to match exactly that number of occurrences of the preceding element, no more and no less.
For example, entering “0{3}” will find exactly three zeros in a row, matching “000” but not “00” or “0000,” perfect for finding specific number patterns.
Searching with Character Ranges
- Position your cursor in the “Find what” field of the Find and Replace dialog box and type “[0-9]“. This number range pattern instructs Word to match any single numerical digit at that position in your text.
For example, if you’re searching for model numbers like “Model 1”, “Model 2”, etc., this pattern will find any instance where a single digit appears after “Model”.
- Enter the pattern “[a-zA-Z]” in the “Find what” field when you need to match any alphabetical character. This combination of lowercase and uppercase ranges tells Word to find any single letter, whether it’s uppercase or lowercase.
For instance, searching for “p[a-zA-Z]t” would match “pat”, “pet”, “pit”, “pot”, “put”, “Pat”, and “Pot”.
- Type the vowel set “[aeiou]” into the “Find what” field of the dialog box. This specific character set directs Word to match any single vowel that appears at that position in your document.
For example, using “c[aeiou]t” would find words like “cat,” “cot,” and “cut,” matching any word where a vowel appears between ‘c’ and ‘t.’
- Place “[!0-9]” in the “Find what” field when you need to find non-numerical characters. The exclamation mark at the range’s start tells Word to match any character that is not a digit.
For instance, in a product code that should only contain numbers, using this pattern would help you find any codes where letters or symbols were accidentally used instead of digits.
- Create a combined pattern “[a-z0-9]” in the “Find what” field to search for multiple types of characters. This combined range instructs Word to match either any lowercase letter or any numerical digit at that position.
For example, searching for product codes that can contain either lowercase letters or numbers, like “a1”, “b2”, or “z9”.
Finding Special Text Patterns
- Position your cursor in the “Find what” field of the Find and Replace dialog box and type “^p“. This special character code instructs Word to search for paragraph marks, which appear when you press the Enter key to create a new paragraph.
- Enter the code “^t” in the “Find what” field when you need to locate tab characters in your document. This special character sequence helps Word identify places where the Tab key has been pressed to create horizontal spacing.
- Type “^w” into the “Find what” field of the dialog box to search for white space in your document. This special character tells Word to look for areas where space characters have been used to create gaps between text.
- Place “^l” in the “Find what” field when you want to find manual line breaks in your text. This code helps Word locate instances where you’ve pressed Shift+Enter to create a new line without starting a new paragraph.
- Insert “^s” in the “Find what” field to search for nonbreaking space characters in your document. This special character code helps Word find spaces that were created using Ctrl+Shift+Space to keep words together on the same line.
Working with Formatting in Find and Replace
Microsoft Word’s ability to search and replace formatting is like having a skilled designer at your fingertips, capable of making consistent style changes throughout your document. Let me walk you through this powerful feature that goes beyond simple text replacement.
Searching for Text with Specific Formatting
- Position your cursor in the “Find what” field at the top of the Find and Replace dialog box and enter the text you want to locate in your document. This field accepts both simple text and complex search patterns.
- Look for and click the “Format” button at the bottom of the dialog box, then select “Font” from the menu that appears. This opens a new dialog box where you can specify detailed font formatting criteria.

- Navigate through the “Font” dialog box and select the specific formatting attributes you want to search for, such as font style, size, color, or special effects. These choices will determine which text formatting patterns Word searches for.

- Click the “OK” button in the Font dialog box after making your formatting selections. This applies your chosen formatting criteria to your search parameters and returns you to the main Find and Replace dialog.
Finding Formatting Without Text
- Position your cursor in the “Find what” field of the Find and Replace dialog box and ensure it remains empty. When this field contains no text, Word only searches based on formatting characteristics.
- Locate and click the “Format” button at the bottom of the dialog box, then select your desired format type from the menu – either “Font,” “Paragraph,” or “Style.” Each option opens a specialized dialog box for its respective formatting attributes.

- Review the formatting options in the dialog box that appears and select the specific criteria you want to search for in your document. Your selections will determine which formatting patterns Word looks for during the search.
- Click the “Find Next” button in the Find and Replace dialog box to begin your formatting search. Word will move through your document, looking for text that matches your specified formatting criteria.

Replacing Formatting Only
- Position your cursor in both the “Find what” and “Replace with” fields of the Find and Replace dialog box and delete any existing content. Empty fields tell Word you want to work with formatting changes only.
- In the Find tab, look for the “Format” button beneath the “Find” field and click it to specify which formatting attributes you want to locate. This opens a dialog box where you can select the current formatting you want to change.

- In the “Replace” tab, first click text box in “Replace with“. Locate the “Format” button under the “Replace” field and click it to choose the new formatting you want to apply. This opens another dialog box where you can specify the formatting that will replace your original formatting.

- Click the “Replace All” button in the “Replace” tab of Find and Replace dialog box toz apply your formatting changes throughout the entire document. This action updates all instances that match your specified formatting criteria.

- Look for the confirmation message that appears after the replacement process is complete. This message tells you exactly how many formatting changes were made in your document, helping you verify the scope of your changes.
Conclusion
Let me share the key takeaways from our exploration of Microsoft Word’s Find and Replace functionality. You now have the tools to make document editing faster and more accurate and consistent. From basic text changes to complex pattern matching and format adjustments, you’re equipped to handle any document editing challenge that comes your way.
I encourage you to start with simple Find and Replace operations and gradually work your way up to more advanced features. Pay special attention to the wildcard and formatting options we’ve covered, as these will give you the most flexibility in your editing tasks. Remember that while powerful, automation works best when you’ve mastered the manual operations and understand exactly what you want to achieve.
Above all, think of Find and Replace as your document editing assistant – it saves you time and ensures consistency across your work. The more you practice with these tools, the more natural they’ll become, and you’ll discover new ways to apply them to your specific needs. Don’t hesitate to refer back to this guide as you explore these features in your documents, and remember that the best way to learn is through hands-on practice with real-world editing tasks.
Frequently Asked Questions (FAQs)
Find and Replace can be accessed several ways in Microsoft Word:
- Press Ctrl+H (Windows) or Command+H (Mac) for direct access to Replace
- Press Ctrl+F (Windows) or Command+F (Mac) for Find, then click the Replace button
- Go to Home tab > Editing group > Replace
- In Word for Web, go to Home > Editing > Replace
Common reasons why Find and Replace might not locate text:
- The ‘Match case’ option is selected (making searches case-sensitive)
- The ‘Find whole words only’ option is selected (preventing partial matches)
- The text is in headers, footers, text boxes, or comments not included in the current search scope
- The text contains hidden formatting or special characters
- The search is limited to a specific section due to how the document is selected
Word for Web (browser version) has a more limited Find and Replace feature set:
- No wildcard support
- Limited or no formatting search capabilities
- No special character searches (like paragraph marks)
- No Reading Highlight feature
- There is no support for searching in specific document sections. You’ll need to open the document in the desktop application for complex Find and Replace operations.
Expert tips for efficient Find and Replace use:
- Create a backup or use ‘Undo’ (Ctrl+Z) as a safety net before major replacements
- Use ‘Find All’ before replacing to verify your search pattern is finding what you expect
- For complex patterns, test on a small section first
- Break complex operations into multiple simpler steps
- Learn keyboard shortcuts to speed up the process (F4 repeats the last Find)
- For operations you perform regularly, record them as macros
- Use styles rather than direct formatting where possible to make format replacements more consistent
Only if you want it to, by default, does Word ignore case differences. Expand the Find dialog and check the “Match case” option to make searches case-sensitive.
