
In this article I will show you how file type changes in Windows 11 work and why they matter for managing your digital documents, media, and data efficiently. Understanding the difference between simply renaming a file extension and converting its contents is crucial for maintaining file integrity and usability across different applications.
As someone who’s spent years troubleshooting file compatibility issues and optimizing workflows, I can tell you that understanding file type conversion is one of the most effective ways to enhance productivity and avoid the frustration of unreadable or corrupted files. The methods I’ll share come from practical experience helping users navigate these common challenges.
Whether you’re looking to share documents in a universally readable format, compress images for faster uploads, or extract audio from videos, you’ll find everything you need in this guide. I’ll walk you through simple extension renaming, built-in Windows 11 conversion tools, Command Prompt techniques, third-party converter software, and online conversion services. By the end, you’ll have multiple reliable methods to handle any file conversion scenario you encounter.
Need to find your device’s MAC address in Windows 11? Check out our detailed tutorial How to Find MAC Address in Windows 11
Table of Contents
What Are File Types in Windows 11?
If you’ve ever wondered why some files open in Word while others launch in Photoshop, or why changing a simple “.txt” to “.html” completely transforms how your computer handles a file, you’re actually exploring the fascinating world of file types in Windows 11.
Understanding File Extensions in Windows 11
At their core, file types in Windows 11 are identified by the characters that appear after the period in a filename. These characters, collectively known as file extensions, tell your operating system what kind of data is contained within the file and which program should be used to open it. For example, when you see a file named “vacation_photo.jpg,” Windows 11 recognizes the “.jpg” extension and knows this image file should be opened with your default image viewer.
Windows 11 relies on these extensions to maintain order in file explorer. Without them, your computer would have to analyze the contents of every file to determine what it is—a process that would significantly slow down your system.
How Windows 11 Manages File Types
Windows 11 uses a registry-based system to track which programs are associated with which file types. When you install a new application, it typically registers itself with Windows as the handler for specific file types. This registration process creates file associations—links between file extensions and the programs designed to open them.
These associations are stored in the Windows registry, a database that contains configuration settings for your operating system. When you double-click a file, Windows checks the registry to find which program is associated with that file type and launches the appropriate application.
Common File Types in Windows 11
Your Windows 11 computer works with hundreds of different file types, but some are more common than others:
Document files include formats like .docx (Microsoft Word), .pdf (Adobe PDF), and .txt (plain text). These contain text and formatting information.
Image files such as .jpg, .png, and .gif store visual data with different compression methods and capabilities.
Audio files like .mp3, .wav, and .flac contain sound data with varying quality and compression levels.
Video files, including .mp4, .mov, and .avi, store moving images and sound with different codecs and compression methods.
Archive files such as .zip and .rar contain multiple files compressed into a single package.
Executable files like .exe and .msi are program files that run when opened.
System files with extensions like .dll and .sys are critical components that help Windows and other programs function properly.
Each file type serves a specific purpose and requires different handling by your operating system.
The Invisible Extension System
Windows 11 hides file extensions by default to create a cleaner visual experience. This design choice can sometimes create confusion when trying to identify or change file types. Learning how to reveal these hidden extensions is the first step in taking control of your file types (which we’ll cover in a later section).
File Types and Program Compatibility
Not every program can open every file type. The data inside files is structured in specific ways that require compatible software to interpret correctly. You’ll often see garbled text or error messages when you try to open a file with an incompatible program.
It’s like trying to read a book written in a language you don’t understand—the information is there, but you need the right tools to make sense of it.
This compatibility requirement is why changing a file extension doesn’t actually convert the file’s contents. Renaming “document.docx” to “document.pdf” doesn’t transform a Word document into a PDF—it just confuses Windows about how to handle the file. True conversion requires restructuring the data inside the file, which is a more complex process.
Why File Types Matter in Windows 11
Understanding file types is crucial for several reasons:
Troubleshooting: When files won’t open or open in the wrong program, file type issues are often the culprit.
Compatibility: Knowing which file types are compatible with your software helps avoid frustration when sharing files with others.
Storage optimization: Different file types have different compression characteristics, affecting how much space they occupy.
Security: Being able to identify potentially dangerous file types helps protect your system from malware.
Productivity: Mastering file type management allows you to work more efficiently with different kinds of data.
Method 1: Renaming File Extensions in Windows 11 using File Explorer
Changing file types in Windows 11 starts with the most straightforward approach: directly renaming the file extension. This method requires no additional software and works for many common conversion needs. However, before you can change file extensions, you need to make them visible, as Windows hides them by default.
Revealing Hidden File Extensions in Windows 11
Windows 11 hides file extensions to create a cleaner user interface, but this can be problematic when you need to identify or modify file types. Here’s how to make file extensions visible:
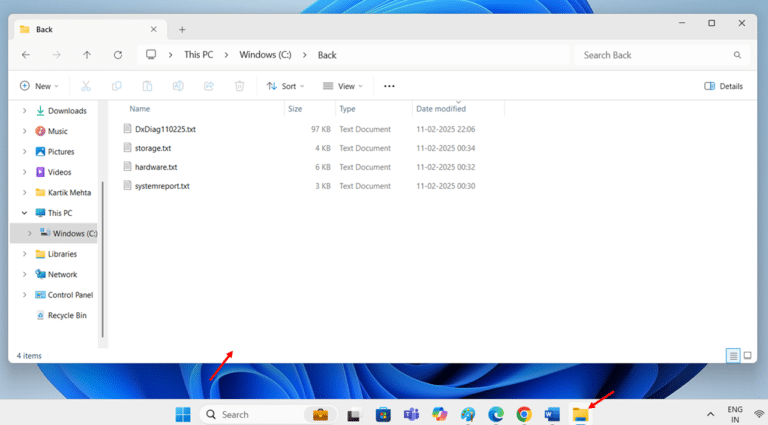
- Open File Explorer by clicking the folder icon in your taskbar or pressing Win + E on your keyboard. This launches the file management interface where you can access all your files and folders.
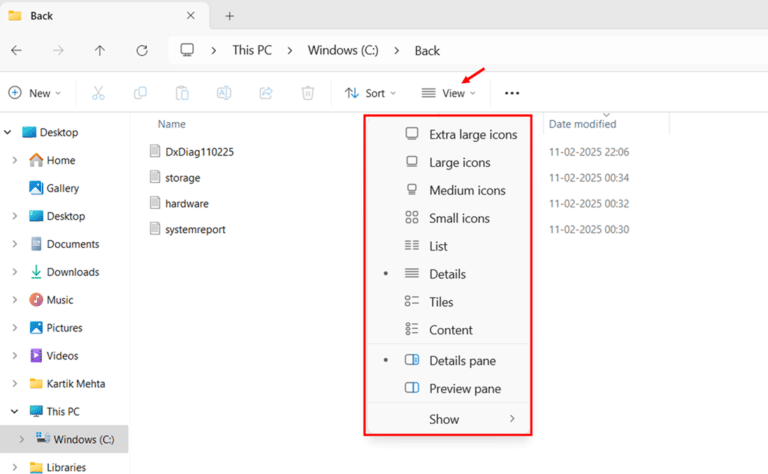
- Click on the View tab located at the top of the File Explorer window. This will display a ribbon of viewing options for your files and folders.
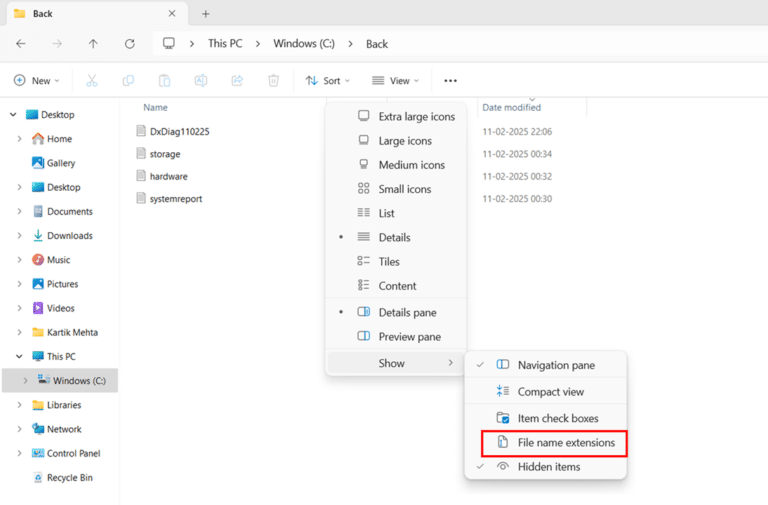
- Look for the Show group in the ribbon menu. Within this section, find and click the checkbox next to File name extensions. When enabled, this option immediately reveals the extensions for all files in your current folder and any folders you open afterward.
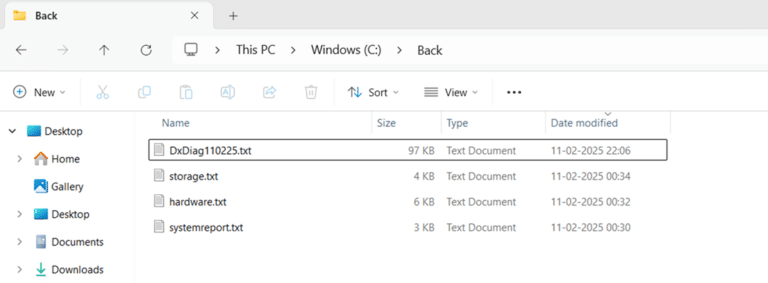
- Verify the setting worked by looking at your files. You should now see extensions at the end of filenames (for example, “Document.docx” instead of just “Document”).
Once file extensions are visible, you can proceed with changing them to modify file types. This newfound visibility also helps you identify file types at a glance, improving your workflow and reducing the chance of opening files with incompatible programs.
Change File Extensions in Windows 11 using File Explorer
Now that you can see file extensions, changing them is a simple process:
- Locate the file you want to convert in File Explorer. Navigate to the folder containing your target file.
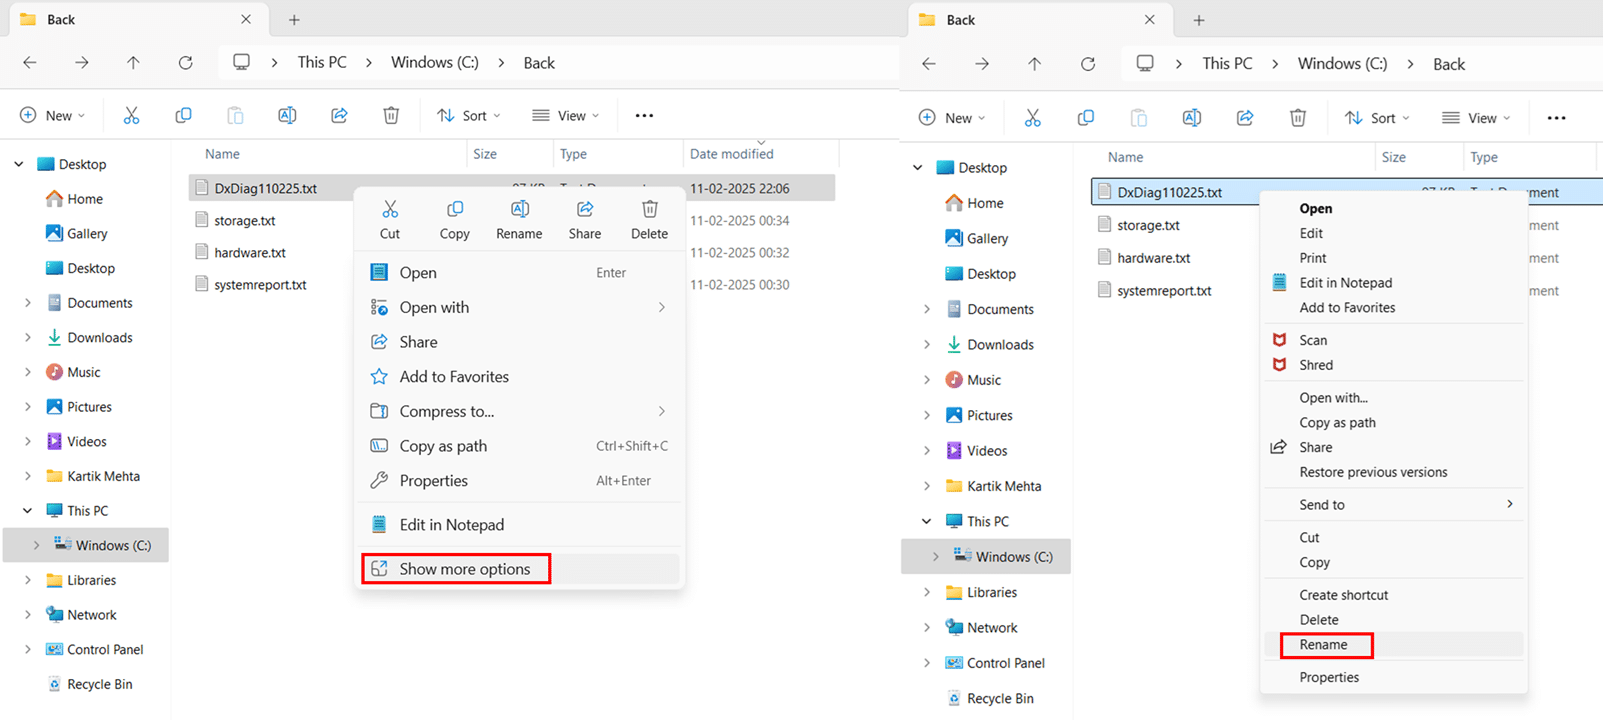
- Right-click on the file and select Show more options from the context menu. A new context menu that appear click Rename Alternatively, select the file and press F2 on your keyboard as a shortcut.
- Position your cursor at the end of the filename, just before the period that precedes the extension. Make sure you don’t accidentally change the main filename—only modify the characters after the last period.
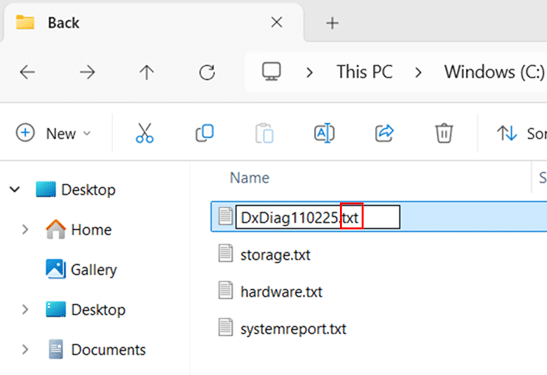
- Delete the current extension and type the new extension you want to use. For example, change “.txt” to “.html” or “.jpg” to “.png”.
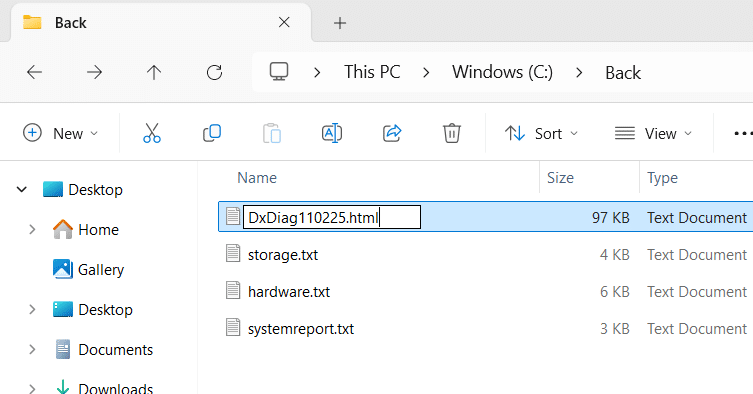
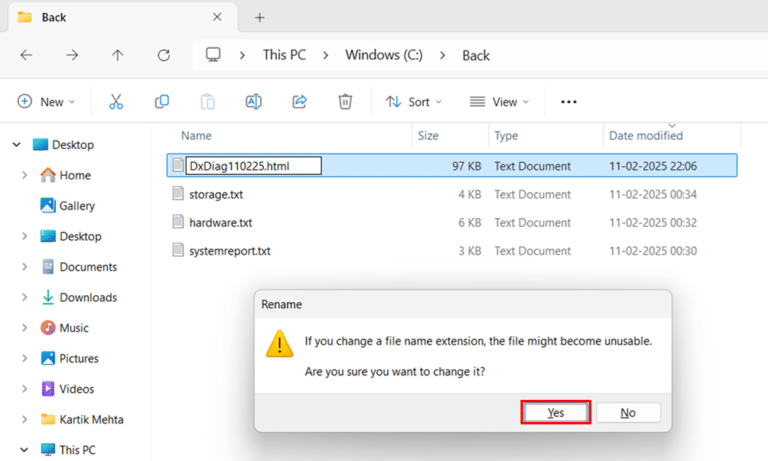
- Press Enter or click elsewhere in the window to confirm the change. Windows will display a warning dialog asking if you’re sure you want to change the file extension.
- Click Yes in the warning dialog to confirm the extension change. Windows warns you because changing extensions can affect file functionality.
- After confirming the change, the file will have its new extension and Windows will associate it with whatever program handles that file type on your system.
Understanding the Warning Message
When you change a file extension, Windows 11 displays a warning that reads something like: “If you change a file name extension, the file might become unusable. Are you sure you want to change it?”
This warning exists for good reason. Changing a file’s extension doesn’t convert its contents—it only changes how Windows identifies the file. Think of it like putting a “milk” label on a bottle of orange juice. The label has changed, but the contents remain the same.
The warning is particularly relevant when:
- You’re changing from one document format to another (like .docx to .pdf)
- You’re attempting to convert between media types (like .mp3 to .mp4)
- You’re modifying system files with extensions like .dll or .sys
In these cases, simply changing the extension rarely achieves the desired result and may render the file unusable until you change the extension back.
When Renaming Extensions Actually Works
Despite the limitations, there are scenarios where renaming extensions is perfectly valid and useful:
Text-based format changes often work well. For example, changing .txt to .html, .css, or .js can be effective because these are all text-based formats. The content remains readable, though formatting might not be optimal.
Some image formats are compatible enough that a simple extension change might work. For instance, some .jpg files can be renamed to .jpeg (and vice versa) without issues since these are essentially the same format with different naming conventions.
Configuration files sometimes use different extensions while maintaining similar internal structures. For example, some .ini files can function as .conf files in certain applications.
Files you’ve accidentally saved with the wrong extension can be fixed through renaming. If you know a file is actually a .docx but was somehow saved as .txt, renaming might restore functionality.
Method 2: Using Microsoft Native Tools for File Conversion
While renaming file extensions only changes how Windows identifies your files, Microsoft has several tools that actually convert file contents from one format to another. These native conversion options offer a more reliable approach than simple renaming, ensuring your files maintain their functionality and appearance after conversion.
Understanding True File Conversion
Before diving into specific methods, it’s important to understand what happens during true file conversion. Unlike renaming extensions, conversion restructures the file’s internal data to match the target format’s specifications. This process translates the content, formatting, and metadata into a compatible structure that the new file type can properly display.
Think of it as translating a book from English to French—you’re not just changing the cover but transforming the entire content while preserving the original meaning. This proper conversion is what Windows 11’s built-in tools provide.
How to Convert Word Documents using "Save As"
Word offers conversion to multiple formats including PDF, RTF, HTML, and older Word versions:
- Open your document in Microsoft Word by double-clicking the file or launching Word and using the Open option.
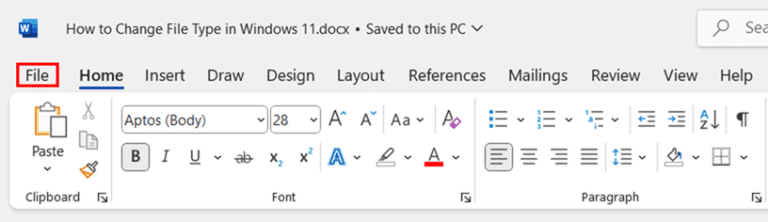
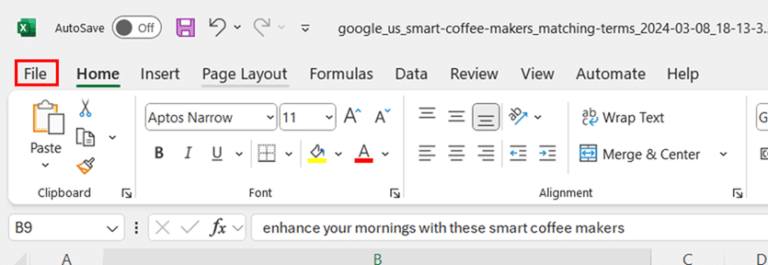
- Click the File tab located in the top-left corner of the Word window. This opens the backstage view with file management options.
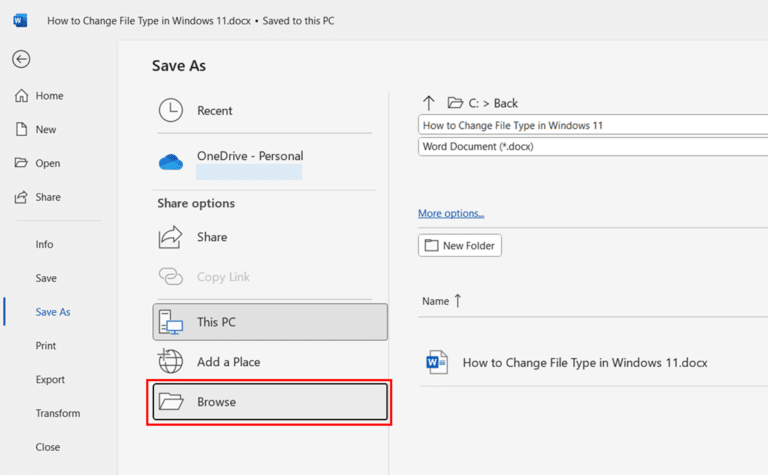
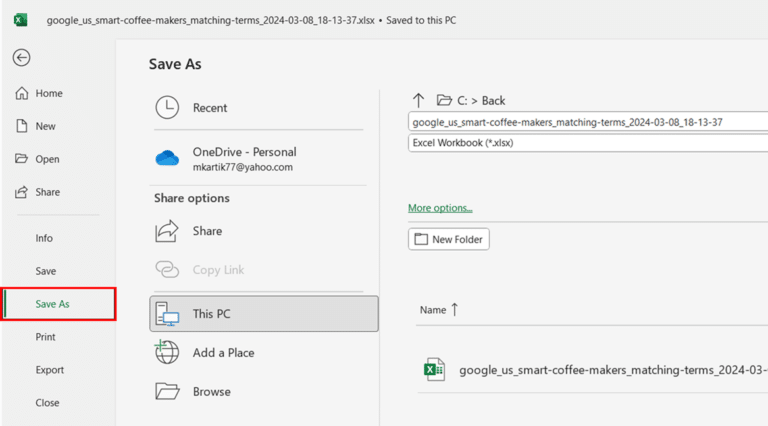
- Select Save As from the left-side menu. This brings up options for saving your document.

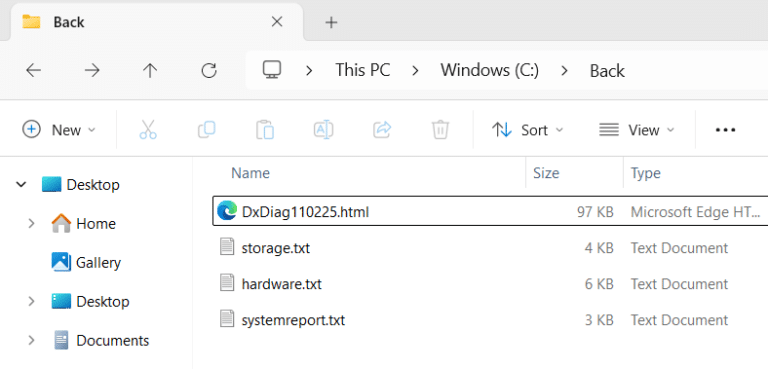
- Choose a save location by clicking Browse or selecting a recent folder. This opens the Save As dialog.
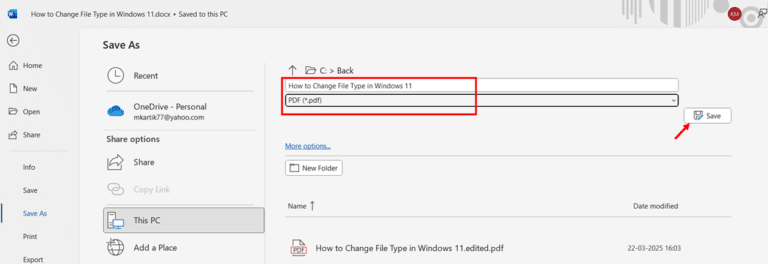
- Find the Save as type dropdown near the bottom of the dialog box. Click on it to view available format options.
- Select your desired format. Common options include:
- PDF (.pdf) for universal compatibility
- Rich Text Format (.rtf) for basic formatting retention
- Web Page (.htm; .html) for online use
- Plain Text (.txt) for unformatted text
- Word 97-2003 Document (.doc) for compatibility with older Word versions

- Name your file in the File name field and click Save to complete the conversion. Word will process the document according to the selected format specifications.
How to Convert Convert Excel Spreadsheets Using Save As
Excel provides similar conversion capabilities for spreadsheet files:
- Open your spreadsheet in Microsoft Excel by double-clicking or using Excel’s Open function.
- Click the File tab in the top-left corner. This opens Excel’s backstage view.
- Select Save As from the menu options on the left side. This prepares Excel for saving in a different format.
- Choose your save location by clicking Browse or selecting a recent folder. The Save As dialog will appear.
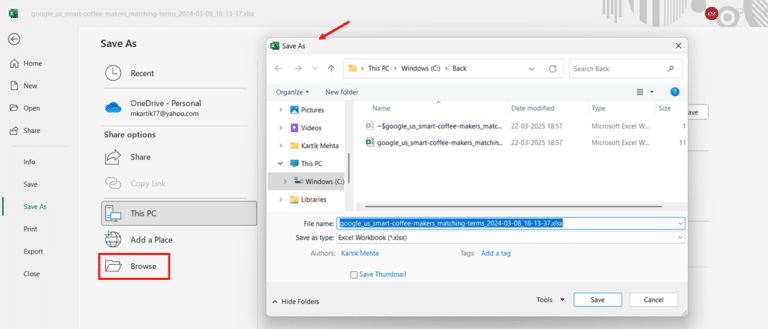
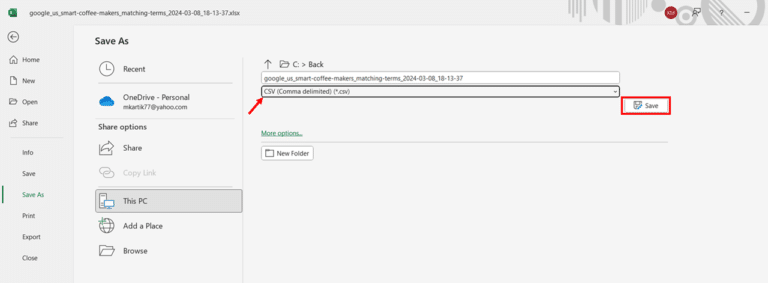
- Click on the Save as type dropdown menu near the bottom of the dialog. Review the available format options.
- Select your target format. Common Excel conversion options include:
- CSV (.csv) for simple data exchange
- PDF (.pdf) for non-editable distribution
- Excel 97-2003 Workbook (.xls) for backward compatibility
- OpenDocument Spreadsheet (.ods) for open-source compatibility
- Text (Tab delimited) (.txt) for plain text data

- Name your file and click Save to create the converted spreadsheet. Excel will notify you of any features unsupported in the target format.
How to Convert Image File Using Windows Photos App Save As
Windows 11’s Photos app includes basic image conversion capabilities:
- Right-click on your image file in File Explorer and select Open from the context menu. Then, choose Photos to open the image in Windows’ built-in Photos app.
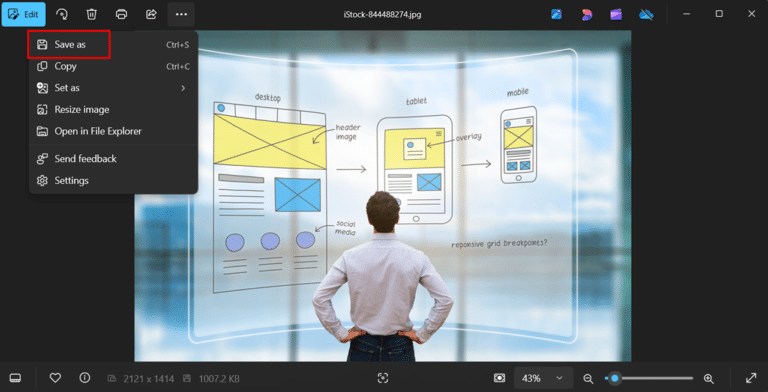
- Click the … (ellipsis) menu in the top-right corner of the Photos app. This reveals additional options for your image.

- Select Save as from the dropdown menu. This opens a save dialog for creating a new file.
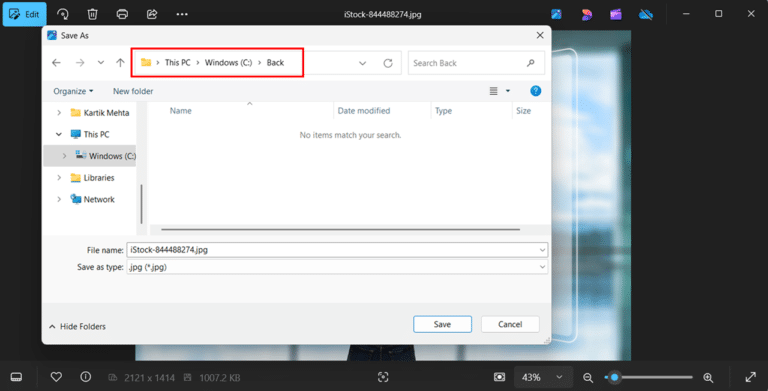
- Navigate to your desired save location in the dialog box. Choose where you want to store the converted image.
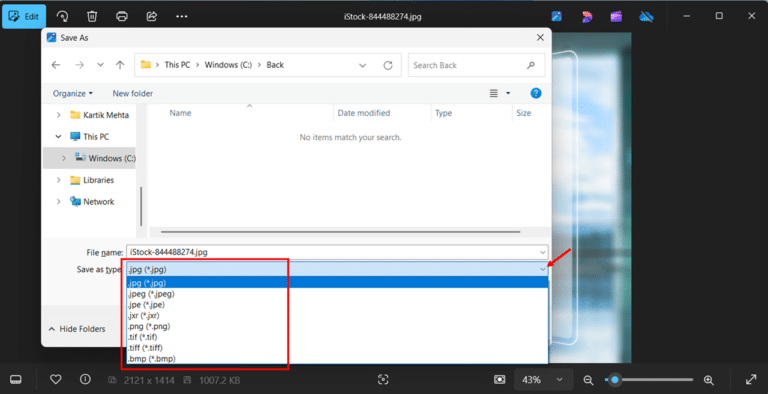
- Click the Save as type dropdown near the bottom of the dialog. View the available image format options.
- Select your target image format. Windows Photos typically supports:
- JPEG (.jpg) for photographs with smaller file sizes
- PNG (.png) for images requiring transparency
- BMP (.bmp) for uncompressed images
- TIFF (.tif) for high-quality, lossless images
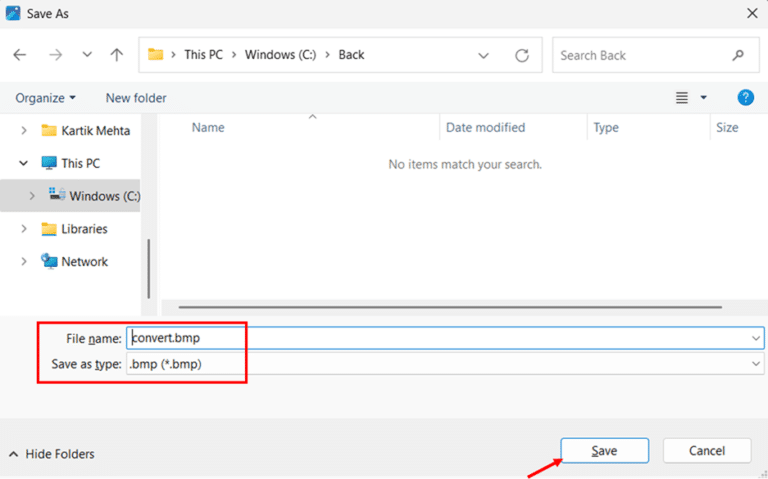
- Enter a filename in the File name field and click Save to create your converted image. The Photos app will process the conversion according to the target format.
The Photos app also offers basic editing tools that can be applied before conversion, allowing you to crop, rotate, or adjust your image before saving it in a new format.
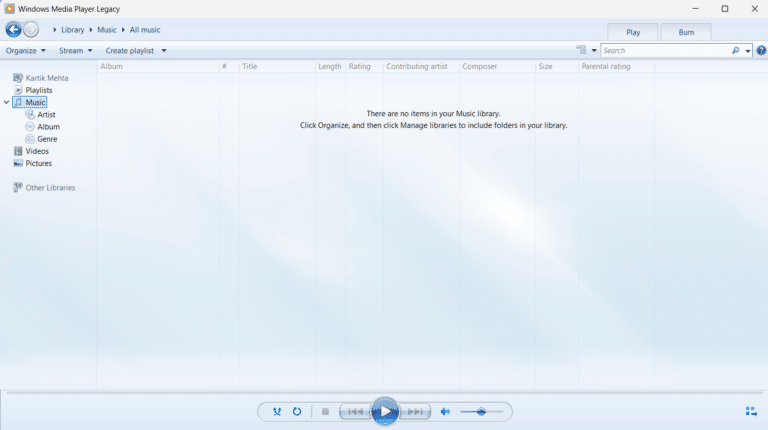
How to Convert Video and Audio File Using Windows Media Player
Windows Media Player offers limited conversion options for audio files:
- Open Windows Media Player by searching for it in the Start menu and clicking on the result. The player will launch with your media library.
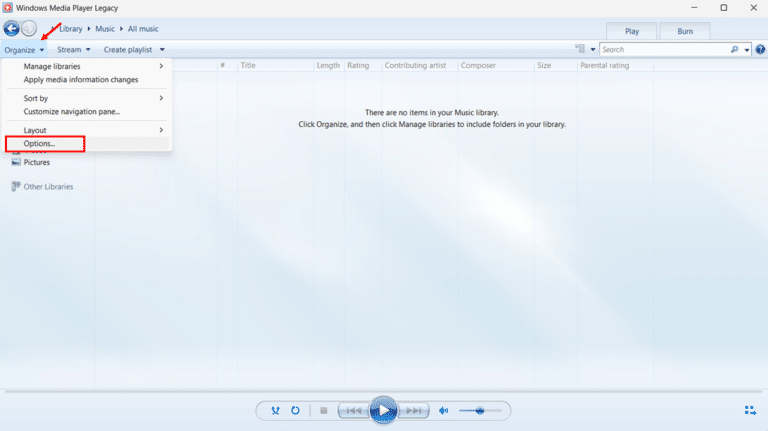
- Click on the Organize menu at the top of the player window, then select Options from the dropdown. This opens the player’s settings.
- Navigate to the Rip Music tab in the Options dialog. This section contains settings for converting audio CDs to digital files.
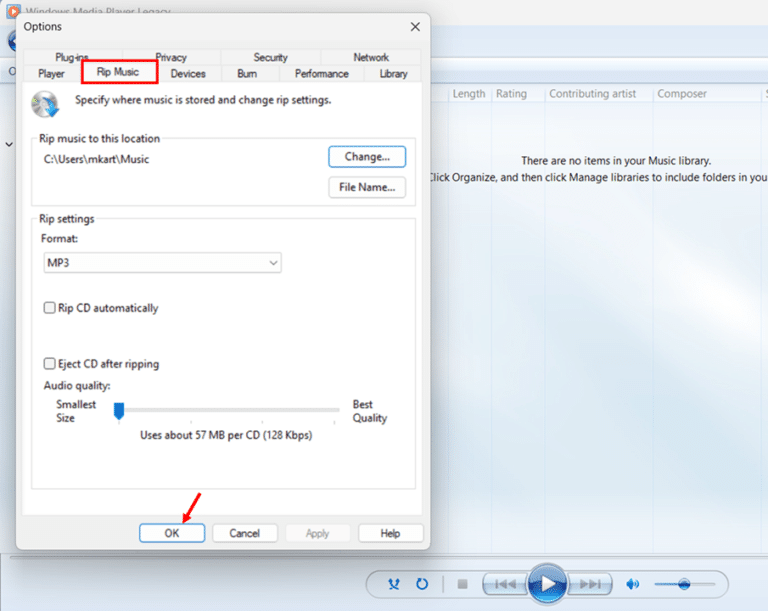
- Find the Format dropdown in the Rip settings section. Click it to view available audio formats.

- Select your preferred format. Windows Media Player typically offers:
- MP3 for universal compatibility
- WMA for Windows-optimized audio
- WAV for uncompressed audio
- Adjust the quality settings using the slider if desired. Higher quality results in larger files.

- Click OK to save your settings, then use the Rip function when playing audio CDs to convert them to your selected format.

While Windows Media Player is limited to CD ripping for conversion, it provides a straightforward option for creating digital audio files from physical media.
Limitations of Built-in Conversion Tools
Although Microsoft’s native tools for conversion are convenient, they do have limitations:
Limited Format Support:The range of supported formats varies by application and is often limited to common formats within the same category (documents, images, etc.).
Batch Processing Deficiencies: Most Microsoft conversion tools are designed for single-file operations, making bulk conversions tedious without custom scripting or third-party solutions.
Automation Constraints: Limited command-line and programmable interfaces compared to dedicated conversion tools, restricting enterprise automation capabilities.
For more specialized conversion needs or broader format support, third-party tools often provide better results
Method 3: Using Command Prompt to Change File Types
For users who want more power and efficiency when changing file types in Windows 11, the Command Prompt offers a robust alternative to graphical methods. This text-based interface might seem intimidating at first, but it provides powerful batch-processing capabilities that can save significant time when working with multiple files.
Why Use Command Prompt for File Type Changes?
The Command Prompt allows you to perform file operations that would be tedious or impractical using conventional methods. Its advantages include:
Batch processing: With a single command, you can rename dozens or hundreds of files in seconds.
Pattern matching: Commands can target specific file patterns, making it easy to convert all files of a certain type.
Automation potential: Command sequences can be saved as batch files for repeated use.
Precision control: You have exact control over the renaming process without dialog boxes or confirmation prompts.
For power users and IT professionals, Command Prompt remains one of the most efficient ways to manage file types in Windows 11.
Accessing Command Prompt in Windows 11
Before you can use Command Prompt for file conversions, you need to know how to access it properly:
- Press the Windows key on your keyboard to open the Start menu. This is the primary access point for Windows 11 applications.
- Type Command Prompt in the search field at the top of the Start menu. This searches your system for the Command Prompt application.
- Look for Command Prompt in the search results. For file operations, the standard (non-administrator) version is usually sufficient.
- Click on the Command Prompt app in the search results. This opens a text-based interface with a black background and command line.
For most file renaming operations, standard Command Prompt permissions are adequate. However, suppose you need to work with system files or protected directories. In that case, you might need to run Command Prompt as administrator by right-clicking the search result and selecting “Run as administrator.”
Navigating to Your Files Using Command Prompt
Before changing file types, you need to navigate to the directory containing your files:
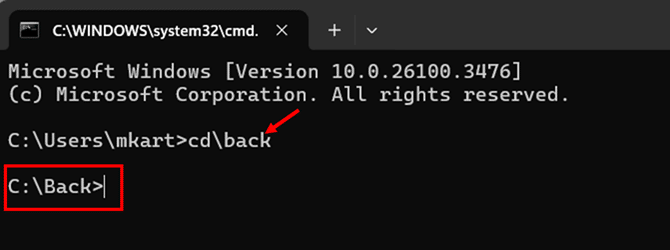
- Use the cd command (which stands for “change directory”) followed by the path to your folder. For example, type cd C:\Users\YourName\Documents to navigate to your Documents folder.
- Press Enter to execute the command. The command prompt will update to show your new location.
- Verify your location by typing dir and pressing Enter. This displays all files and folders in your current directory, allowing you to confirm you’re in the right place.
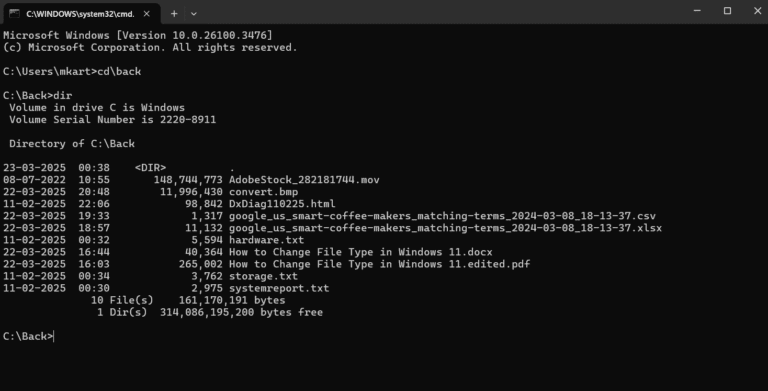
- Look at the file list to identify the files you want to convert. Take note of their names and current extensions.
If you’re unsure of the exact path, you can copy it from File Explorer by navigating to the folder, clicking in the address bar, and copying the path. Then, you can paste it into Command Prompt by right-clicking and selecting Paste.
Basic Syntax for Changing File Extensions
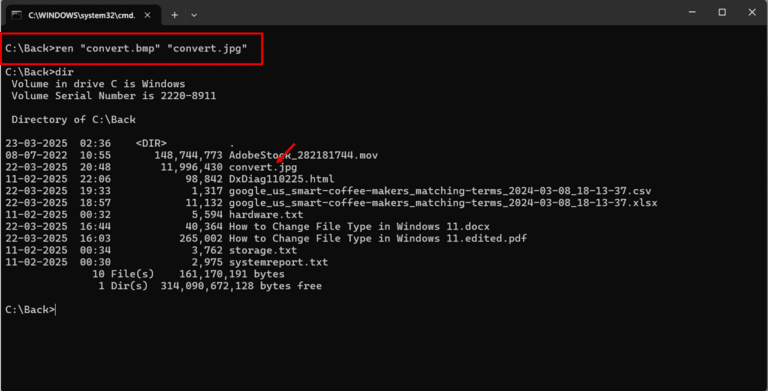
The primary command for renaming files in Command Prompt is ren (short for rename). Here’s the basic syntax:
ren “filename.oldextension” “filename.newextension”
For a single file conversion, the process is straightforward:
- Type ren followed by a space at the command prompt. This initiates the rename command.
- Type the current filename with its extension in quotes. For example, “document.txt”. The quotes are important if the filename contains spaces.
- Add a space, then type the new filename with the desired extension in quotes. For example, “document.html”.
- Press Enter to execute the command. The file extension will be changed immediately without any confirmation dialog.
- Verify the change by typing dir and pressing Enter to see the updated file listing.
Method 4 Changing File Types in Bulk
Batch Renaming Multiple Files with Wildcards
The real power of Command Prompt emerges when working with multiple files. You can use wildcards to target groups of files:
- Use the ren command followed by a wildcard pattern. The asterisk (*) represents any sequence of characters.
- Specify the current extension you want to convert from. For example, *.jpg targets all JPG files in the current directory.
- Add the target extension pattern. For example, *.png would change all those files to a PNG extension.
- Press Enter to execute the command. All matching files will be processed instantly.
Here’s a practical example:
ren *.jpg *.png
This command converts the extensions of all JPG files in the current directory to PNG. Note that as with other renaming methods, this doesn’t perform actual content conversion—it only changes the extensions.
Advanced Batch Renaming Techniques
For more sophisticated renaming operations, Command Prompt offers several advanced techniques:
Targeting Specific Filename Patterns
You can use partial wildcards to target specific naming patterns:
- Combine specific text with wildcards in your command. For example, type ren Photo*.jpg Photo*.png to only rename files that begin with “Photo”.
- Press Enter to execute the command. Only files matching the specified pattern will be affected.
Recursively Processing Subfolders
To change file extensions in the current folder and all its subfolders:
- Use the for /R command structure for recursive operations. For example:
for /R %f in (*.txt) do ren “%f” “*.html”
- Press Enter with caution—this will affect all matching files in all subdirectories.
This powerful command should be used carefully, as it affects many files across multiple folders.
Creating Reusable Batch Files for File Conversion
If you frequently perform certain conversion tasks, you can create reusable batch files:
- Open Notepad by searching for it in the Start menu and clicking the result.
- Type your command sequence in the text editor. For example:
@echo off
echo Converting all TXT files to HTML…
ren *.txt *.html
echo Conversion complete!
pause
- Click File and select Save As from the dropdown menu. Navigate to a convenient location.
- Change the Save as type dropdown to All Files (.) instead of Text Documents.
- Name your file with a .bat extension, such as ConvertTextToHtml.bat.
- Click Save to create your batch file. You now have a clickable icon that performs the conversion when double-clicked.
This technique turns complex Command Prompt operations into easy-to-use tools that anyone can run without remembering command syntax.
Safety Precautions When Using Command Prompt
Command Prompt executes instructions immediately without confirmation dialogs, so caution is essential:
Always ensure you’re in the correct directory before running commands. Use dir to verify the contents.
Consider running a test on a small subset of files first before processing large batches.
For important files, create backups before using batch renaming commands, as they cannot be easily undone.
Remember that changing extensions via Command Prompt, like other renaming methods, doesn’t convert the file contents—only the extension.
Be especially careful with recursive commands affecting subfolders, as they can modify more files than expected.
Limitations of Command Prompt File Type Changes
While powerful, Command Prompt has similar limitations to other extension-renaming methods:
It only changes file extensions, not file contents. For true format conversion, you’ll need dedicated conversion software.
Commands can be syntax-sensitive—a missing quote or extra space can cause errors or unintended results.
Some operations may require administrator privileges, especially when working with system folders.
If you need actual file conversion rather than just extension changes, Command Prompt should be combined with conversion utilities or scripting languages that can transform file contents.
Method 5: Third-Party File Converter Software for Windows 11
When Windows 11’s built-in tools don’t offer the conversion capabilities you need, third-party file converter software steps in to fill the gap. These specialized applications are designed specifically for transforming files between different formats and often support a much wider range of file types than Windows’ native options.
Why Consider Third-Party Conversion Software?
Third-party converters offer several advantages over Windows’ built-in tools:
Format diversity: Most converters support dozens or even hundreds of file formats, including specialized and industry-specific types.
Batch processing: Convert multiple files or entire folders in a single operation.
Conversion quality: Specialized algorithms optimize the conversion process to maintain quality and formatting.
Additional features: Many converters include editing tools, compression options, and metadata handling.
Customization: Advanced settings allow you to fine-tune the conversion parameters for optimal results.
For users who regularly work with diverse file types or need high-quality conversions, third-party software provides capabilities that simply aren’t available in Windows 11’s standard toolkit.
Popular File Converter Applications for Windows 11
Several well-regarded file converter applications work seamlessly with Windows 11. Here’s an overview of some popular options:
Free File Converter Options
FileZigZag: A desktop application that handles over 100 file formats. It’s particularly strong with document and image conversions.
Handbrake: Specializes in video conversion with excellent quality control and compression options.
XnConvert: Focuses on image conversion with batch processing and extensive editing capabilities.
Free File Converter: A straightforward utility supporting common file formats with minimal complexity.
Audacity: While primarily an audio editor, it offers excellent audio format conversion capabilities.
Premium Converter Software
Adobe Acrobat Pro: The gold standard for PDF conversion, offering unmatched accuracy when converting to and from PDF formats.
Wondershare UniConverter: A comprehensive multimedia converter handling video, audio, and images with advanced editing features.
Format Factory: Supports virtually every popular media format with customizable output settings.
Any Video Converter Ultimate: Despite the name, it handles not just video but also audio and image conversions.
Movavi Video Converter: Known for fast conversion speeds while maintaining quality, particularly for video files.
Customizing Conversion Settings for Optimal Results
Most third-party converters offer detailed customization options that can significantly improve conversion quality:
- After adding your files, look for Settings, Options, or Properties buttons near your selected file(s) before starting the conversion.
- Explore the available quality settings for your specific conversion type. For images, this might include resolution and compression; for video, bitrate and framerate.
- Adjust metadata options to control what information carries over to the new format. This is particularly important for photos and media files.
- Look for format-specific options like text extraction for PDFs, compression methods for archives, or codec selection for video files.
- Consider enabling batch profiles or presets if you frequently perform the same type of conversion. These save your preferred settings for future use.
- Test conversion with a single sample file before processing a large batch, especially when using new settings. This allows you to verify quality before committing to a time-consuming process.
Taking the time to optimize these settings can make a substantial difference in the quality and usefulness of your converted files.
Method 6: Using Online File Conversion Services
Online file conversion services offer a convenient alternative if you need to convert files quickly without installing additional software on your Windows 11 system. These web-based tools allow you to convert files directly in your browser, requiring only an internet connection and the files you want to transform.
Advantages of Online Conversion Services
Online converters provide several benefits that make them attractive for many Windows 11 users:
No installation required: Unlike desktop applications, online converters don’t occupy space on your hard drive or require setup processes.
Accessibility from any device: You can access these services from any computer with internet access, not just your primary Windows 11 machine.
Regular updates: Web services are continuously maintained by their providers, ensuring compatibility with the latest file formats.
Simplified interface: Most online converters feature straightforward, user-friendly designs focused on essential functions.
System resource efficiency: The conversion processing happens on remote servers, not your computer, preserving your system resources for other tasks.
Online services provide a practical solution for occasional conversion needs or when working on a computer where you can’t install software.
Popular Online File Conversion Services
Several reliable online conversion platforms work well with Windows 11:
Convertio: Supports over 300 file formats across documents, images, audio, video, and more with a clean interface.
CloudConvert: Offers conversion between more than 200 formats with additional tools like compression and file merging.
Zamzar: One of the original online converters, known for reliability and a straightforward four-step conversion process.
Online-Convert.com: Provides specialized conversion options with detailed settings for each format type.
FileZigZag: Features both an online service and a downloadable application, supporting numerous format combinations.
Each of these services has its strengths, with some specializing in specific file types like documents, images, or media files.
Limitations of Online Conversion Services
While convenient, online converters do have several limitations to consider:
File size restrictions: Most free services limit the maximum file size (typically 100MB-500MB), making them unsuitable for large videos or high-resolution images.
Internet dependency: Without an internet connection, online converters are completely inaccessible.
Quality control: Some services compress files more aggressively than desktop alternatives, potentially reducing quality.
Limited customization: Online tools typically offer fewer adjustment options than dedicated software.
Processing time: Upload and download times can make online conversion slower than local processing for large files, especially with slower internet connections.
Advertising and upselling: Free online converters are often supported by advertising or attempts to upsell premium features.
These limitations may be acceptable trade-offs for occasional, small-file conversions for the convenience provided.
Tips for Effective Online Conversion
To get the most from online conversion services:
- Test with a sample file before uploading large batches to verify the quality meets your needs. This prevents wasting time on unsuitable services.
- Use specialty converters for specific file types—some services excel at document conversion while others are optimized for multimedia.
- Check for advanced options hidden in menus or “more settings” links. Many services offer additional controls that aren’t immediately visible.
- Consider creating an account with services you use frequently. This often provides higher limits and the ability to track conversion history.
- When converting sensitive documents, look for services advertising zero-knowledge encryption or client-side processing, which offer enhanced privacy.
- Be patient with larger files, as they require more upload time, processing time, and download time. Plan accordingly for time-sensitive conversions.
- Save the URLs of effective converters to your browser bookmarks for quick access when needed again.
With these strategies, online converters can become valuable tools in your Windows 11 file management arsenal, complementing the other methods we’ve explored.
Conclusion
You now have a complete toolkit for changing file types in Windows 11, from simple extension renaming to sophisticated converter software. I recommend starting with the built-in Windows tools for basic conversions before moving to third-party options for more complex needs. Remember that changing the extension alone doesn’t convert the file’s contents—choose the right method based on what you’re trying to accomplish.
Always back up important files before conversion attempts. This simple habit has saved me countless hours of frustration when conversions didn’t go as planned. If you encounter problems, revisit the troubleshooting section of this guide for specific solutions to common conversion issues.
The methods I’ve shared will adapt to most file conversion scenarios you’ll encounter in Windows 11. Understanding the differences between file extensions and true format conversion allows you to handle simple and complex file type changes confidently and efficiently.
If you want to understand what is Windows 11 startup folder and how to manage the Windows 11 startup applications you can checkout my Essential guide on Windows 11 Startup Folder
Frequently Asked Questions (FAQs)
Changing a file’s extension doesn’t convert its internal structure. When you rename “document.docx” to “document.pdf,” you only change how Windows identifies the file, not transform it into an actual PDF. The file’s internal structure remains in the original format. For true conversion, you need to use proper conversion tools like the “Save As” function in applications, dedicated converter software, or online conversion services that restructure the file’s contents to match the new format.
Windows 11 hides file extensions by default to create a cleaner visual experience. To reveal them, open File Explorer, click the View tab at the top, then find and check the “File name extensions” box in the Show section of the ribbon. Once enabled, extensions will appear for all files, allowing you to identify and modify them as needed. This setting persists until you change it again.
Quality or formatting loss occurs because different file formats support different features. When converting from feature-rich formats to simpler ones, unsupported elements must be approximated or removed. For example, converting a DOCX with complex formatting to TXT loses all formatting because TXT only supports plain text. Similarly, converting a high-quality PNG to JPEG introduces compression artifacts because JPEG uses lossy compression. To minimize quality loss, choose formats that support similar features, use high-quality conversion settings, and test with a sample file before batch processing. For critical documents, consider using formats specifically designed for preservation, like PDF/A for documents or lossless formats for media.
Free converter software typically offers basic conversion capabilities with limited format support, occasional ads, and fewer customization options. Paid converters generally provide more comprehensive format support, batch processing capabilities, advanced customization settings, higher quality output, better customer support, and no advertisements. Free options like HandBrake and FileZigZag work well for occasional conversions. In contrast, paid options like Adobe Acrobat Pro and Wondershare UniConverter offer professional-grade features for frequent or specialized conversion needs.
To change which program automatically opens a specific file type in Windows 11:
- Right-click on a file of the kind you want to change
- Select “Open with” from the context menu
- Choose “Choose another app” from the submenu
- Select your preferred application from the list or click “More apps” to see additional options
- Check the “Always use this app to open [file type] files” box at the bottom
- Click “OK” to save your preference
Windows 11 will use your selected application whenever you double-click files with that extension.
You can automate file conversions in Windows 11 through several methods:
- Create batch (.bat) files with Command Prompt commands for extension renaming
- Set up scheduled tasks using Task Scheduler that runs conversion scripts at specific times
- Use PowerShell scripts for more advanced conversion automation
- Install automation software like AutoHotkey to create conversion macros
- Use the “watch folder” feature in third-party converters that automatically process files added to specified folders.
For regular conversion needs, setting up automation can save hours of manual work. The most appropriate method depends on your technical comfort level and specific conversion requirements.