Are you frustrated with how much screen space your Windows 11 taskbar consumes, especially when you’re trying to maximize every pixel for productive work? As someone who has spent years helping users optimize their Windows interfaces, I can tell you that understanding how to make your Windows 11 taskbar smaller is one of the most effective ways to create more workspace and enhance productivity. Windows 11 offers powerful customization options that can significantly reduce the taskbar size while maintaining all the necessary functionality.
Whether you’re looking to maximize screen space on a small laptop, create a cleaner desktop aesthetic, or want more room for your actual work, you’ll find everything you need in this comprehensive guide. I’ll walk you through safe Windows Settings adjustments that provide immediate improvements, and strategic removal of unnecessary taskbar elements. Each method is designed to give you progressively more control over your taskbar size while maintaining the necessary functionality.
Want a cleaner Windows 11 interface? Check out my detailed tutorial on how to make your taskbar transparent and enhance your desktop’s visual appeal.
Table of Contents
Understanding Windows 11 Taskbar Changes
When Microsoft released Windows 11, they didn’t just update the operating system – they completely rebuilt the taskbar from scratch using XAML technology. This fundamental change has created a ripple effect that affects how you interact with your desktop daily.
The most noticeable difference you’ll encounter is the centered alignment of the taskbar icons. Unlike the left-oriented taskbar of Windows 10, the taskbar in Windows 11 looks more like something from macOS. This isn’t just a cosmetic change – Microsoft designed this centered approach to create a more balanced visual experience, especially on larger monitors where left-aligned icons can feel disconnected from the main content area.
Microsoft’s approach reflects a broader design philosophy change that prioritizes visual consistency over user customization. The company invested heavily in creating a more polished, modern appearance with several enhancements:
- New animations for launching, minimizing, and maximizing apps
- Updated icons for Search, Start Menu, Widgets, and Chat
- Improved visual feedback throughout the interface
- Touch-optimized elements for tablet and hybrid device users
Method 1: Adjusting Display Scaling to Resize Taskbar
The most effective built-in method for changing your taskbar size involves modifying your display scaling settings. This approach affects your entire interface, so it’s perfect if you want everything to be consistently smaller or larger.
Display scaling works by adjusting how Windows renders all interface elements. When you reduce scaling from 125% to 100%, your taskbar becomes noticeably smaller, along with all other Windows elements.
This method is particularly useful because it maintains visual consistency across your entire desktop experience, providing immediate and reversible results. Unlike registry modifications, display scaling changes are completely safe and supported by Microsoft, making this the ideal starting point for most users seeking a smaller taskbar.
- Right-click on an empty area of your desktop. This action opens the context menu that provides quick access to display settings.
- Click on “Display settings” from the context menu. This takes you directly to the display configuration page in Windows Settings.

- Look for the “Scale & layout” section in the main display settings window. This section contains the primary controls for adjusting the size of interface elements on your screen.
- Locate the “Scale” dropdown menu under the “Change the size of text, apps, and other items” heading. This dropdown shows your current scaling percentage and available options.
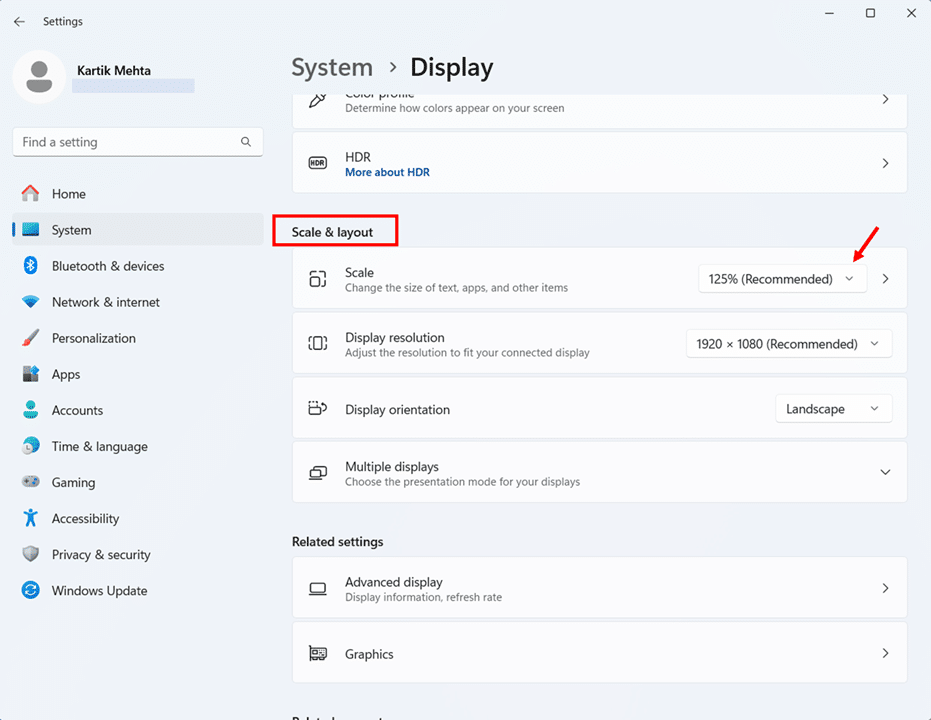
- Click on the “Scale” dropdown to reveal available scaling options. Common options include 100%, 125%, 150%, and 175%, though the exact options depend on your display’s resolution and capabilities.

- Select a different scaling percentage based on your preferences. If you want a smaller taskbar, choose a lower percentage, like 100%. If you want a larger taskbar, select a higher percentage, such as 150% or 175%.

- Observe the immediate changes to your taskbar and overall interface. Windows applies the new scaling in real-time, so you can see how the change affects your taskbar size immediately.
- Click “Keep changes” if prompted, or simply continue using your computer if you’re satisfied with the new size. Some applications may require a restart of computer to adapt to the new scaling setting fully.
Important considerations for this method: Changing display scaling affects your entire Windows interface, not just the taskbar. Text, icons, menus, and all other interface elements will scale proportionally. While this maintains visual consistency, it means you can’t isolate the taskbar size change. Additionally, some older applications may not handle scaling changes gracefully and might appear blurry or improperly sized.
Method 2: Using Custom Scaling for Precise Control on Resizing Taskbar
If the standard scaling options don’t provide the exact taskbar size you’re looking for, Windows 11 offers custom scaling capabilities that give you more precise control over interface sizing. While the standard dropdown typically offers options like 100%, 125%, 150%, and 175%, custom scaling allows you to use any percentage between 100% and 500% in increments as small as 1%.
However, custom scaling comes with trade-offs: some applications may appear blurry with non-standard percentages, and you’ll need to sign out and back in for changes to take full effect. This method works best when you’ve tried standard scaling options but need something more tailored to your specific display and viewing preferences.
- Right-click on an empty area of your desktop. This action opens the context menu that provides quick access to display settings. Click on “Display settings” from the context menu.

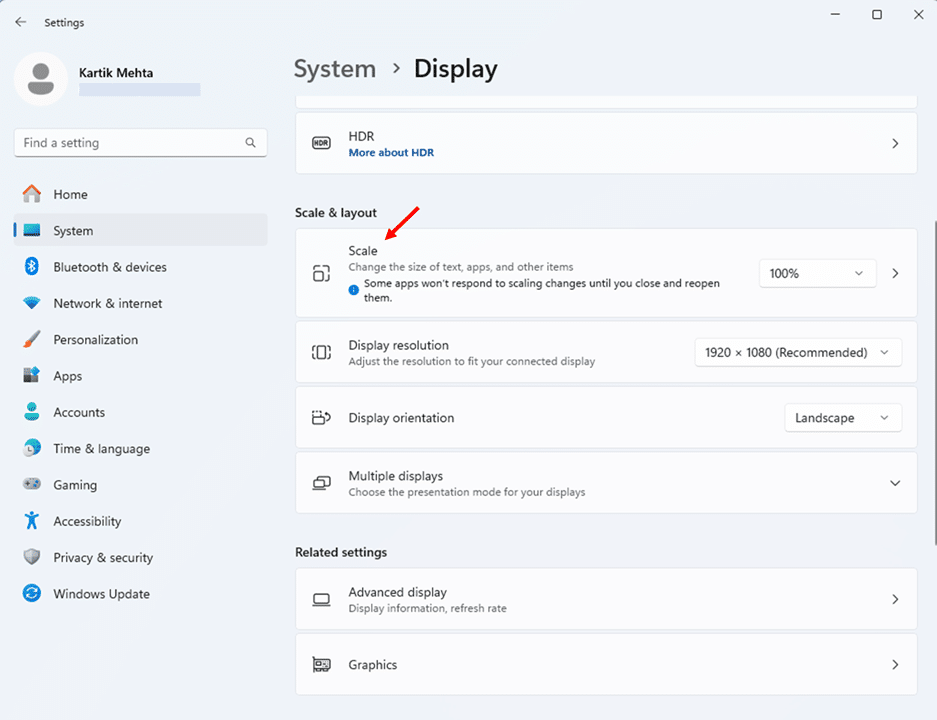
- Scroll down in the display settings to find the “Scale & Layout”
- Click on “Scale” to open additional scaling configuration options. This page provides access to custom scaling percentages that aren’t available in the standard dropdown.
- Look for the “Custom scaling” section on the advanced scaling settings page. This section allows you to specify an exact scaling percentage.
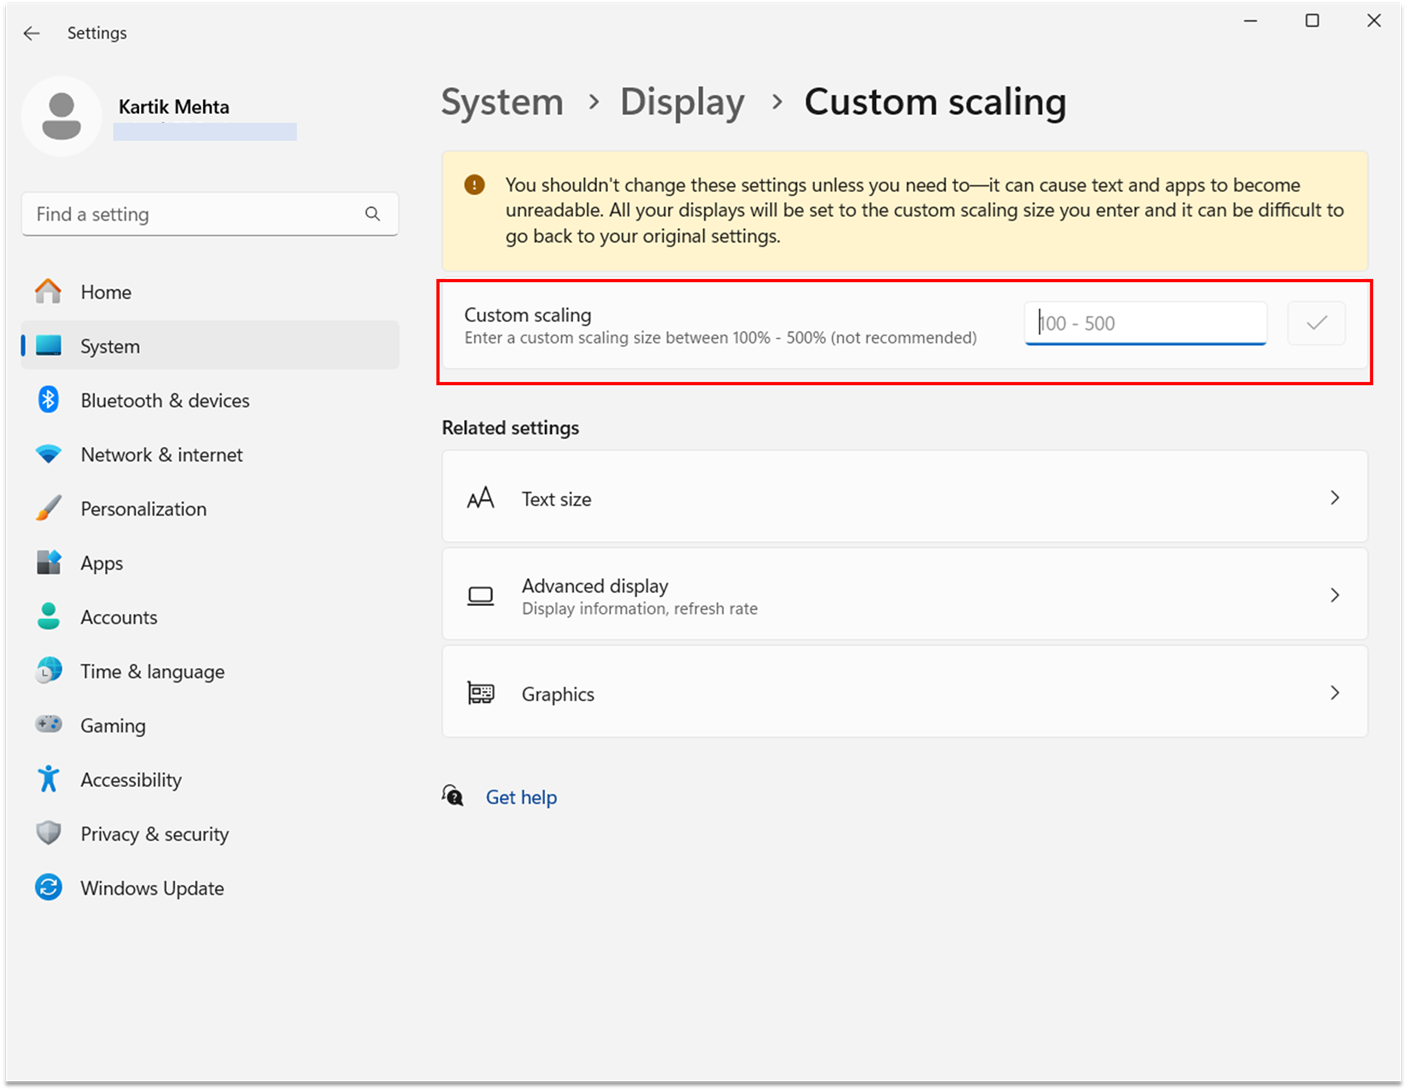
- Enter a custom scaling percentage in the text field. You can use any percentage between 100% and 500%, allowing for very precise control over interface sizing. Click the check mark button to apply.
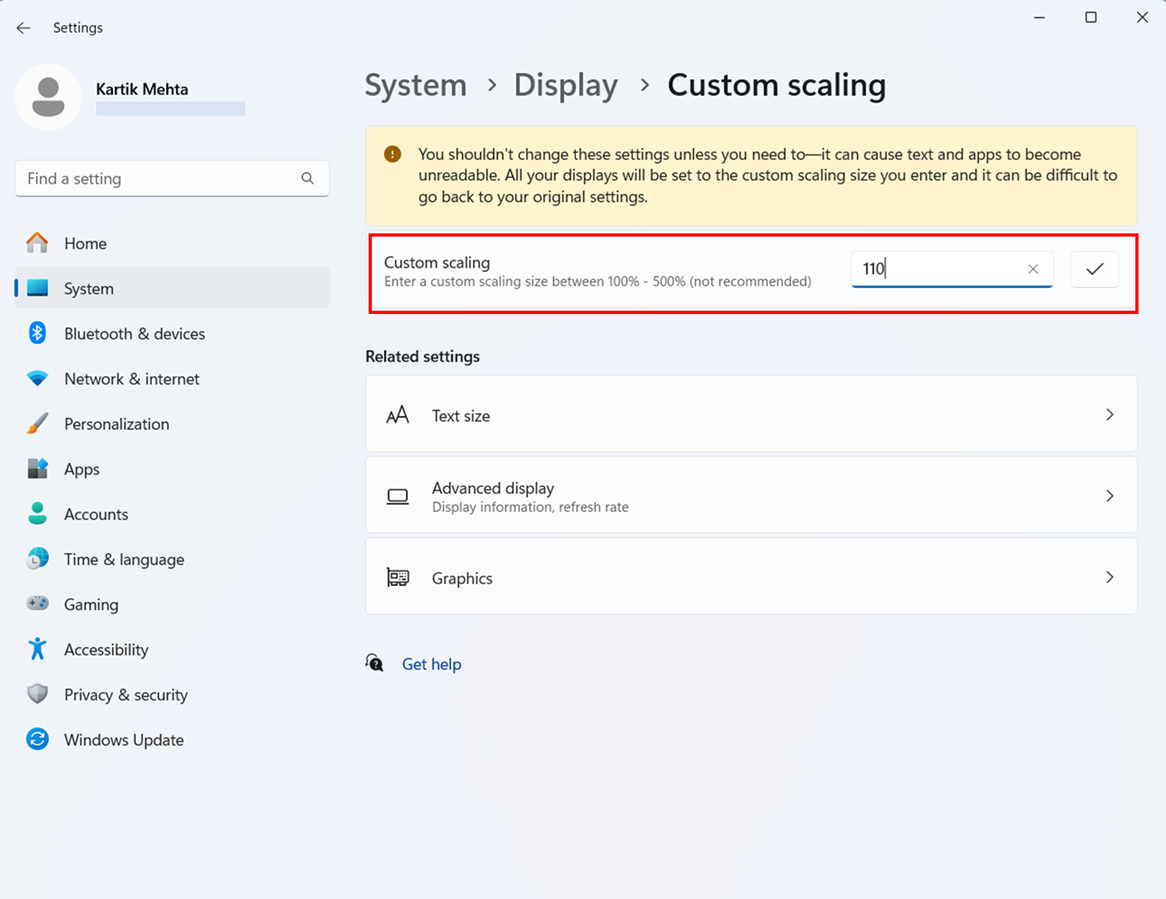
- Click Sign out now when prompted and sign back in to fully apply the custom scaling. This step ensures that all system components and applications properly adapt to your custom scaling setting.

Custom scaling provides the most precise control over taskbar sizing through display settings, but it comes with an increased risk of application compatibility issues. Some programs may not render correctly with non-standard scaling percentages, so test your essential applications thoroughly after making changes.
Method 3: Adjusting Individual Taskbar Elements
Beyond display scaling adjustments, you can also modify which elements appear on the taskbar, effectively changing how much horizontal space it consumes and how cluttered it appears. This approach focuses on visual efficiency and content optimization rather than height reduction.
By removing unused features like widgets, chat, or the search box, you create more breathing room for your actual applications and reduce the visual weight of the taskbar.
This method is particularly effective as a complementary technique, as it addresses both the physical size (through scaling) and content density of your taskbar. The beauty of this approach is that it’s completely reversible, allowing you to maintain only the features you use and creating a cleaner, more personalized interface without sacrificing functionality.
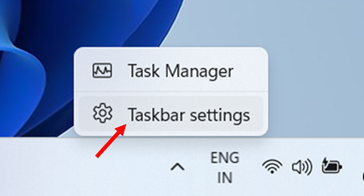
- Right-click on an empty area of the taskbar itself. This provides access to taskbar-specific settings without navigating through the main Windows Settings.
- Select “Taskbar settings” from the context menu. This opens the dedicated taskbar configuration page in Windows Settings.
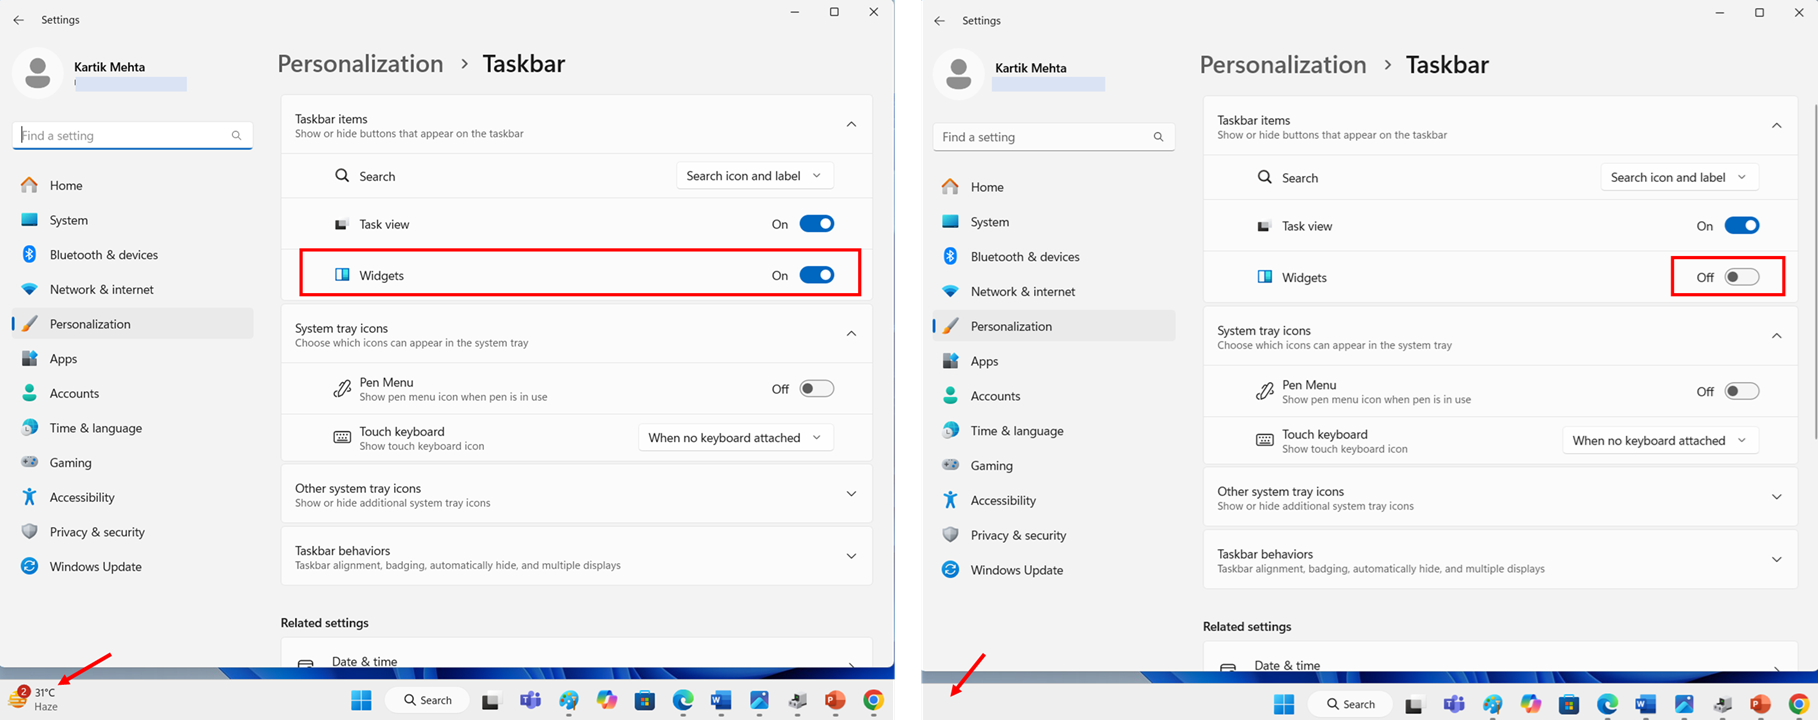
- Review the “Taskbar items” section at the top of the settings page. This section shows toggles for Search, Task view, Widgets, and Chat (if available in your region).
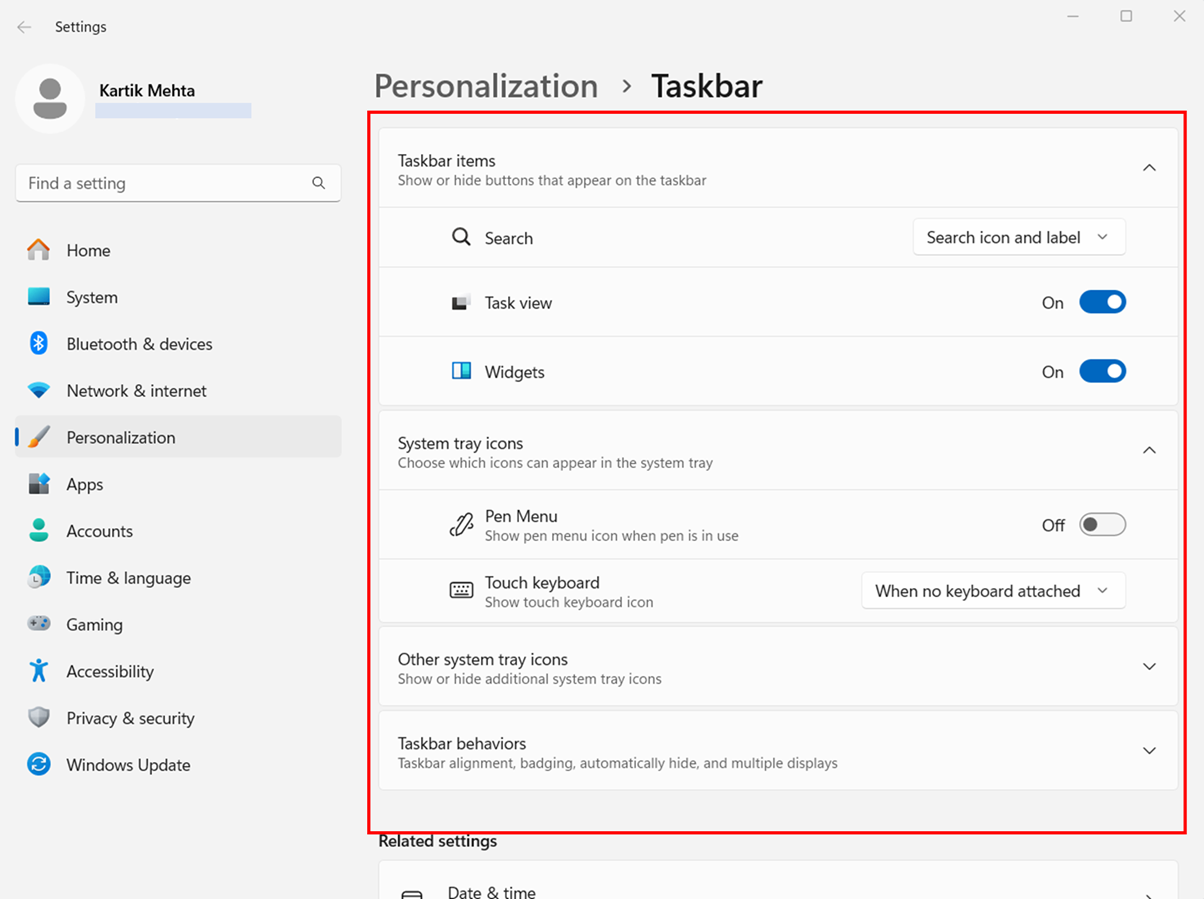
- Toggle off any items you don’t regularly use by clicking their respective switches. Removing unused elements creates more space for your pinned applications and can make the taskbar feel less crowded.
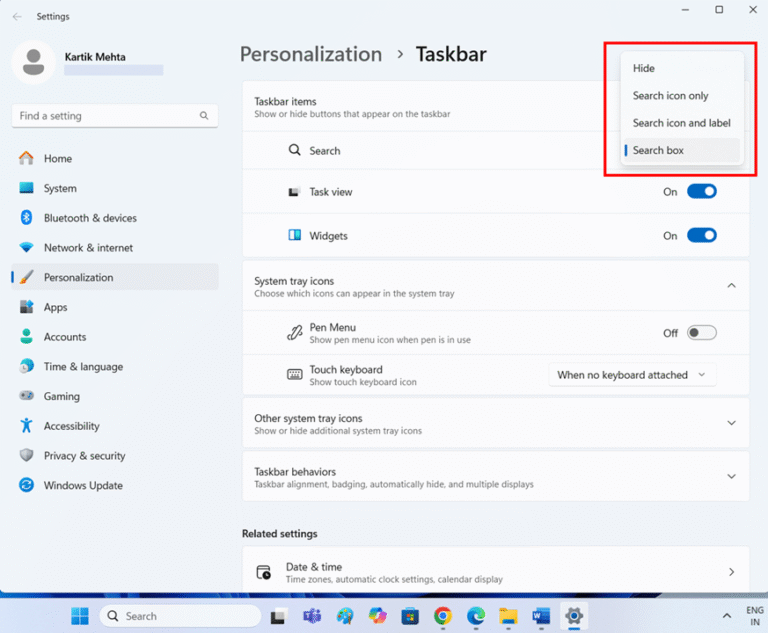
- Adjust the “Search” setting using the dropdown menu. You can choose between a large search box, a search icon, or hiding search entirely. Selecting the icon option saves significant taskbar space.
- Configure the “Widgets” toggle based on your preferences. Disabling widgets removes the dedicated widgets button, freeing up additional taskbar space.
- Scroll down to the “Taskbar behaviors” section for additional space-saving options. This section contains settings that affect how the taskbar functions and appears.

- Consider enabling “Automatically hide the taskbar” if you want maximum screen space. When enabled, the taskbar disappears when not in use and reappears when you move your mouse to the bottom of the screen.
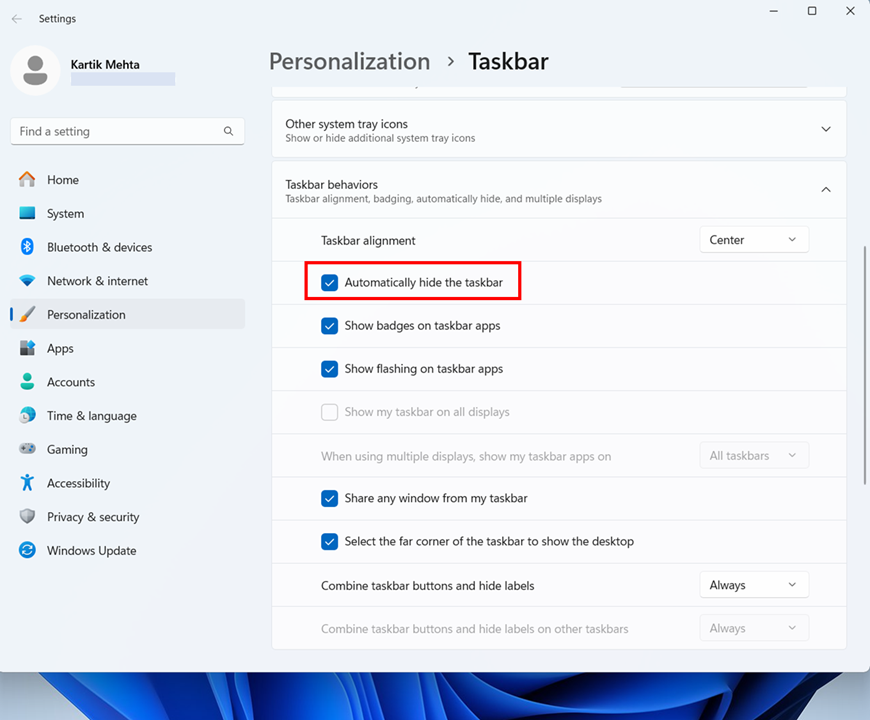
- Adjust the “Taskbar alignment” from Center to Left if you prefer the traditional Windows layout. This doesn’t change the taskbar size but can make it feel more compact by grouping all elements on one side.

Conclusion
You now have everything you need to make your Windows 11 taskbar smaller and more efficient. I have covered the essential methods that work: using Windows Settings to adjust display scaling and remove unnecessary elements, editing the registry to unlock hidden size options, strategically removing taskbar icons and widgets, and optimizing your configuration for your specific screen size. These aren’t just theoretical techniques – they’re practical solutions that help you reclaim valuable screen space while maintaining the necessary functionality.
You now know how to balance functionality with visual preferences and implement changes without risking system stability. The best taskbar setup is one that boosts your productivity while remaining manageable, and you’re now equipped to build and sustain exactly that.
Want a cleaner desktop without the taskbar constantly visible? Learn how to hide it completely in my guide How to Hide the Taskbar in Windows 11.
Frequently Asked Questions (FAQs)
Yes, display scaling affects all interface elements system-wide, including text, icons, menus, and application windows. Reducing scaling from 125% to 100% makes everything smaller, not just the taskbar. Some older applications may appear blurry or improperly sized with non-standard scaling settings.
No, Windows 11 does not include built-in options to move the taskbar from the bottom of the screen. This functionality was removed from Windows 10. Third-party applications can provide this capability, but they require additional software installation and ongoing maintenance.
Yes, taskbar customizations are user-specific. Each user account can have its own taskbar size, element visibility, and configuration settings. Changes made in one account don’t affect other users on the same system.
Reducing taskbar size has minimal impact on system performance. The primary benefits are visual and spatial rather than performance-related. However, removing unused taskbar elements, such as widgets and chat, can slightly reduce background resource usage and network activity.
Pinned applications remain functional regardless of changes to the taskbar size. Smaller taskbar configurations may make icons appear more cramped, while larger configurations provide more comfortable spacing. The number of visible pinned applications depends on your screen resolution and chosen size.