As someone who’s optimized Windows systems for diverse workstations since Windows 7, I can tell you that understanding screen rotation in Windows 11 is one of the most effective ways to transform your productivity and comfort while working on your computer. Changing your display orientation adapts your technology to your needs rather than forcing you to adapt to your screen’s limitations.
Whether you’re looking to set up a vertical monitor for coding, fix an accidentally flipped display, or create a multi-monitor workstation with mixed orientations, you’ll find everything in this how to rotate screen in Windows 11 guide. I’ll walk you through keyboard shortcuts for instant rotation; Windows display settings for permanent changes, context menu methods for quick access, and troubleshooting techniques for when issues arise.
You’ll gain precise control over your visual workspace by mastering these rotation methods. You’ll see more code at once in portrait mode, enjoy better media viewing in landscape, and create custom environments for specialized tasks. The techniques in this guide will help you overcome common rotation obstacles and confidently configure your displays to match exactly how you work.
For a complete guide on multiple ways to get help in Windows 11, check out my detailed article “How to Get Help in Windows 11“
Table of Contents
Quick Keyboard Shortcuts to Rotate Your Screen in Windows 11
Keyboard shortcuts provide the fastest way to rotate your screen in Windows 11. These handy key combinations can instantly change your display orientation without navigating menus or settings. Let’s explore how to use them and what to do when they don’t work as expected.
Using Ctrl+Alt+Arrow Keys
- Ensure you are logged into Windows 11 with an account that has administrator privileges.
- Press and hold the Ctrl and Alt keys simultaneously on your keyboard.
- While holding these keys, press the Up Arrow key to set your screen to standard landscape orientation.
- While holding Ctrl and Alt, press the Right Arrow key to rotate your screen 90 degrees clockwise to portrait orientation.
- While holding Ctrl and Alt, press the Down Arrow key to flip your screen upside down (180 degrees rotation).
- While holding Ctrl and Alt, press the Left Arrow key to rotate your screen 90 degrees counterclockwise to portrait orientation.
- Release all keys after selecting your desired orientation, and Windows 11 will apply the rotation immediately.
These shortcuts are handy when you need to quickly switch orientations for a presentation or to view content in a different layout temporarily. The immediate response makes them ideal for situations where you don’t want to interrupt your workflow by navigating through settings menus.
Using Windows 11 Display Settings to Rotate Screen
While keyboard shortcuts offer quick temporary changes, the Windows 11 Display Settings provide a more permanent and reliable way to rotate your screen. This method works universally across all Windows 11 devices regardless of your graphics card manufacturer, making it the most dependable approach when you need to set a specific screen orientation.
Accessing Display Settings Through the Settings App
- Click on the Start button located in the taskbar or press the Windows key on your keyboard.
- Click on Settings (the gear icon) in the Start menu, or use the keyboard shortcut Windows + I to open the Settings app directly.

- Select System from the left sidebar of the Settings window.
- Click on Display in the System settings menu to access all display-related options.

- Locate the Scale & layout section in the Display settings, where you’ll find the screen orientation options.

- Click on the dropdown menu under Display Orientation to view all available rotation options.
- Select one of the four orientation options: Landscape, Portrait, Landscape (flipped), or Portrait (flipped) based on your preference.

- Review the preview change on your screen, showing how your display will look with the new orientation.
- Click Keep changes within 15 seconds to apply the new orientation, or wait for the countdown to finish, and Windows will revert to the previous orientation.
- If you have multiple displays connected, ensure you’ve selected the correct monitor in the display diagram at the top of the settings page before changing orientation.
The Settings app method is particularly useful when setting up a more permanent display configuration, such as a vertical monitor for coding or reading, or when configuring a multi-monitor workspace where different screens serve different purposes.
Configuring Different Orientations for Multiple Monitors
- Open Settings by pressing Windows + I on your keyboard.
- Navigate to System and then select Display from the options.
- Look at the display diagram at the top of the screen, which shows all the connected monitors.
- Click on the display that you want to rotate in the diagram to select it.
- Verify you’ve selected the correct monitor by checking that the number on your physical display matches the selected display in the diagram.
- Scroll down to the Scale & layout section while selecting your desired monitor.
- Click the dropdown menu under Display Orientation and select your preferred orientation for that specific monitor.
- Click Keep changes when prompted to apply the new orientation to only the selected monitor.
- Repeat steps 4-8 for each additional monitor you wish to configure with a different orientation.
- Click Apply when you’ve finished configuring all your displays to save the entire multi-monitor configuration.
This approach allows you to have different orientations for different monitors, which is particularly useful for specialized workstations. For example, you might keep your main display in landscape mode for general work while setting a secondary monitor to portrait mode for reading documents or coding.
Optimizing Display Settings After Rotation
Once you’ve rotated your screen, you may need to adjust additional settings for the best experience:
- While still in the Display settings, check the Scale percentage setting to ensure text and apps are an appropriate size on your rotated screen.

- Adjust the Scale percentage by clicking on the dropdown menu and selecting a higher percentage if items appear too small, or a lower percentage if they seem too large.
- Click on Advanced Display to access additional display properties.

- Verify the Resolution setting is optimal for your rotated orientation by selecting the resolution marked as (Recommended) or choose another if needed.

- Check the Refresh rate option to ensure your display is running at its optimal speed after rotation.

- Click on Identify if you have multiple monitors to confirm which physical screen corresponds to which number in your configuration.
- Arrange the display boxes in the diagram by dragging them to match the physical arrangement of your monitors.
- In Multiple Displays select the Make this my main display checkbox if you want to change which monitor serves as your primary display.
- Adjust the Night light settings if the rotated display appears to have different color temperatures than before.
- Click Apply after making all your adjustments to save your comprehensive display configuration.
These optimization steps ensure that your newly rotated display provides the best viewing experience. Different orientations often benefit from different scaling settings, as text and interface elements may need to be resized for comfortable viewing and interaction.
When to Choose Display Settings for Screen Rotation in Windows 11 Over Other Methods
The Settings app approach to screen rotation offers several advantages that make it preferable in certain situations:
- Open the Settings app when you need a permanent or semi-permanent rotation setting that persists after reboots.
- Use this method when keyboard shortcuts are disabled or unavailable on your system.
- Choose Display Settings when configuring complex multi-monitor setups with different orientations.
- Select this approach when you need to simultaneously adjust other display properties and orientation.
- Rely on the Settings app method when using Windows 11 on tablets or convertible devices where automatic rotation may need to be configured.
Windows 11’s Display Settings provide a comprehensive solution for screen rotation that works reliably across all devices and configurations. While it requires a few more steps than keyboard shortcuts, it offers greater control and persistence, making it ideal for setting up your workspace exactly how you want it.
Using the Context Menu for Quick Screen Rotation in Windows 11
The desktop context menu provides one of the most convenient methods for rotating your screen in Windows 11. This approach sits between keyboard shortcuts and formal settings in terms of accessibility and allows you to make quick changes without remembering key combinations. Let’s explore how to access and use this feature, understand when it’s available, and learn how to make the most of this approach.
Accessing Rotation Options via the Desktop Context Menu
- Clear or minimize any open windows to ensure you can see your desktop background.
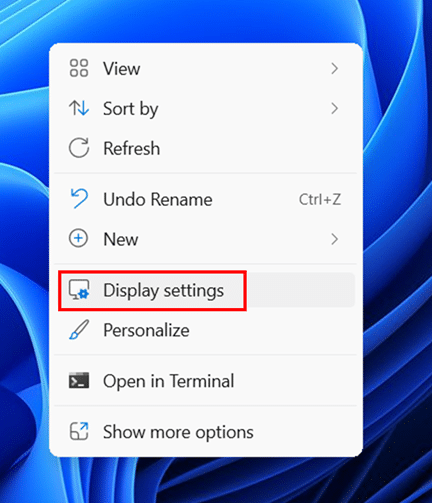
- Right-click on an empty area of your Desktop to open the context menu.
- Look for the Display settings option near the bottom of the context menu and click on it.
- Wait for the Settings app to open the Display section, which happens automatically when using this method.

- Locate the Scale & layout section within the Display settings page.
- Click on the dropdown menu under Display Orientation to view all available rotation options.
- Select your desired orientation option: Landscape, Portrait, Landscape (flipped), or Portrait (flipped).
- Click Keep changes when prompted to apply the new orientation, or wait for the countdown to expire if you want to cancel.
- Notice how Windows 11 remembers this setting even after you restart your computer, making it suitable for permanent configuration changes.
- Return to this menu using the same right-click method whenever you need to adjust your screen orientation.
Benefits of Using the Context Menu Approach
The desktop right-click method offers several advantages that make it particularly useful in specific scenarios:
- Use the context menu when you need a more visual approach than keyboard shortcuts but don’t want to navigate through multiple settings pages.
- Select this method when demonstrating screen rotation to others, as the steps are easy to follow and observe.
- Choose this approach when working on an unfamiliar system where you aren’t sure if keyboard shortcuts are enabled.
- Opt for the context menu when you need to make a one-time adjustment that will persist after reboots.
- Use this method when you want to check other display settings simultaneously as changing orientation.
- Select the right-click approach when quickly accessing other graphics settings that may be linked from the Display settings page.
- Choose this method when you need to ensure you’re changing settings for the correct monitor in a multi-display setup.
- Utilize the context menu when keyboard shortcuts might conflict with application shortcuts in your current workflow.
- Prefer this approach when you want a confirmation dialog before changes take effect, which helps prevent accidental orientation changes.
- Use the right-click method when explaining the process to someone else, as it follows a logical and easy-to-describe flow.
The context menu approach bridges the gap between the immediacy of keyboard shortcuts and the depth of dedicated settings pages. It provides quick access without memorizing key combinations, making it ideal for occasional adjustments or helping less technical users.
Shortcuts to Remember When Using the Context Menu Method
While the context menu approach itself is straightforward, there are a few tips and shortcuts that can make it even more efficient:
- Press Shift + F10 when the desktop is selected to open the context menu without using the mouse.
- Remember that pressing Esc will close the context menu if you open it accidentally.
- Press D (for Display) after opening the context menu to jump to the Display settings option quickly.
- Use the Tab key to navigate the Display settings page once it’s open.
- Press Alt + O when in the orientation dropdown to expand the list of orientation options.
- When prompted after changing orientation, utilize Alt + K to trigger the “Keep changes” button.
- Press Windows + D to quickly show the desktop if you have windows open and need to access the desktop context menu.
- Use Alt + Tab to switch back to the Display settings window if you accidentally click away from it.
- Remember the Windows + P shortcut as an alternative that opens projection options, which include some basic rotation settings.
- Try Alt + Spacebar + X to maximize the Settings window if it opens in a small size, which makes navigation difficult.
Troubleshooting Common Screen Rotation Issues in Windows 11
Even with the various methods available for rotating your screen in Windows 11, you might occasionally encounter problems that prevent rotation from working properly or cause unexpected behavior after rotation. Understanding these common issues and how to address them can save you significant time and frustration. Let’s explore the most frequent screen rotation problems and their solutions.
Solving Issues with Stuck or Frozen Screens After Rotation
When your screen gets stuck during or after rotation, it can be particularly disorienting. Here’s how to address this situation:
- Wait at least 30 seconds before taking action, as Windows 11 sometimes needs extra time to stabilize after changing display orientation.
- Press Windows + Ctrl + Shift + B simultaneously to reset your graphics driver without restarting your computer.
- Press the keyboard shortcut Ctrl + Alt + Up Arrow to return your display to standard landscape orientation.
- Connect to your computer remotely from another device using Remote Desktop or Quick Assist, if possible, to access settings on the frozen screen.
- Press Windows + P to open the projection menu, which sometimes allows you to reset display configurations even when the main screen is stuck.
- Hold the power button on your computer for 10 seconds to perform a hard shutdown if other methods fail, then restart your system.
- Boot into Safe Mode by holding Shift while clicking Restart in the Start menu, then navigating through Troubleshoot > Advanced options > Startup Settings > Restart > 4 or F4.
- Open Device Manager by right-clicking the Start button and selecting it from the menu, then expand Display adapters, right-click your graphics card, and select Disable device followed by Enable device.
- Check your display cable connections to ensure they haven’t come loose during the rotation process, as this can sometimes cause display freezing.
- If possible, Connect an external monitor to determine whether the issue is with your display hardware or Windows 11’s display settings.
Stuck screens often result from graphics driver issues or hardware limitations. Understanding the difference between software and hardware problems helps you apply the appropriate solution more effectively.
Conclusion
You now have everything you need to rotate your screen in Windows 11. I’ve shown you multiple methods that suit different situations – keyboard shortcuts for quick changes, Display Settings for permanent adjustments, and graphics card software for advanced control. Choose the method that best fits your immediate needs and technical comfort level.
I recommend keeping your graphics drivers updated to prevent most rotation issues you might encounter. If you frequently switch orientations, consider creating a system restore point before making significant changes. By applying these techniques, you can optimize your display for coding, reading, design work, or any task where screen orientation makes a difference in your productivity and comfort.
For different methods to adjust screen brightness in Windows 11, check out my detailed article “How to Change Brightness on Windows 11“.
Frequently Asked Questions (FAQs)
Yes, Windows 11 fully supports independent orientation settings for each connected display. Navigate to Settings > System > Display to see numbered boxes representing each monitor. Click on the specific monitor you want to configure, scroll down to Scale & layout, and change only that display’s orientation without affecting others. This is particularly useful for mixed setups where you might want a vertical secondary monitor for code or documents alongside a landscape primary display for general work. The system remembers these per-monitor settings even after disconnecting and reconnecting displays.
Persistence depends on how you change the orientation. Changes made through Windows Settings (System > Display > Orientation) or graphics card control panels are permanent and will remain after rebooting, logging off, or even after Windows updates. However, rotations performed using keyboard shortcuts might be temporary on some systems, especially those with certain Intel graphics configurations that treat hotkey rotations as temporary operations. If you need the rotation to persist reliably, always use the Settings app or your graphics control panel rather than keyboard shortcuts. Your orientation settings are stored per user account so that different users can have different orientations on the same computer.
Yes, Windows 11 has auto-rotation capability for 2-in-1 devices and tablets. You can toggle this on/off in Quick Settings (Win+A) by clicking the Rotation lock button.
In most normal usage scenarios, screen rotation has a negligible impact on system performance. However, several minor considerations exist. Some graphics drivers optimize differently for landscape versus portrait orientations, which might affect graphics-intensive applications. Ultra-wide curved monitors may have display quality differences in portrait mode due to their curvature being oriented incorrectly. For multi-monitor setups, having displays with different orientations can sometimes slightly increase the workload on your GPU. Video playback and games might run slightly less efficiently in portrait mode since most are optimized for landscape viewing. These differences are typically minor and only noticeable on systems already running near their performance limits.
No, Windows 11 includes built-in rotation support, but updated graphics drivers provide the best experience and enable keyboard shortcuts.