
Sending emails is an integral part of most office jobs nowadays. While typing and hitting the send button takes only a few seconds, what if you wanted to schedule the email delivery for a later date and time? Well, this post will help you get the answer to – How to schedule and email in Outlook.
Outlook has an excellent feature that allows users to schedule emails in advance. Whether you want the email to be sent at a specific time when you are away from your desk or schedule it for late at night when the recipients are likely to be less busy, Outlook makes it super convenient.
In this step-by-step guide, you will learn how to schedule emails in the Outlook desktop application and the Outlook web app for Office 365 users. We will cover the exact steps to schedule the emails, make any modifications if required later on, and view all your scheduled emails in one place.
Before scheduling a email for sending ensure your Outlook Signature is inplace. Refer our blog How to Add or Change Email Signature in Outlook
So let’s get started!
Table of Contents
How to Schedule an Email in Outlook
Scheduling an email in Outlook allows you to set a specific date and time in the future for an email to be delivered automatically. This is extremely useful when you want to send communications during off-peak hours or simply don’t want an email going out until a certain date.
Follow these detailed steps to schedule sending an email in the Outlook desktop application:
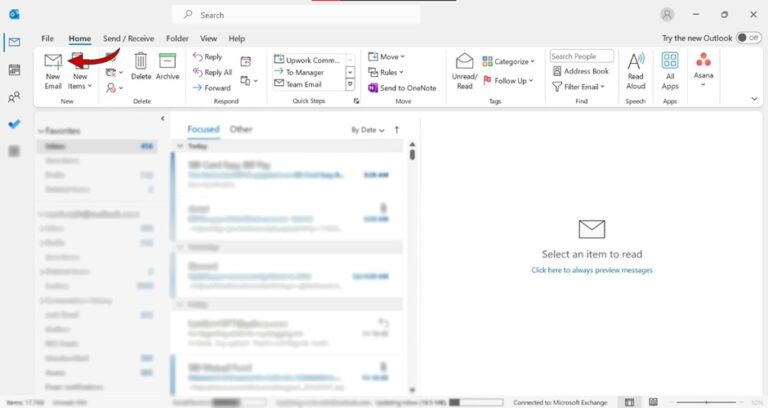
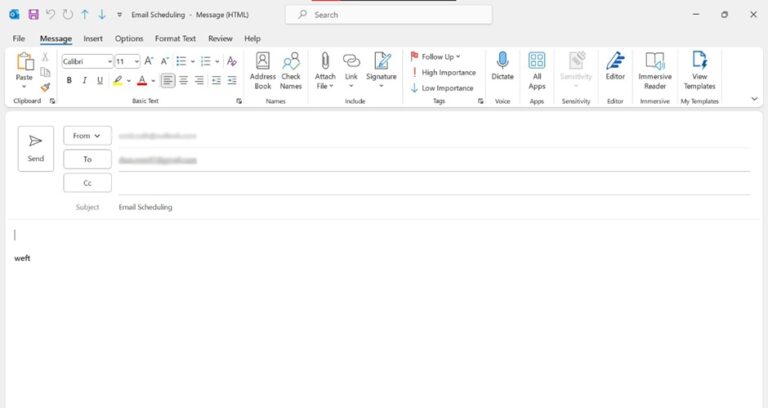
Step 1: Open a new email in the Outlook desktop app as you normally do by clicking the “New email” button, usually found in the top left corner of the Outlook window.
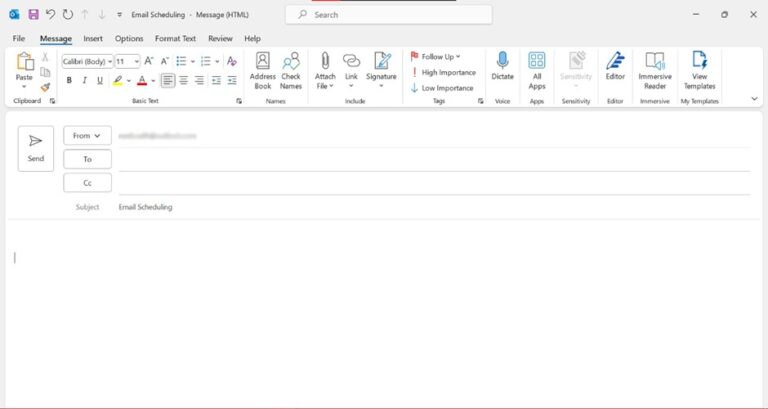
Step 2: Compose your email by filling out all the critical details – recipient email address(es), subject line, email text, etc. Be sure to complete the content of the email thoroughly before scheduling; just don’t hit the send button yet! It is easy to overlook adding some important information later once you schedule the email.
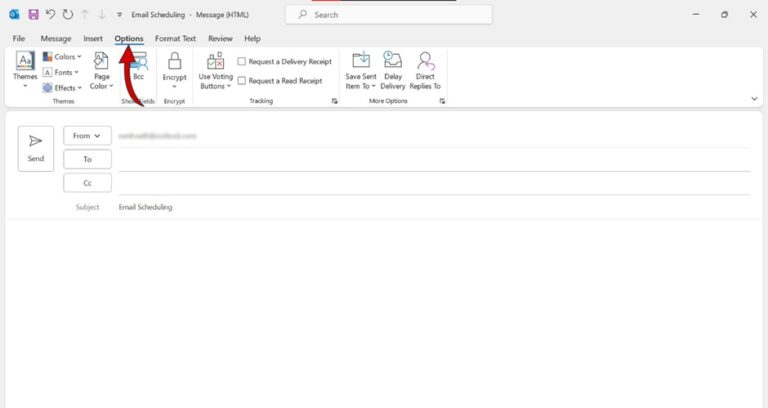
Step 3: In the upper-right corner of the open email window, click the “Options” tab. This tab may be named slightly differently or positioned differently in older versions of Outlook, but generally, there is an Options or Tools tab available.
If you see the Delay Delivery button already visible somewhere without going to Options, feel free to skip to the next step.
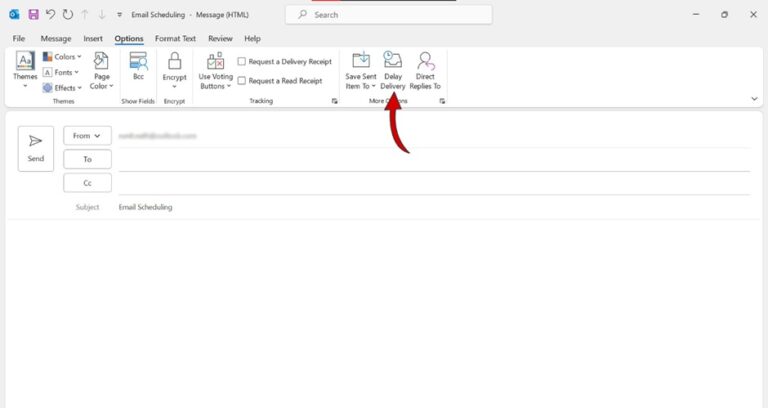
Step 4: Clicking the Options tab opens up a drop-down menu with additional settings related to the email. Click the ” Delay Delivery ” button under the “More Options” section below in this menu and click the “Delay Delivery” button.
Step 5: This opens up the “Delay Delivery” popup box with scheduling options. Here, you need to configure the specific date and time when you want Outlook to automatically send out the email in the future.
You can pick a date from the calendar icon in the box or manually type in the date. For time, use the hour and minutes selection to indicate AM or PM in addition to the numbers.
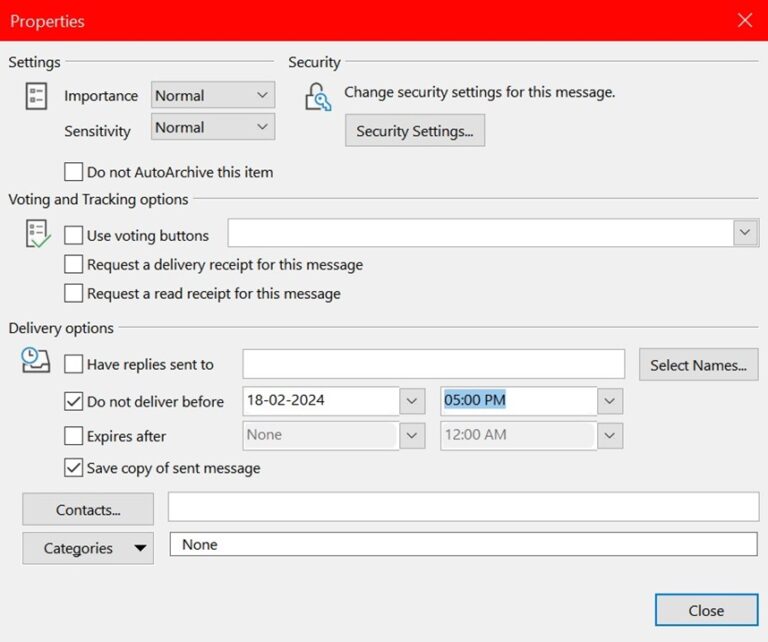
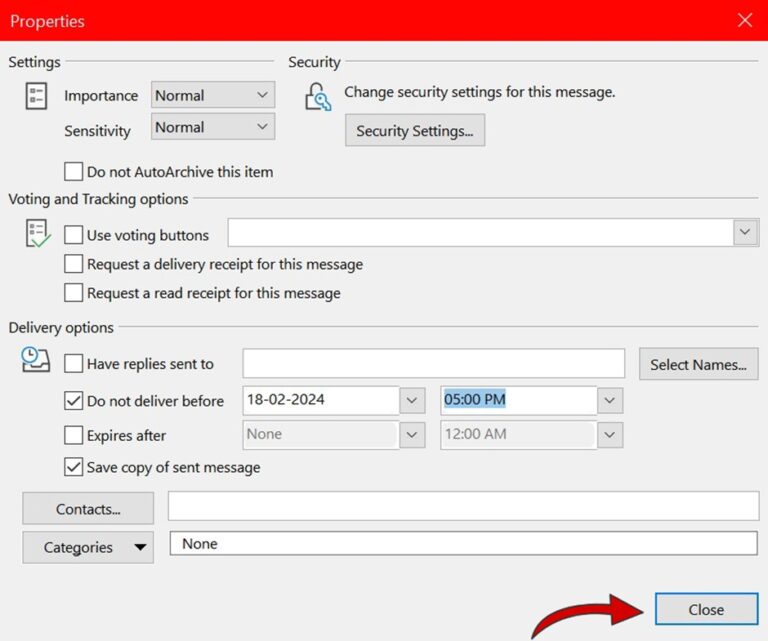
Step 6: Once the date and time are successfully selected in the Delay Delivery popup box, click “Close.” This confirms the delivery schedule you set and automatically queues up the email to be sent at the specified date and time without any further action.
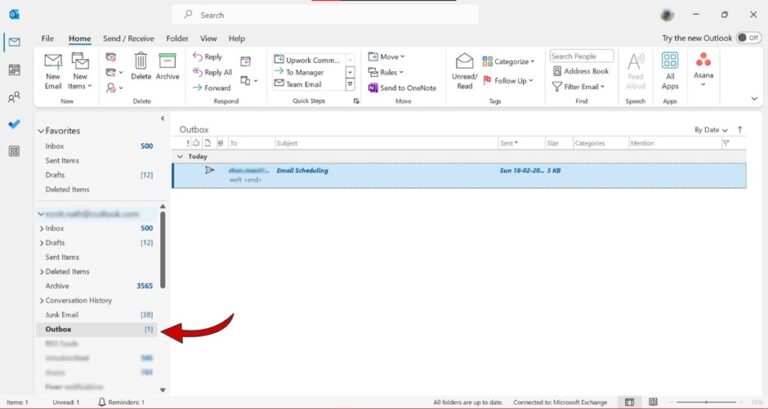
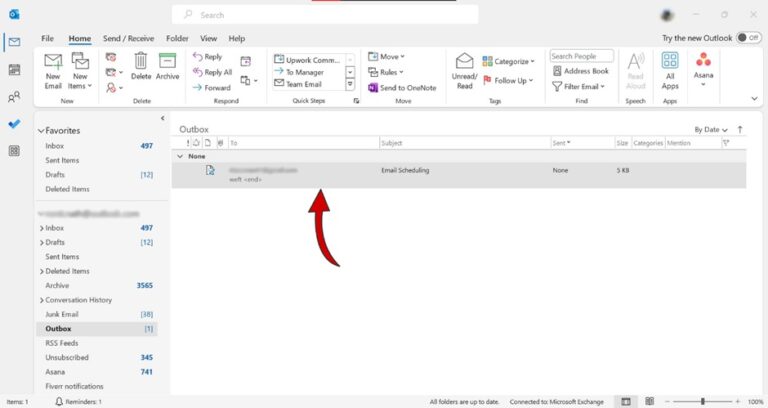
Step 7: After closing the Delay Delivery popup, you will see that Outlook has automatically moved the scheduled email from your main Inbox into the Outbox folder. This is where all outgoing emails sit until they are ready to be sent out, including any scheduled emails.
The email will now wait in the Outbox folder until the scheduled delivery day and time you set in the previous steps.
That’s it! These seven steps with detailed explanations allow you to easily schedule sending any outgoing emails in the Outlook desktop application for automated future delivery per your chosen date/time.
How to Keep Track of Scheduled Emails in Outlook
Once you have successfully scheduled emails to be sent automatically in the future from Outlook, you may be wondering – how do I easily view or track all my scheduled emails that are pending delivery?
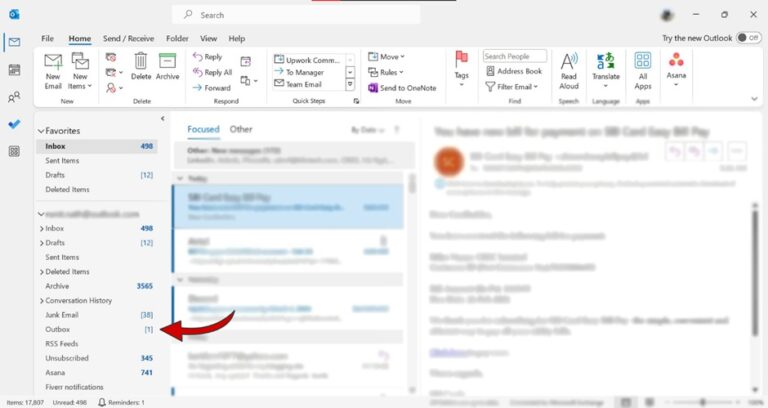
Outlook provides a useful dedicated folder called Outbox that neatly stores all outgoing emails, including scheduled ones awaiting their pre-set delivery time. Follow these detailed steps to access it:
Step 1: Look for the “Outbox” folder in this list and click to open it.
Step 2: Opening the Outbox displays any messages waiting to be sent from your account. This includes scheduled emails with a status showing as “Delivery pending” based on the pre-configured send date/time.
You can see the delivery date/time listed under each pending scheduled email for easy reference.

Step 3: To preview any scheduled email’s full content, double-click the email line item. This will open up the email body where you can review the complete email and make any last-minute edits if required before the intended delivery schedule.
Pro Tip – To easily view scheduled emails sorted by their delivery date/time, either ascending or descending, use the sorting option available on top of the Outbox screen. This allows you to track upcoming scheduled emails in chronological order.
So, in a nutshell, the Outbox folder in Outlook gives you full visibility into all outgoing scheduled emails pending delivery. Now, you can simply relax until Outlook automatically sends out the emails as per the configured delivery date and time!
How to Change the Delivery Date and Time of a Scheduled Email in Outlook
You may have perfectly scheduled an email in Outlook to be sent automatically at a later date. However, requirements can change, and you might need to edit when that scheduled email gets delivered.
Not to worry at all! Outlook allows you to seamlessly modify the configured delivery date and time of already scheduled emails when needed through a few simple steps:
Step 1: Go to the Outbox folder in Outlook, where all your scheduled emails awaiting delivery can be viewed, as explained in the previous section. Locate the particular email you want to reschedule.
The delivery date shown below the email indicates the currently configured auto-send settings for this scheduled item.
Step 2: Double-click to open the email. From here, navigate to the “Delay Delivery” option under the Options tab. This allows editing of the existing email delivery options.

Step 3: Selecting Delivery Options opens up the familiar “Delay Delivery” popup box you used when initially scheduling this email. Your previously configured date and time values will be populated.
You can simply update the date and/or time values to the new delivery schedule based on the latest needs. All previous email content or recipients will remain fully intact.

Step 4: Once done updating the delivery schedule per current needs, click “Close” in the Delay Delivery popup box to save the changes.
Outlook will now use this updated date/time to send the given email automatically. The previous Schedule gets overwritten seamlessly.
Step 5: For confirmation, view the delivery details shown under the email in the Outbox folder again. This will now display the revised auto-send Schedule with updated data and time as needed!
Pretty convenient, isn’t it? No need to go through the hassle of recalling already sent emails or recreate scheduled emails from scratch if delivery plans undergo last-minute change!
How to Schedule an Email in Outlook Online
So far, we have covered scheduling email functionality within the Outlook desktop app. But what about Office 365 users who access Outlook online via a web browser?
Fret not; the email scheduling feature is equally available with Outlook online. Follow these steps to schedule sending emails:
Step 1: Log in to your Office 365 account on www.outlook.com and click New Message to create a new email.
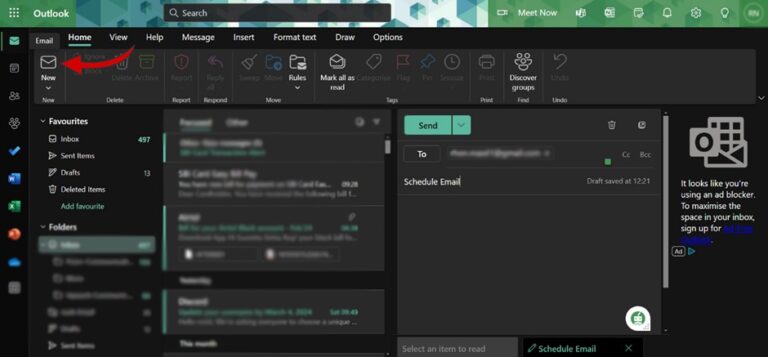
Step 2: Enter the recipient, subject line, email text, etc. Ensure the email content is fully ready to be sent out later.
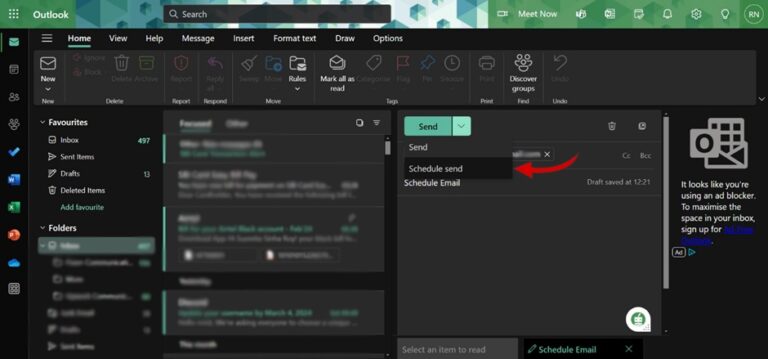
Step 3: Select the Down arrow beside the Send Button visible at the top of the email editor.
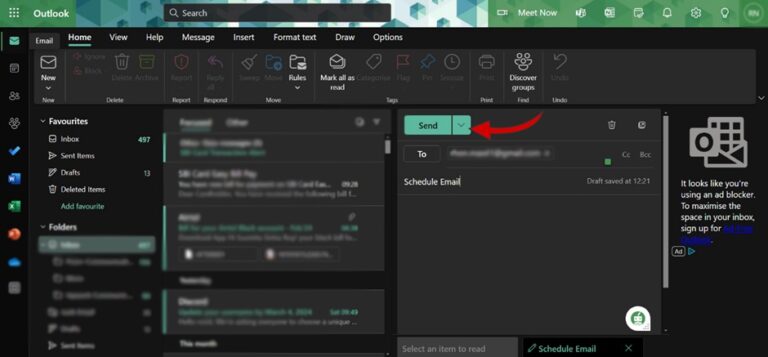
Step 4: From the drop-down menu, click the Schedule Send option. This opens up a side menu.
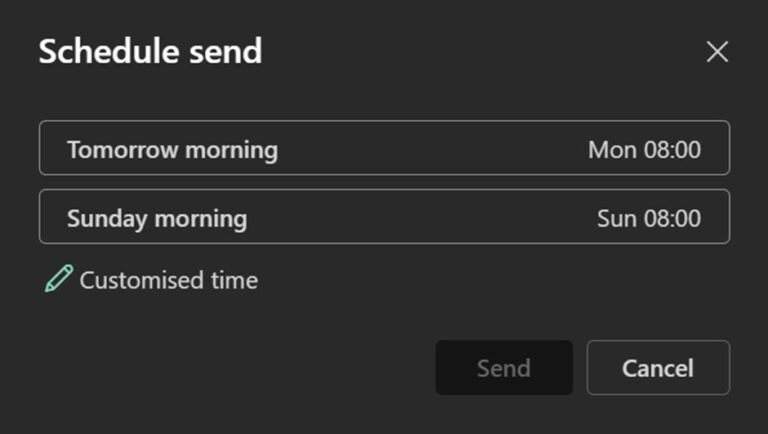
Step 5: On the Delay Delivery panel, toggle the Delay Delivery button to switch it On.
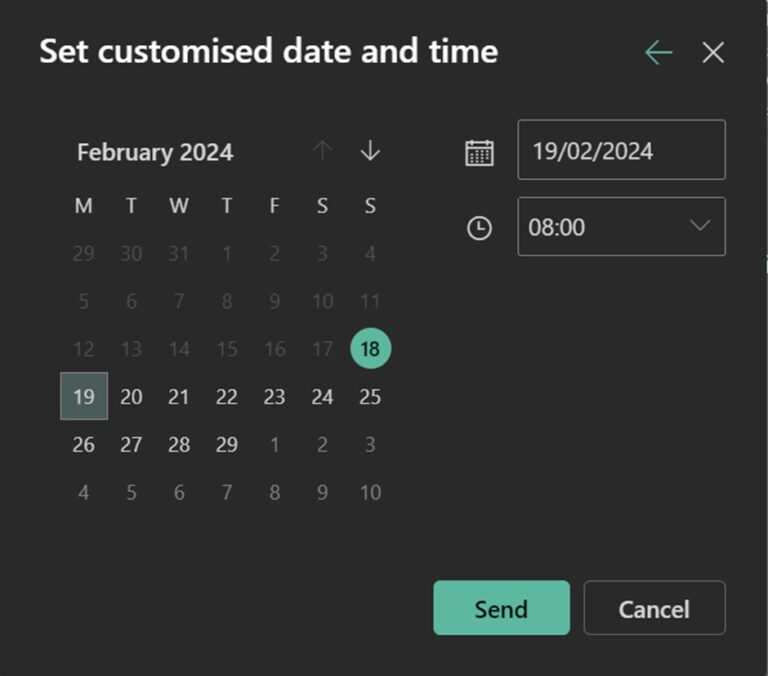
Step 6: Next, choose from the suggested time slots or click on the Customised date and exact time from the date/time picker when you want the email sent out automatically.
Step 7: Click Send once you have selected the preferred delivery date/time.
This schedules the email to be sent as per the selected Schedule.
Step 8: The scheduled email now gets moved from your Inbox into the Scheduled folder. Click on the Scheduled tab in the left sidebar at any time to review scheduled emails pending delivery.
So whether you use the Outlook desktop app or access Outlook online, scheduling future emails is no big deal!
Conclusion
Scheduling email delivery in Outlook is a handy feature for professionals and personal users. It lets you plan communications in advance and save time from manually hitting the send button during busy hours.
With this step-by-step guide, you are now equipped to:
- Schedule sending new emails in Outlook desktop or online
- Reschedule delivery date and time if plans change
- Easily track all scheduled emails pending delivery
- Make last-minute edits to an email before it is sent out
Scheduling emails also reduces the risk of unintentionally sending out communications too early. So feel free to use it whenever required!
Did you find this guide helpful? Do share any feedback or queries in the comments section below. Happy scheduling!
Frequently Asked Questions (FAQs)
Here are some common questions about scheduling emails in Outlook:
Q1. Do scheduled emails ever fail to send at the Delivery time?
Mostly no – Outlook is generally very reliable in automatically sending out scheduled emails at the configured delivery date and time unless there are connectivity issues, the mailbox exceeds storage quota, etc.
Q2. What happens if my Outlook/system is switched off when a scheduled email delivery time is reached?
Outlook will automatically trigger and send out the scheduled email when the connection/system restarts based on the delivery date/time configured while scheduling, even if your system is powered off at the delivery time.
Q3. How many emails can I schedule at once? Is there any limit?
Outlook sets no defined limit on the number of emails you can schedule simultaneously. However, if you schedule too many emails close to each other, delivery might get slightly delayed than the exact delivery time configured. Avoid scheduling more than ten emails within the span of an hour for optimal delivery.
Q4. Can I schedule meeting invites and other items apart from emails?
Unfortunately, the Delay Delivery feature works only for scheduling plain email communication. But you can explore Calendar options if you wish to schedule meeting invites, appointments, etc.
