Mac OS Monterey was announced on June 7, 2021. It was released on October 25, 2021. Mac OS Monterey (version 12) is the eighteenth eminent release of Mac OS. Mac OS Monterey introduces new features such as Safari, Universal Control, Portrait mode in FaceTime, AirPlay to Mac, Shortcuts application, and more. Users can now also set up shortcuts. AirPlay now allows users to share almost anything. MacOS 12.6 is the latest version.
The list of devices supported by macOS Monterey are:
- iMac – Late 2015 onwards
- iMac Pro – 2017 and later
- Mac Pro – Late 2013 onwards
- Mac mini – Late 2014 onwards
- MacBook – 2016 and later
- MacBook Air – 2015 and later
- MacBook Pro – 2015 and later
If you bought a Mac some time ago or just switched from Microsoft Windows to macOS Monterey, you have a long way to go in exploring the new one. All know that MacOS offers a great user experience with many features.
Some may sound familiar to you, but some may sound unfamiliar. This post reveals multiple Mac OS Monterey tips and tricks that can help you significantly improve your work efficiency. Read on to find out all the mysteries.
Table of Contents
How to install mac os Monterey
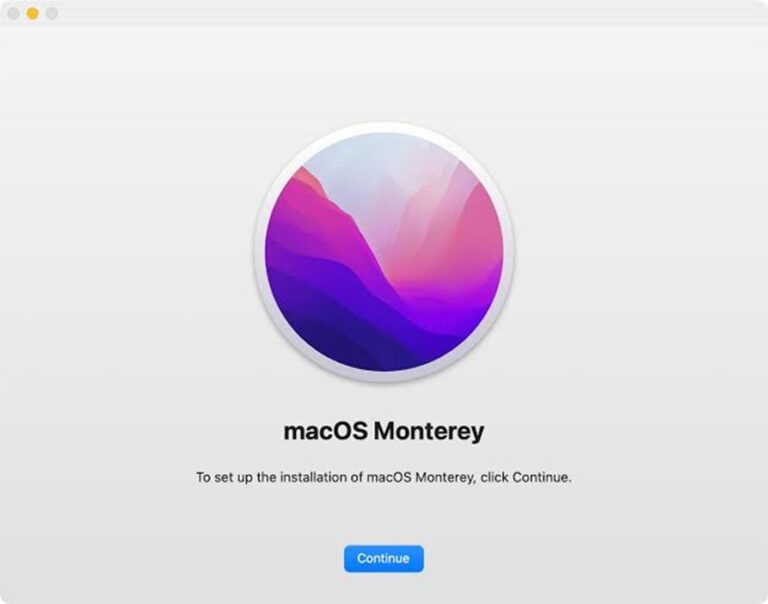
The macOS Monterey installer is accessible for download from the App Store.
- First activate the App Store
- Then, Enter “macOS Monterey” in App Store Search
- Then click the Get button to begin downloading the macOS installer.
- After downloading to your Applications folder, the installer opens automatically. Follow the onscreen instructions to install macOS
How to update Mac OS Monterey
Before we proceed to the steps on how to update to a macOS Monterey, you should know that it’s a good practice to back up your Mac before installing new applications.
- Open System Preferences.
- Click on Software Update.
- Your computer will check for updates; if an update is there, it will show that an update is available for your Mac.
- Click on Upgrade Now to download the installer for the new version of macOS.
- While the installer is being downloaded, you will be able to continue to use your Mac. However, it may take a while to download, especially if it’s very large and your network is slow.
- Once the installer has downloaded, you should see a window pop up on your Mac asking you to start the installation process. If you are ready to install, click to install the new version of macOS – but beware that your Mac will be out of action for a little while as the software installs.
- Follow the onscreen instructions to finish installing the software update, which should take around half an hour to an hour, depending on the spec of your Mac.
How to check the version of macOS?
New versions are released about once a year by Apple. Now, let’s look at how to check which macOS operating system is installed in our system.
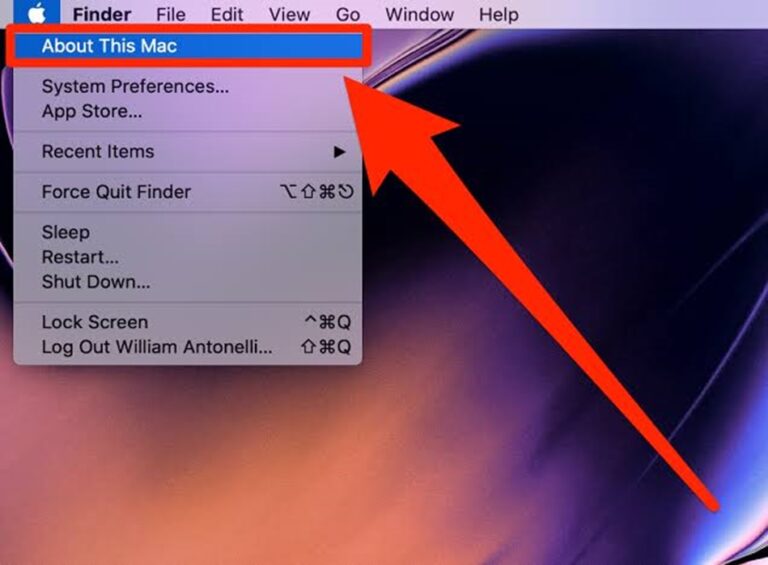
- Select the Apple menu in the upper left corner of the screen.
- Select About This Mac from the expanded menu.
- New screen will open, click on overview tab at the top of that screen. The version of the macOS you have installed appears on it. The exact version number of the operating system installed appears below that.
How to take a screenshot on macOS Monterey
It only takes pressing a couple of keys to capture a screenshot on Mac. In this section, you’ll find more information on taking a screenshot if you are a Mac OS Monterey user. Press Shift + Command + 5 to pop up a screen capture menu that will allow you to:
- Capture Entire Screen
- Capture Selected Windows
- Capture Selected Portion
- Record Entire Screen
- Record Selected Portion.

As you can see from the above screenshot, the “option” button on the right-hand side will let you select where your screenshot output should be saved.
If you have a MacBook Pro with a Touch Bar, you can take ascreenshot of the Touch Bar by pressing Shift + Command + 6.
How to clear disk space on mac os Monterey
Mac OS Monterey has built-in optimization tools to optimize storage space quickly.
- Above the storage bar, tap the ‘Manage’ button to open the Storage Management window.
- You will see four recommendations to optimize.
- Follow the recommendations to free up some space.
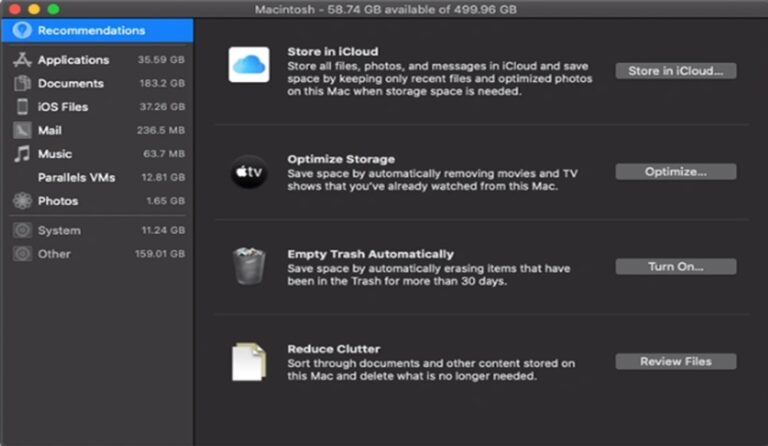
- Store in iCloud – Click the Store in iCloud button; this option will help you to store your documents, photos, videos, files, and more in iCloud.
- Optimize Storage – Once you turn it on, the macOS will automatically wipe out iTunes movies and TV shows that you have already viewed.
- Empty Trash Automatically – By turning on this function, you let your system automatically remove files that have been in the Trash for over 30 days.
- Reduce Clutter –If you want to manually dump unneeded bulky or duplicate files and documents into Trash, then click the Review Files button.
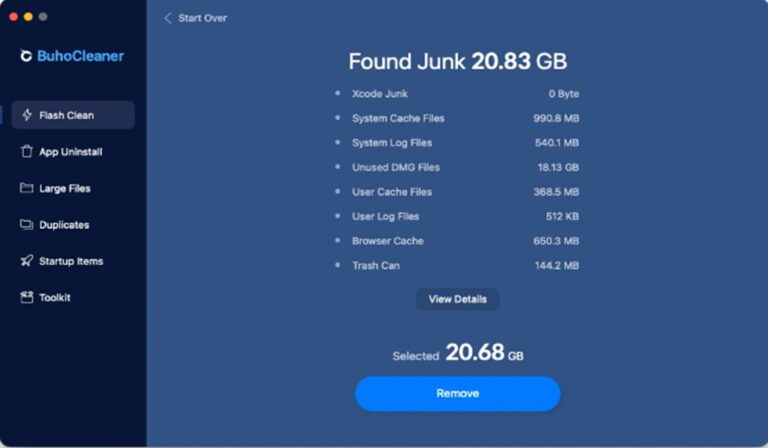
You can also use apps to scan and clean up your Mac quickly. The BuhoCleaner app works perfectly on macOS Monterey. It is one of the finest Mac cleaning software designed to be powerful yet easy to use. This tool allows the Flash Clean feature to clean and optimize your Mac like a pro. You can get rid of all the junk files from your browser, system, and users in a matter of seconds.
What is the time machine on mac os Monterey?
Time Machine is a built-in backup mechanism used in mac os Monterey to keep an up-to-date copy of all of the files on your Mac. It was first introduced in October 2007 and refined in upcoming versions enabling ” more compact, faster, and more reliable backups .”Time Machine is special among most backup applications. It captures entirely what was on your Mac on any day in the past. This feature will recover emails, files, or media that may have been unintentionally deleted. The work of Time Machine is surprisingly complex, but setting up Time Machine and using this feature is quite simple. It is most commonly used with external disk drives.
When Time Machine is first set up, it will execute a full backup of your Mac. Be patient, as the initial backup may take some time. Once the first backup is complete, Time Machine examines your Mac for changed, new, and deleted files once every hour.
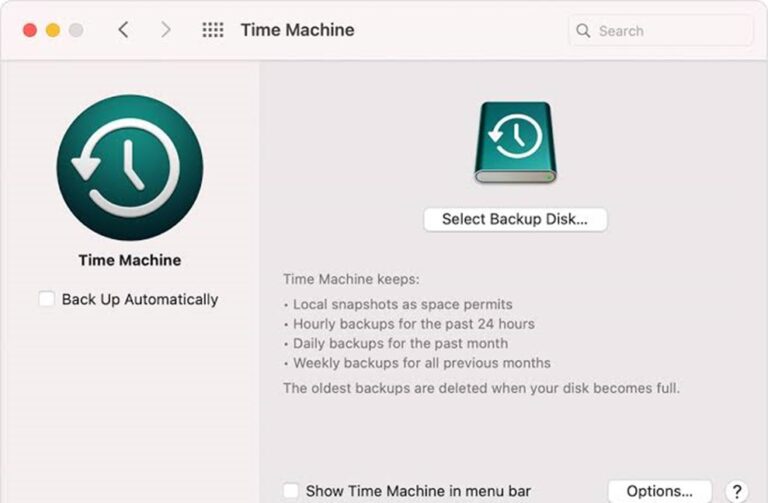
Time Machine retains hourly backup, a daily backup for the past month. It also retains weekly backups. All it requires is the external drive that you’re using for Time Machine should have available space. The oldest backups are deleted from your device through Time Machine once the backup external drive is full.
How to use the Time Machine on macOS Monterey
As said above time machine is most commonly used with external disk drives. Connect the storage drive to your device. Mac may ask if you want to use the drive for Time Machine backups. If it doesn’t, go along with these simple steps.
- First, click the Apple logo then tap on System Settings.
- Now click on General in the sidebar.
- Tap on Time Machine on the right.
- Select the external device as your backup target.
- Click the add button (+) on the screen.
Note: If the Time Machine icon isn’t in the menu bar, click the Apple menu then tap on System Settings. Now click on Control Centre in the sidebar and scroll down to Time Machine. From the pull-down menu choose “Show in Menu Bar”.
How to hide desktop icons on Mac os Monterey
The desktop has taken center stage in our daily computer interactions ever since the introduction of the graphical user interface (GUI) on the first Mac. After all, it’s the most practical and noticeable location for our files.
You most likely keep the stuff you download from the internet on your desktop. If you ever need to remember something vital, you may store it there. There are even a variety of GTD wallpapers that transform your
The issue is that nobody has the time to consistently clear up the desktop, which has a tendency to become cluttered quite rapidly. How, then, do you make your Mac appear presentable?
You can be getting ready to present, or you might want to take a screenshot quietly. Moving icons into different folders would take too much time in both scenarios.
Here are a few ways to remove an icon from your Mac’s desktop
Terminal
The Terminal is one of the most effective apps on the Mac. to that. As Command Prompt is used in Windows, The Terminal app works similarly in Mac. One can control any aspect of the Mac via Terminal commands. For some users, though, the Terminal could look confusing and unapproachable, so it’s better to study one command at a time.
- Launch Terminal from Applications ➙ Utilities
- Type “defaults write com.apple.finder CreateDesktop false”
- Press Enter
- Now restart Finder by typing “killall Finder” and hitting Enter once again
The desktop icons are gone! Now you can use the system without icons. Once you need them back, type defaults and write com. apple.finder CreateDesktop true and then killall Finder again.
One Switch
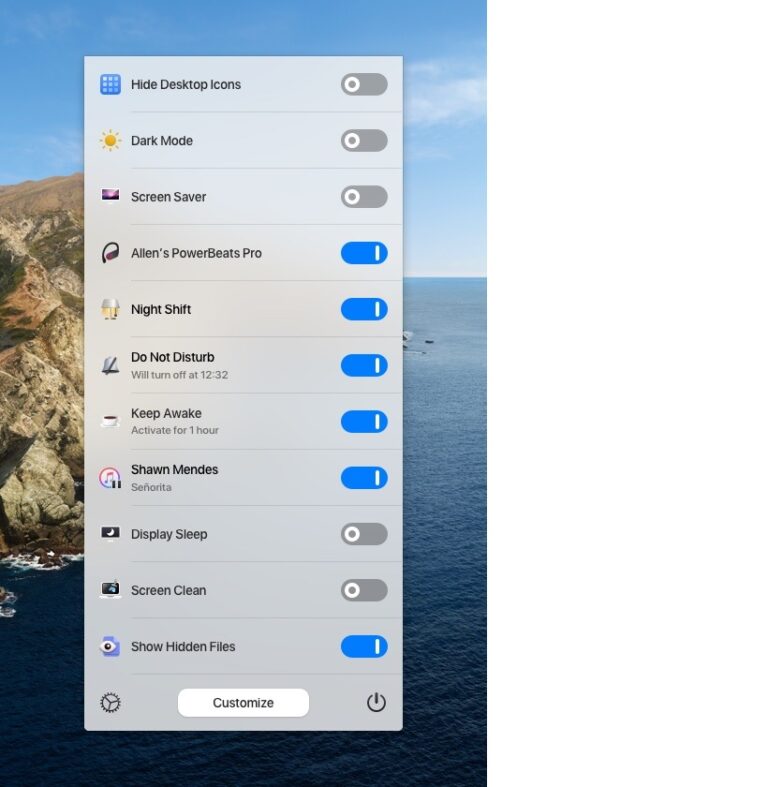
All the most popular yet elusive functions are now at your fingertips thanks to this small app, which stays in your menu bar. You can use the mouse to conceal icons.
One Switch makes it simple to connect to your preferred Bluetooth device, enable Dark Mode, keep your Mac awake indefinitely, conceal desktop icons and much more.
One Switch is available in three license types: The prices are as listed below.
- 1 Device License – $4.99
- 2 Devices License – $7.99
- 5 Devices License – $16.99
Almighty
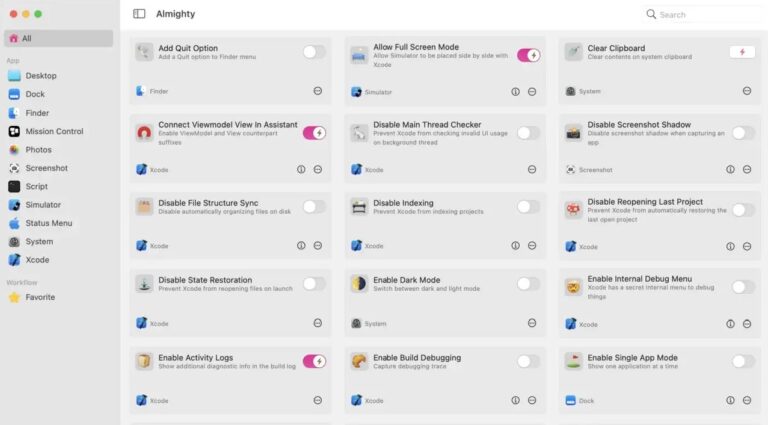
Almighty is a useful additional tool for hiding desktop icons in macOS. The setting is set to display desktop icons in the screenshot. Flip the option off to make them invisible. By default, this parameter is turned off. After using this tool on your first installation of Almighty, you may need to toggle it on and back off for your desktop icons to conceal.
While we’re at it, Almighty is a capable Mac configurator that allows you to change a lot more than just your desktop’s appearance. For many Mac functionalities, the software provides convenient switchers. Almighty is indeed as powerful as its name might imply, with features like deleting your clipboard’s contents and shutdown schedules. It’s possible that you’ll start by using it to delete desktop icons but end up configuring dozens more Mac settings with it!
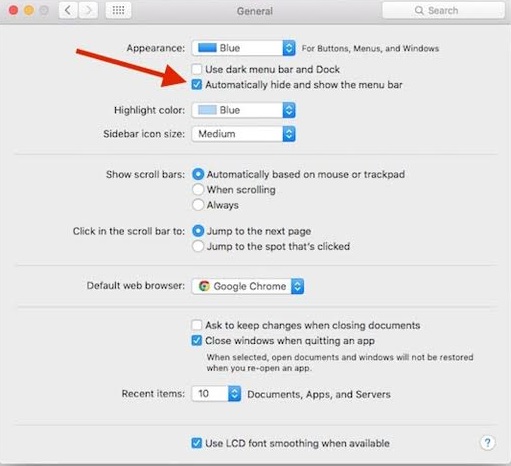
How to hide the menu bar on macOS Monterey
A menu bar at the top of your desktop gives you access to Mac menus, app menus, and other system icons. Steps to auto hide this menu bar is given below
- Click on the Apple logo
- Select System Preferences
- Click on Dock & Menu Bar,
- Check Automatically hide or show the menu bar
How to stop apps from opening on startup macOS Monterey
MacOS Monterey startup programs and apps will launch automatically when you turn on the Mac. Few startup apps may stress your Mac processor and memory, increasing load time by harming system performance. Some startup programs and apps will also be helpful.
Some of the common startup items are Email and messaging apps, iTunes and other media players, Cloud storage apps like Dropbox or Google Drive, Gaming apps, Anti-malware programs, News and weather apps, etc.; now let us know how to get rid of this.
Mac contains a property in your System preferences that functions like a startup manager. It will let you see a list of all your startup apps and programs. There, you can disable programs on startup. This makes your Mac get back to faster and lighter.
Follow the below steps to stop apps from opening on startup:
- Tap on the Apple menu in the top-left corner and click on System Preferences.
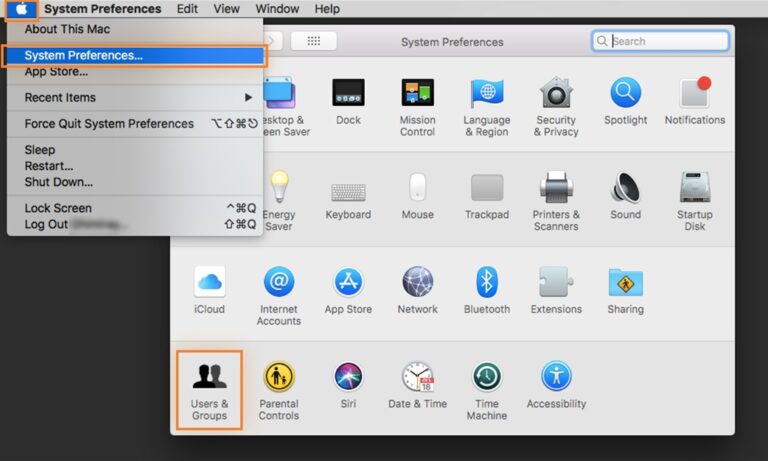
- Now choose Users & Groups
- Click the Login Items tab; you will see your list of startup program
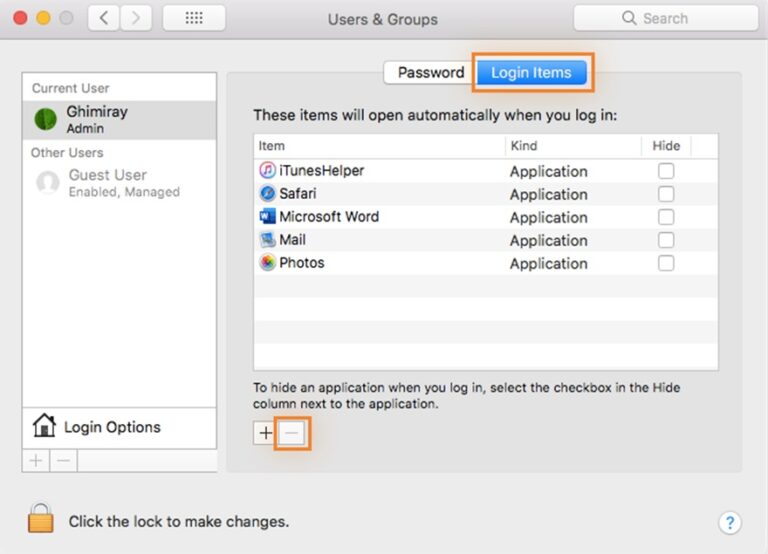
- Now you can choose one or more startup programs to remove and click the minus button at the bottom to clear it from the list.
For a more easy and thorough cleanup of your Mac, install Avast Cleanup. It’s a specialized cleanup tool that will clear duplicate files hidden and clean out all sorts of junk in your Mac’s drive. In addition, it will automatically expose and detach useless files left lurking after old apps are uninstalled. That frees up space and will help get your Mac running at the best performance.
How to clear caches on macOS Monterey
Caches are records that your Mac generates when you use applications and browse websites. Caches are intended to speed up your Mac. But one should clean them often. Over time, they will stake up and take hold of huge storage space. This makes your Mac run slower and degrades your Mac performance it should.
A cache is used to collect temporary data, and it is a type of temporary memory. It will help your browser, system, and applications load faster in future use. Like, when you browse a webpage, your browser downloads images, videos, Java scripts, HTML files, etc., and stores them in a cache folder. Later, when you revisit the same site, the stored cache files will be browsed and loaded without connecting to the network. General cache files we can discuss are system cache, application cache, and browser cache.
Deleting the cache has many advantages, like correcting webpage errors, freeing up storage space, third-party software, preventing tracking by malware, and so on
Let’s look at how to Clear System Cache
Note that a few of the cache files are important to your system. Clearing them may create problems with your system. If you still want to clear your system cache, we suggest that you back up your system files first.
- Press Shift-Command-G on the Finder window; it will open the ‘Go to the Folder’ window.
- Now type /Library/Caches/ and then click the Go button

Delete the files in each subfolder.
- Empty your Trash.
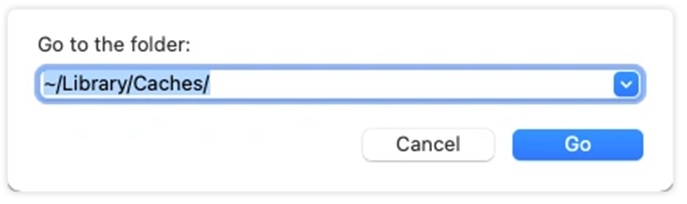
Let us look at how to Clear Application Cache
- Press Shift-Command-G on the Finder window; it will open the ‘Go to the Folder’ window.
- Type ~/Library/Caches in the blank box, and click the Go button. You will see the caches of all applications.
- Look for the folder of the app you want to delete.
- Now delete all its files that will empty the Trash
BuhoCleaner
Deleting the system, application, and browser cache one by one is very time-consuming. Is there an easy and quick solution? BuhoCleaner is one of the tools you need. BuhoCleaner is a very simple and practical Mac cache cleaner that can safely remove cache files from your Mac with just one click.
Even if you’re not an expert, install it on your Mac, and you’re good to go. After installation, launch it and click the “Scan” button to detect all cache files on your Mac. If you trust this smart section, click the “Remove” button. Otherwise, click the “Review Details” button and manually select the files you want to delete or save.