Windows 11 Startup Folder and Its Management: Essential Guide

Windows 11 Startup Folder and Its Management

The Windows 11 startup folder is a powerful yet often overlooked feature that gives you direct control over which programs launch when your computer starts up.

Let me show you how the Windows 11 startup folder works and why it matters for your daily computer use. As someone who’s spent years optimizing Windows systems, I can tell you that understanding your startup folder is one of the most effective ways to control your PC’s boot time and overall performance.

Whether you’re looking to speed up your computer’s startup, automatically launch specific programs, or troubleshoot startup issues, you’ll find everything in this guide. I’ll walk you through accessing user and system-wide startup folders, creating custom startup configurations, and optimizing your startup sequence for better performance.

If you’re interested in making your Windows 11 run faster, check out my comprehensive guide on “How to Speed Up Windows 11

Table of Contents

What is the Windows 11 Startup Folder?

The Windows 11 startup folder is a special directory that Windows automatically checks each time your computer boots up. Think of it as a launch pad for programs – any application shortcuts placed in this folder will automatically start running when you turn on your PC. It’s one of those incredibly useful features that’s been part of Windows since the early days, though its location and how you use it has evolved over time.

The startup folder isn’t just a single location; Windows 11 maintains two different startup folders. The first is a user-specific startup folder, which only launches programs for your individual user account. The second is a system-wide startup folder that launches programs for everyone who uses the computer. This dual-folder system gives you precise control over which programs start automatically and who they start for.

Shortcuts vs. Direct Access:

While tools like Task Manager and the Settings app can also manage startup programs, accessing the actual startup folders gives you direct control. You can see exactly what’s set to start up, add new programs by creating shortcuts, or remove programs by deleting their shortcuts. This direct access makes it easier to manage your startup programs without navigating through multiple menu layers.

Where is the Startup Folder in Windows 11?

Finding the startup folder in Windows 11 might initially seem tricky, but I will walk you through every method to access it. Windows 11 has two different startup folder locations, and I’ll explain exactly how to find both of them, along with when you should use each one.

Understanding the Two Windows Startup Folder Locations

Windows 11 maintains two distinct startup folder locations. The first is your personal startup folder, which affects only your user account. The second is the system-wide startup folder, which impacts all users on your computer. Let me break down the exact locations for you:

Your personal startup folder is located at: %AppData%\Microsoft\Windows\Start Menu\Programs\Startup

The system-wide startup folder can be found at: C:\ProgramData\Microsoft\Windows\Start Menu\Programs\StartUp

Accessing logged in user Windows 11 Startup Folder Using Run Dialog

  1. Press the Windows key + R on your keyboard to open the Run dialog.
Accessing logged in user Windows 11 Startup Folder Using Run Dialog step1
  1. Type shell:startup in the Run dialog box and press Enter.
  1. Windows 11 will open your personal startup folder in File Explorer.
Accessing logged in user Windows 11 Startup Folder Using Run Dialog step 3

Accessing the Windows 11 Startup Folder (All-Users) Using Run Dialog

  1. Press the Windows key + R to open the Run dialog.
  1. Type shell:common startup in the Run dialog box and press Enter.
Accessing the Windows 11 Startup Folder (All-Users) Using Run Dialog step 2
  1. Windows 11 will open the all-users startup folder in File Explorer.

Navigating to Logged in user Windows 11 Startup Folder in File Explorer

  1. Open File Explorer by pressing the Windows key + E.
Navigating to Logged in user Windows 11 Startup Folder in File Explorer step 1
  1. Click on the address bar at the top of the window. Type %AppData%\Microsoft\Windows\Start Menu\Programs\Startup for your personal startup folder. 
Navigating to Logged in user Windows 11 Startup Folder in File Explorer step 2
  1. Press Enter to open your personal Startup folder
Navigating to Logged in user Windows 11 Startup Folder in File Explorer step 3

Navigating to Windows 11 Startup Folder (All-Users) in File Explorer

  1. Open File Explorer by pressing the Windows key + E.
Navigating to Windows 11 Startup Folder (All-Users) in File Explorer step 1
  1. Click on the address bar at the top of the window. Type C:\ProgramData\Microsoft\Windows\Start Menu\Programs\StartUp.
Navigating to Windows 11 Startup Folder (All-Users) in File Explorer step 2
  1. Press Enter to open common Startup folder for all users
Navigating to Windows 11 Startup Folder (All-Users) in File Explorer step 3

Accessing Logged in user's Windows 11 Startup Folder Using Command Prompt

  1. Press the Windows key + R keys to open the Run dialog, then type “cmd” and press Enter to open the Command Prompt
Accessing Logged in user's Windows 11 Startup Folder Using Command Prompt step 1
  1. Type cd %AppData%\Microsoft\Windows\Start Menu\Programs\Startup in the Command Prompt
  1. Press Enter to navigate to the location.
Accessing Logged in user's Windows 11 Startup Folder Using Command Prompt step 2 and 3

Accessing Windows 11 Startup Folder (All-Users) Using Command Prompt

  1. Press the Windows key + R keys to open the Run dialog, then type “cmd” and press Enter to open the Command Prompt.
  1. In Command Prompt type cd %ProgramData%\Microsoft\Windows\Start Menu\Programs\StartUp.
  1. Press Enter to navigate to the location.
Accessing Windows 11 Startup Folder (All-Users) Using Command Prompt step 2 and 3

Making the Most of Quick Access

Once you’ve located the startup folders, consider pinning them to Quick Access in File Explorer if you plan to modify them frequently. This creates a one-click shortcut to either startup location. Right-click the startup folder in File Explorer and select “Pin to Quick Access” to add it to your Quick Access panel.

How to Add Programs to Windows 11 Startup

Adding programs to your Windows 11 startup folder allows them to launch automatically when your computer starts. Let me walk you through the different methods to accomplish this, ensuring you understand each approach and when to use it.

Adding Programs to Windows 11 Startup Folder Using Drag and Drop Method

  1. Press the Windows key + R to open the Run dialog.
  1. Type shell:startup and press Enter to open your personal startup folder.
  1. Press the Windows key + E to open a new File Explorer window.
  1. Navigate to the program you want to add to the startup.
  1. Right-click the program’s .exe file and select Create shortcut.
  1. Drag the newly created shortcut into the startup folder window.
  1. The shortcut will now be in the windows Startup folder

Creating Shortcuts Directly in the Windows Startup Folder

  1. Open the startup folder by pressing the Windows key + R and typing shell:startup.
Creating Shortcuts Directly in the Windows Startup Folder step 1
  1. Right-click any empty space in the folder and select New > Shortcut.
Creating Shortcuts Directly in the Windows Startup Folder step 2
  1. Click the Browse button to locate your program’s .exe file.
  1. Select the program and click OK to confirm the selection.
Creating Shortcuts Directly in the Windows Startup Folder step 4
  1. Click Next to continue with the shortcut creation.
Creating Shortcuts Directly in the Windows Startup Folder step 5
  1. Type a name for your shortcut and click Finish.

Creating Shortcuts Directly in the Windows Startup Folder (All-Users)

  1. Press Windows key + R and type shell:common startup.
  1. Click Yes when prompted for administrator permissions.
  1. Right-click in the folder and select New > Shortcut.
  1. Click Browse to locate the program’s executable file.
  1. Select the program and click OK to confirm.
  1. Click Next to proceed with the shortcut creation.
  1. Enter a name for the shortcut and click Finish.

Creating Delayed Startup Items in Windows

  1. Open the startup folder using shell:startup in the Run dialog.
  1. Right-click in the folder and select New > Text Document
Creating Delayed Startup Items in Windows step 2
  1. Name the file “delayed_start.bat” (including the .bat extension).
  1. Right-click the new file and select Edit.
Creating Delayed Startup Items in Windows step 4
  1. Type timeout /t 60 /nobreak to create a 60-second delay.
  1. start “” “C:\Program Files\Microsoft Office\root\Office16\OUTLOOK.EXE”
Creating Delayed Startup Items in Windows step 5 and 6
  1. Press Ctrl + S to save the changes.

Using Task Manager to Enable Startup Programs

  1. Press Ctrl + Shift + Esc to open Task Manager.
  1. Click the Startup apps tab in Task Manager.
  1. Click the Enable button if your desired program is listed but disabled.
Using Task Manager to Enable Startup Programs step 3

Verifying Startup Programs Were Added Successfully Using Task Manager

  1. Open Task Manager by pressing Ctrl + Shift + Esc.
Verifying Startup Programs Were Added Successfully Using Task Manager step 1
  1. Click the Startup apps tab to view all startup items.
Verifying Startup Programs Were Added Successfully Using Task Manager step 2
  1. Locate your newly added program in the list.
  1. Check that the Status column shows Enabled.
Verifying Startup Programs Were Added Successfully Using Task Manager step 3 and 4

How to Remove Programs from Windows 11 Startup

Taking control of your startup programs can significantly improve your system’s boot time and overall performance. I’ll show you several reliable methods to safely remove startup items

Removing Programs from the logged in user Windows 11 Startup Folder

  1. Press the Windows key + R to open the Run dialog.
Removing Programs from the logged in user Windows 11 Startup Folder step 1
  1. Type shell:startup and press Enter to open your personal startup folder.
Removing Programs from the logged in user Windows 11 Startup Folder step 2
  1. Right-click the program shortcut you want to remove.
  1. Select Delete from the context menu.
Removing Programs from the logged in user Windows 11 Startup Folder step 3 and 4

Removing Programs from All-Users Startup

  1. Press Windows key + R and type shell:common startup.
Removing Programs from All-Users common Startup step 1
  1. Right-click the program shortcut you want to remove.
  1. Select Delete from the context menu
Removing Programs from All-Users common Startup step 2 and 3

Disabling Startup Programs Through Task Manager

  1. Press Ctrl + Shift + Esc to open Task Manager.
  1. Click the Startup apps tab in Task Manager.
Disabling Startup Programs Through Task Manager step 2
  1. Select the program you want to manage.
  1. Click the Disable button to prevent it from starting automatically.
Disabling Startup Programs Through Task Manager step 3 and 4
  1. Review the Startup impact column to identify resource-heavy programs.

Best Practices for Managing the Windows 11 Startup Folder

Managing your Windows 11 startup folder effectively can make the difference between a sluggish and a snappy system. I’ve spent years optimizing Windows systems, and I’ll share the essential practices to help you maintain an efficient startup configuration.

Understanding Startup Management Principles

Think of your startup folder as the morning routine for your computer. Just as you wouldn’t want to do everything immediately after waking up, your computer needs a well-organized sequence of startup programs. The key is to balance convenience with performance, ensuring that essential programs launch automatically while preventing unnecessary applications from slowing down your boot time.

Creating a Strategic Startup Plan

Before adding any programs to your startup folder, evaluate their importance to your daily workflow. Consider whether you genuinely need immediate access to each program when your computer starts. For instance, while your antivirus software should start immediately, your favorite game launcher can probably wait until you’re ready to play.

Implementing Proper Organization

Keep your startup folder clean and well-documented. Create a simple text file in the startup folder that lists each program and its purpose. This documentation proves invaluable when troubleshooting issues or deciding which programs to remove. When adding new programs, always test them individually to understand their impact on your system’s performance.

Security Best Practices

Treat your startup folder like the front door to your house – you wouldn’t let strangers walk in, so don’t let unknown programs automatically start with Windows. Always verify programs before adding them to startup, and regularly check for unauthorized additions. Remember that malware often tries to persist through startup entries, so maintaining security is crucial.

Performance Optimization Techniques

Monitor your startup programs’ resource usage and adjust accordingly. If your computer takes longer to become responsive after startup, it’s time for a review. Use batch files with delayed starts for resource-heavy applications, letting your system stabilize before launching demanding programs. Think of it as staging a performance – you don’t want all actors on stage at once.

Regular Maintenance Procedures

Schedule monthly reviews of your startup configuration. During these checks, verify that each startup item still serves a purpose and runs correctly. Remove obsolete entries and update any shortcuts that may have broken due to program updates or system changes. This regular maintenance prevents the accumulation of unnecessary startup items.

Backup and Recovery Planning

Always maintain backups of your startup configuration. Export your startup settings and save copies of important shortcuts before making significant changes. Document any customizations you’ve made, including delay times and dependencies between programs. This documentation serves as your recovery roadmap if things go wrong.

Adapting to System Changes

As you install new programs or update existing ones, your startup needs may change. Stay flexible and adjust your startup configuration accordingly. When upgrading hardware or switching to a new computer, review your startup settings to take advantage of improved capabilities or adjust for different resource constraints.

Remember that managing your startup folder is an ongoing process, not a one-time task. By following these practices consistently, you’ll maintain an efficient and reliable startup configuration that serves your needs while keeping your system performing at its best.

Conclusion

Managing your Windows 11 startup folder effectively gives you direct control over your system’s boot process and daily workflow. I’ve shown you the essential methods to customize startup programs, from basic folder management to creating delayed launch sequences that match your needs.
You’ve now learned everything needed to optimize your startup configuration – finding the folders, adding programs strategically, and setting up delayed launches. Remember to regularly review your startup items and their impact on system performance, removing anything you no longer need.

Frequently Asked Questions (FAQs)

Windows 11 maintains two distinct startup folder locations:

  • Your personal startup folder: %AppData%\Microsoft\Windows\Start Menu\Programs\Startup
  • The system-wide startup folder: C:\ProgramData\Microsoft\Windows\Start Menu\Programs\StartUp

For quick access, press the Windows key + R and type “shell:startup” for your personal folder or “shell:common startup” for the all-users folder.

Not all startup programs appear in the startup folder because Windows 11 uses multiple mechanisms to launch programs at startup. These include registry entries, Task Scheduler, system services, and Group Policy settings. Check the Startup tab in Task Manager for a complete view of startup programs.

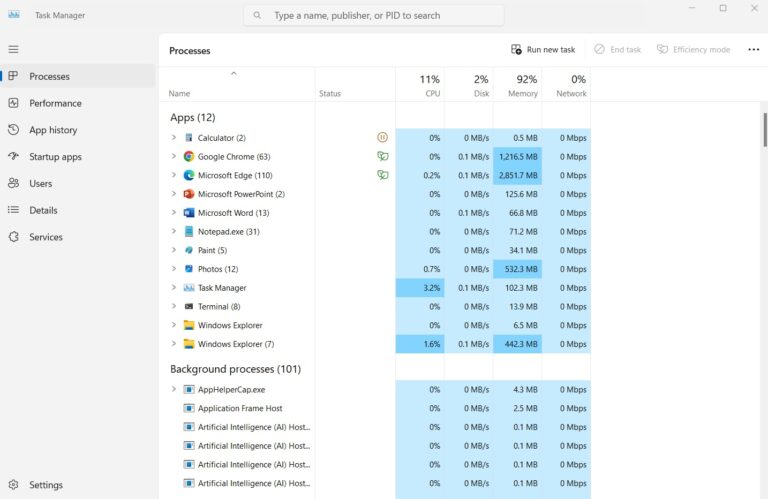
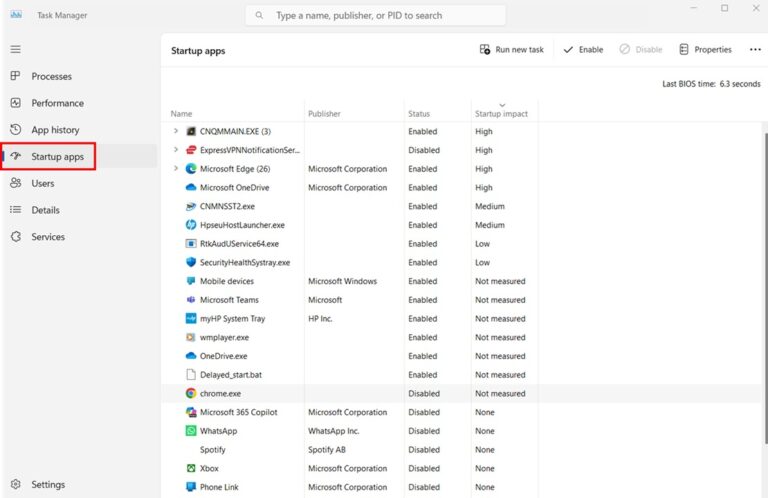
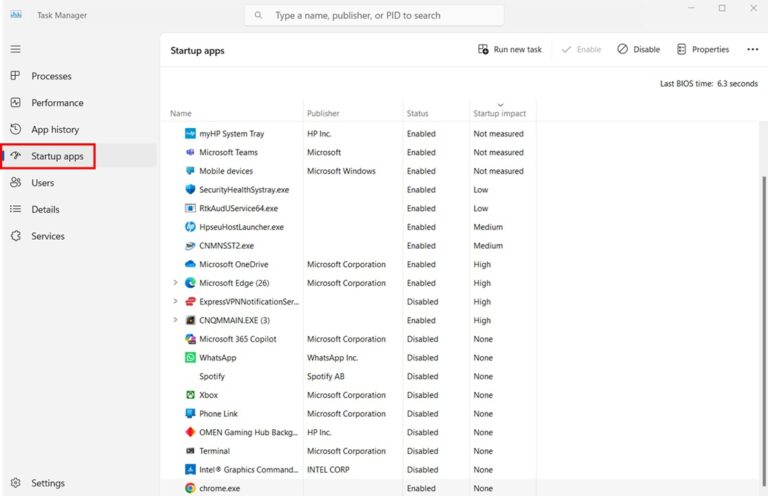
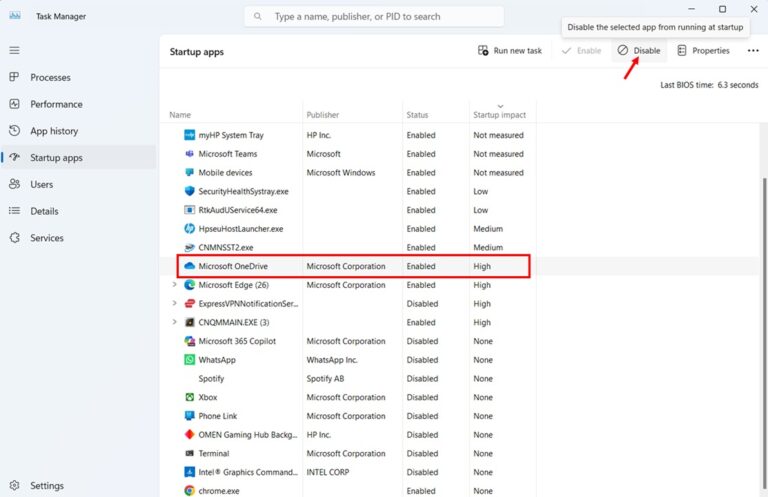
Yes, each program added to startup impacts your System’s performance. Every startup program increases boot time, consumes system memory, and uses CPU resources. It’s recommended only to add essential programs that you use daily. Monitor startup impact in Task Manager (Ctrl + Shift + Esc, Startup apps tab) to see which programs affect performance most.

Yes, the startup folder is accessible in Safe Mode using the same methods (Win + R, type “shell:startup”). However, startup programs won’t automatically run in Safe Mode unless specifically configured to do

No, Windows 11 doesn’t impose a specific limit on startup items. However, each program impacts system performance, so practical limitations depend on your computer’s resources.

  • Leave a Comment

    Your email address will not be published. Required fields are marked *

    Scroll to Top