As an End User Computing architect with over two decades of deploying Windows environments, I have found that the features delivering the most value are rarely the headline ones. Snap Layouts and Snap Groups are a case in point: built into every edition of Windows 11 and consistently overlooked, they solve the most common productivity drain on any desktop, which is the constant manual rearranging of overlapping windows.
Sound familiar? Fifteen browser tabs, a spreadsheet, Teams in the corner, and a PDF you keep referencing, all managed by Alt + Tab roulette. Or two minutes of dragging window edges into place, lost the moment you unplug from your monitor. Manual window management is an invisible time sink that everybody pays for every day.
Snap Layouts and Snap Groups were built to solve exactly this. Hover over a window’s maximize button or press Win + Z, pick a layout, and Windows instantly snaps your apps into clean halves, thirds, or quadrants. Snap Groups go further: Windows 11 remembers snapped windows as a set and keeps the group on your taskbar and in Alt + Tab so that you can restore the entire arrangement with a single click. There is nothing to install, configure, or pay for. Both features ship with every edition of Windows 11 and work across mouse, keyboard, and touchscreen, from a 13-inch laptop to an ultrawide multi-monitor setup.
This guide covers the three ways to open Snap Layouts (including the quick Win + Z shortcut), how to create and restore Snap Groups from the taskbar, essential keyboard shortcuts, snap settings, multi-monitor behavior, fixes for the common Snap Layouts not working issue, and a comparison with PowerToys FancyZones for power users who want more control.
If you also struggle with staying focused once your workspace is set up, pairing Snap Layouts with Focus Sessions in Windows 11 takes the productivity gains even further.
Table of Contents
What Are Snap Layouts and Snap Groups in Windows 11?
Snap Layouts and Snap Groups are two separate features that work together. Snap Layouts handles the arrangement; Snap Groups handles the memory. Both ship with every edition of Windows 11 at no extra cost.
Snap Layouts
Snap Layouts are prebuilt window arrangements in Windows 11. Instead of manually dragging and resizing windows, you choose a template, and Windows places each app into a zone at the correct size.
There are two ways the layouts appear on screen:
Snap Flyout appears when you hover over a window’s maximize button or press Win + Z. It shows layout thumbnails you can click to snap the active window.
Snap Bar appears when you drag a window toward the top center of the screen. Drop the window onto a zone in the bar to snap it.
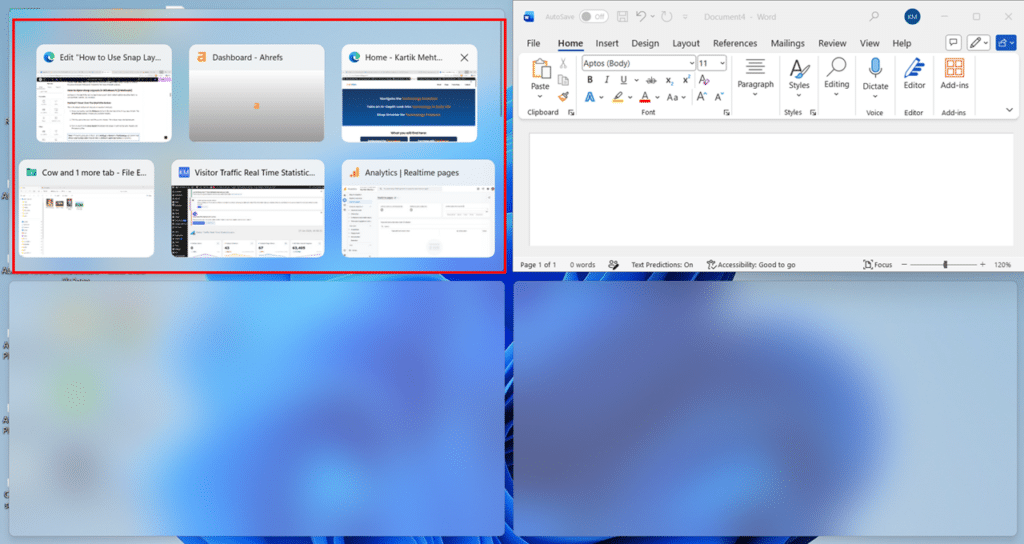
After placing the first window, Snap Assist shows thumbnails of your other open apps so you can fill the remaining zones.
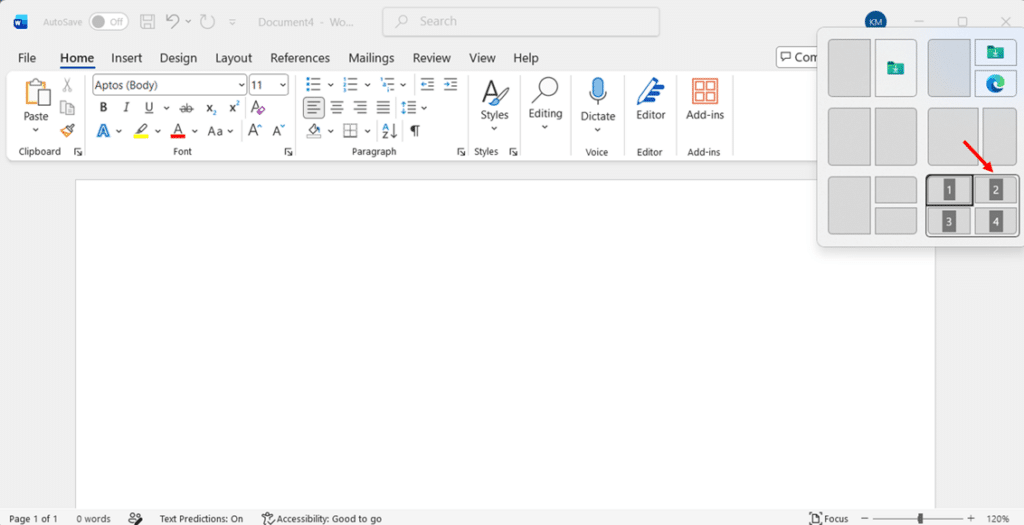
Note: The number of layout options depends on your display width. Screens narrower than 1920px show four layouts. Screens 1920px and wider show six, including three-column arrangements.
Snap Groups
A Snap Group is created automatically the moment you snap two or more windows together. Windows 11 saves the arrangement in the background with no extra steps required.
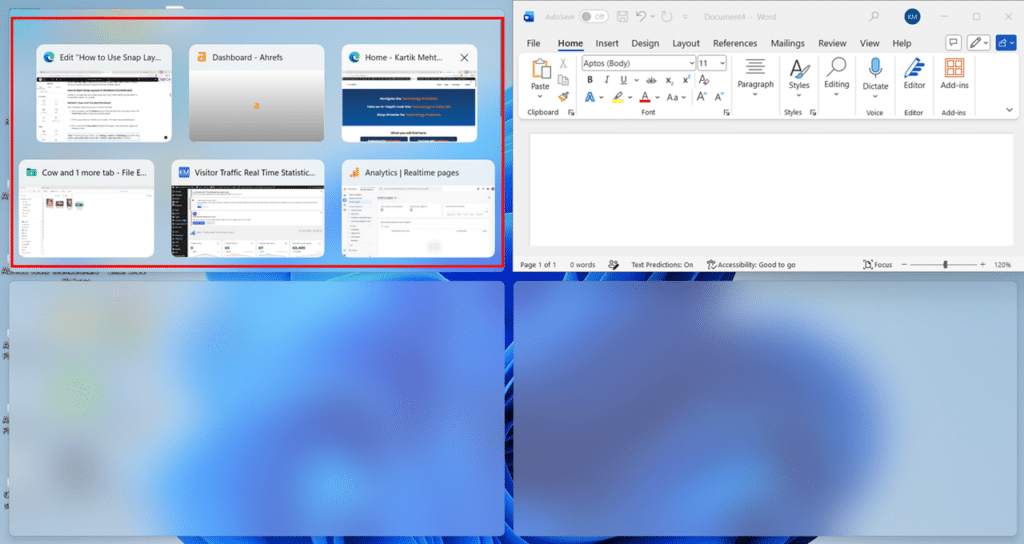
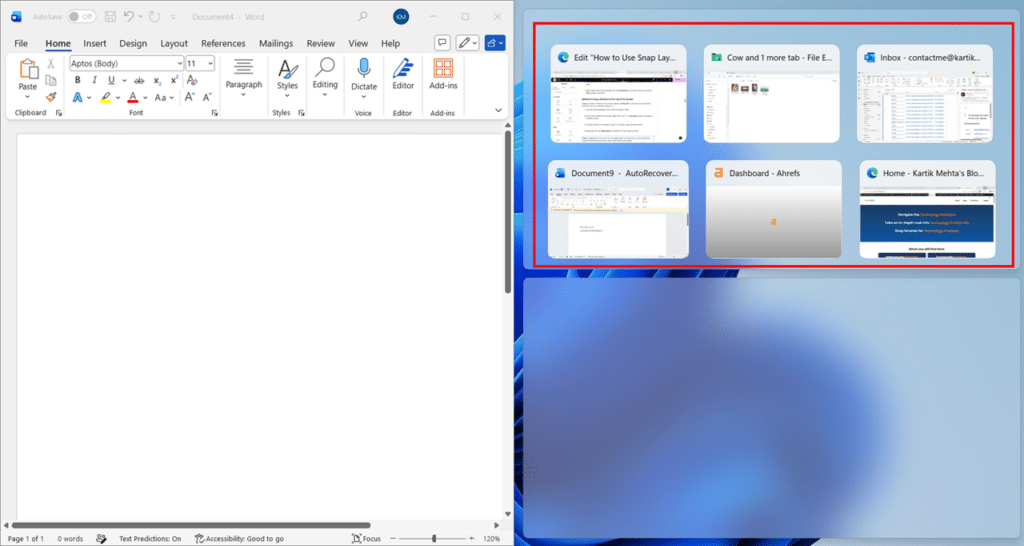
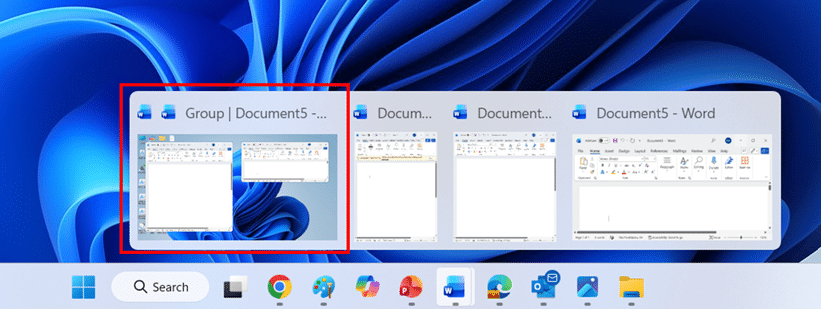
The group then appears in three places: hovering over any app’s taskbar icon shows a group preview, Task View (Win + Tab) lists the group, and the Alt + Tab switcher includes it. Clicking the group thumbnail restores all windows to their exact snapped positions.
How to Open Snap Layouts in Windows 11 (3 Methods)
Windows 11 provides three ways to open Snap Layouts. Each method reaches the same result, so use whichever matches your workflow.
Method 1: Hover Over the Maximize Button
This is the default method and requires no keyboard shortcuts.
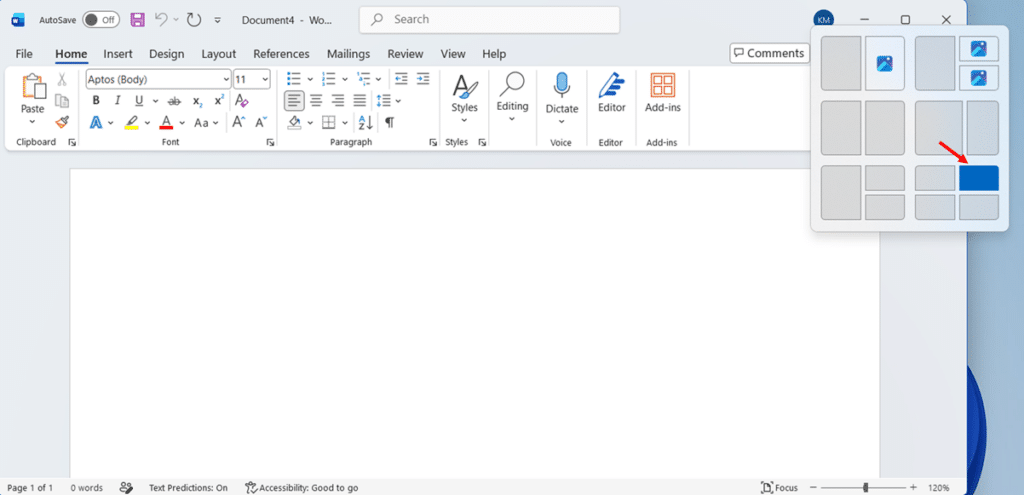
- Hover your pointer over the Maximize button in the top-right corner of any open window. The Snap Flyout appears, showing your available layouts.
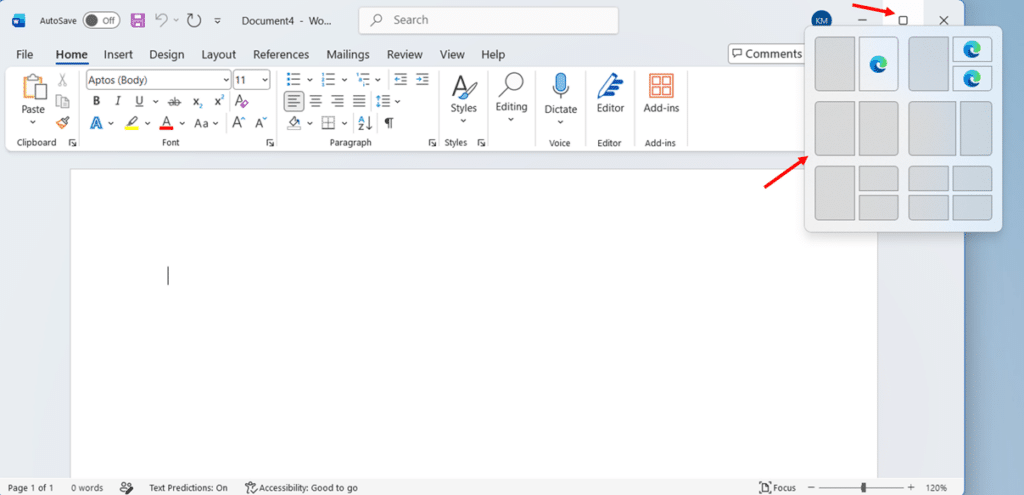
- Click the zone where you want the current window. The window snaps into that position.
- Click an app from the Snap Assist thumbnails that appear in each empty zone. Repeat until the layout is filled.
Note: If hovering produces no flyout, go to Settings > System > Multitasking and confirm that Show snap layouts when I hover over a window’s maximize button is turned on.
Method 2: Press Win + Z
This method opens the Snap Flyout from the keyboard. Windows overlays a number on each layout so you can select without using the mouse.
- Press Win + Z. The Snap Flyout opens with numbered labels on each layout.
- Press the number key for the layout you want. Windows highlights the zones within that layout.
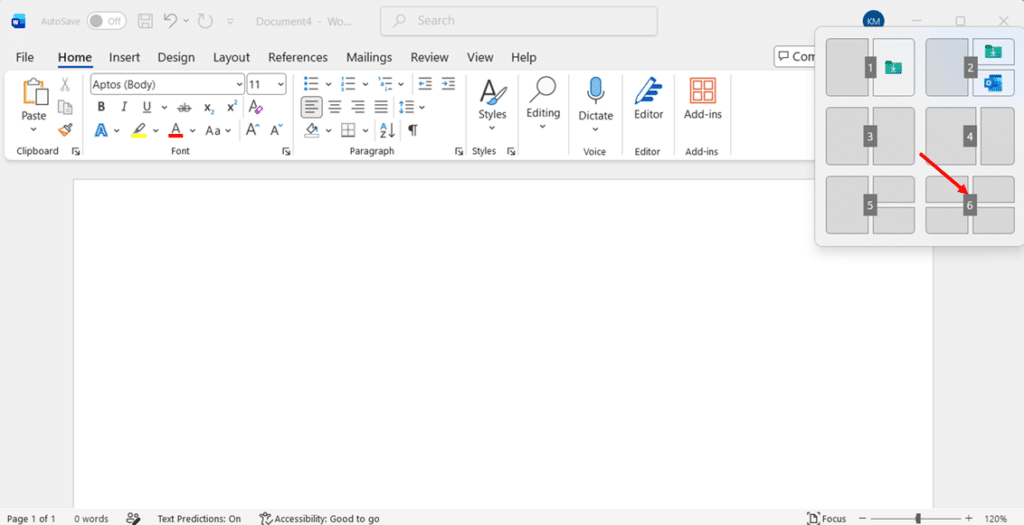
- Press the number key for the zone where you want the active window. The window snaps into place.
- Select apps for the remaining zones from the Snap Assist thumbnails using arrow keys and Enter to stay mouse-free.
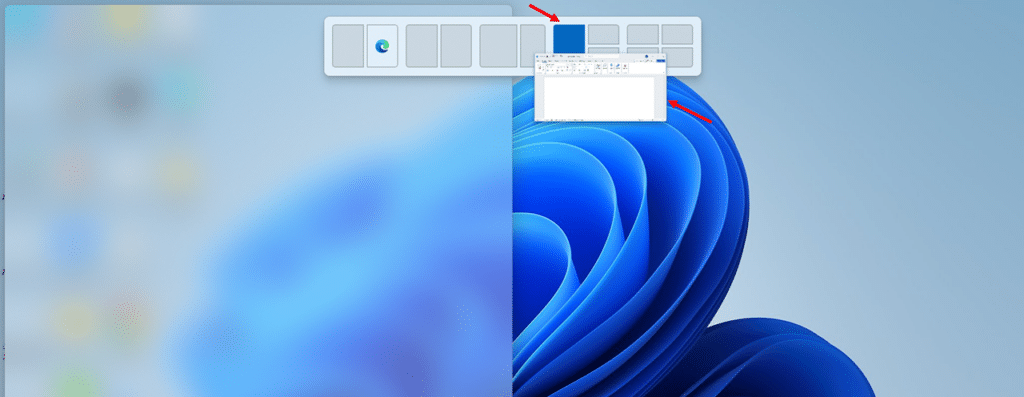
Method 3: Drag a Window to the Top of the Screen
Dragging a window to the top of the screen triggers the Snap Bar, a strip of layout options that drops down for you to drop the window into.
- Click and hold the title bar of the window you want to snap.
- Drag it slowly toward the top-center edge of the screen. The Snap Bar appears, showing your available layouts.

- Drop the window onto the zone you want. The window snaps into that position.
- Select apps from the Snap Assist thumbnails to fill the remaining zones.
Note: Dragging all the way to the very top edge quickly will maximize the window rather than trigger the Snap Bar. Pause briefly near the top to let the bar appear.
How to Create and Use Snap Groups in Windows 11
A Snap Group is created automatically when you snap two or more windows together. There is no Save button and no extra steps. This section covers how groups are created, how to restore them, and how they behave when you minimize, close, or undock.
How Snap Groups Are Created
- Snap your first window using any method from the previous section, for example, pressing Win + Z, choosing a layout, and selecting a zone.
- Select a second app from the Snap Assist thumbnails to fill another zone. Windows 11 automatically saves snapped windows as a Snap Group.
- Hover over the taskbar icon of any app in the group to confirm. Two previews appear: one for the app alone and one showing the grouped windows together.
Restoring a Snap Group from the Taskbar
- Hover over the taskbar icon of any app that belongs to the group.
- Click the group preview showing all snapped windows. Every window in the group returns to the foreground in its exact snapped position.
Restoring a Snap Group with the Keyboard Only
- Press Win + T to move keyboard focus to the taskbar.
- Press the Arrow keys to move the highlight to any app that belongs to your Snap Group.
- Press Enter on the group preview. All windows in the group come to the foreground together.
Essential Keyboard Shortcuts for Snap Layouts
Every shortcut below works in any app, requires no setup, and has been available in Windows 11 from day one. Learn these, and you will rarely need to drag a window manually again.
| Shortcut | What It Does |
|---|---|
| Win + Z | Open the Snap Flyout with numbered layout options |
| Win + Left Arrow | Snap the active window to the left half of the screen |
| Win + Right Arrow | Snap the active window to the right half of the screen |
| Win + Up Arrow | Maximize window, or move a snapped window to the top quadrant |
| Win + Down Arrow | Restore or minimize the window, or move a snapped window to the bottom quadrant |
| Win + Tab | Open Task View to see all windows and Snap Groups |
| Alt + Tab | Switch between open windows and Snap Groups |
| Win + Home | Minimize all windows except the active one |
| Win + Shift + Left/Right | Move the active window to the next monitor |
| Win + D | Show or hide the desktop |
How to Customize Snap Settings in Windows 11
All snap behavior is controlled from a single page in Settings. The defaults work well for most users, but each part of the snapping system has its own toggle so you can disable specific behaviors without turning off snapping entirely.
How to Open Snap Settings
- Press Win + I to open Settings.
- Select System from the left sidebar, then select Multitasking.

- Click the Snap windows row to expand it. All snap toggles are listed here.

What Each Toggle Controls

Snap windows (master toggle): Turns all snapping on or off. Disable only if you want snapping removed entirely.
When I snap a window, show what I can snap next to it: Controls Snap Assist, the thumbnail row that appears after your first snap. Turn off if you prefer to select your second window manually.
Show snap layouts when I hover over a window’s maximize button: Controls the Snap Flyout. Disable if the panel appears when you only intended to click maximize. Snapping via Win + Z and arrow keys still works.
Show snap layouts when I drag a window to the top of my screen: Controls the Snap Bar. Disable if you do not use drag-to-snap.
Show my snapped windows when I hover over taskbar apps, in Task View, and when I press Alt + Tab: Controls Snap Groups visibility. Disabling this removes group previews from the taskbar and Alt + Tab.
When I drag a window, let me snap it without dragging all the way to the screen edge: Makes drag-snapping trigger earlier. Recommended on large or ultrawide monitors where screen edges are a long mouse travel away.
Troubleshooting: Snap Layouts Not Working in Windows 11
If Snap Layouts are not appearing, work through the fixes below in order. Most cases are resolved by Fix 1 or Fix 2.
Fix 1: Check the Snap Settings Toggle
- Press Win + I to open Settings, select System, then select Multitasking.
- Confirm the Snap windows master toggle is set to On.
- Expand the Snap windows section and confirm that Show snap layouts when I hover over a window’s maximize button is checked. The master toggle can be on while the flyout is separately disabled.
Fix 2: Install Pending Windows Updates
Snap features have received fixes in most major Windows 11 updates. A partially installed update can leave Explorer in an inconsistent state.
- Press Win + I, then select Windows Update from the sidebar.
- Select Check for updates, install any pending updates, and restart when prompted.

Fix 3: Restart Windows Explorer
If Win + Z and arrow-key snapping work but the hover flyout does not appear, the Explorer process is likely in a bad state. Restarting it closes no open apps except File Explorer windows.
- Press Ctrl + Shift + Esc to open Task Manager.
- Right-click Windows Explorer and select Restart. The taskbar will briefly disappear and rebuild.

Fix 4: Disable Conflicting Third-Party Tools
Window management utilities such as PowerToys FancyZones, AquaSnap, and DisplayFusion can conflict with Snap Layouts by remapping Win + Z or overriding drag behavior. Temporarily disable any such tool, then test snapping again. If snapping returns, adjust the tool’s hotkey settings rather than removing it entirely.
Conclusion
Snap Layouts and Snap Groups will change how much of your screen works for you at any given moment. After two decades of deploying Windows environments, I have watched users lose hours every week to window juggling that these features eliminate in seconds. The tools are already on your machine, they cost nothing, and you have three ways to reach them: hover the maximize button, press Win + Z, or drag a window to the top of the screen. Pick whichever fits how you already work.
Start with one habit today. Open your two most-used apps, snap them side by side using whichever method feels most natural, and leave them there for the rest of the afternoon. That single change cuts the majority of your daily Alt + Tab traffic. Once it feels natural, build your first Snap Group, explore the keyboard shortcuts in Section 5, and dial in your settings for your specific screen setup. Each step compounds. Within a week, your desktop will stay organized without you thinking about it.
If you manage a team of Windows users, share this guide with them. The time saved per person is small each day, but across a team, it adds up quickly, and the setup takes minutes. Snap Layouts is one of the few features I recommend to every Windows 11 user without exception, regardless of their role, screen size, or workflow. Use it.
While you’re optimizing your Windows 11 setup, Clipboard History in Windows 11 is another built-in feature worth enabling so you can paste from multiple recent copies without losing content between windows.
Frequently Asked Questions (FAQs)
No. Snap Layouts and Snap Groups are Windows 11-only. Windows 10 has basic window snapping (drag to an edge or corner) but no layout flyout, Snap Groups, or taskbar group preview.
No. Snap Layouts work independently per monitor. You can build a separate layout on each screen, but there is no built-in way to create a single layout that spans multiple displays.
Four layouts on screens narrower than 1920px. Six layouts on screens 1920px wide or wider, including a three-column option not available on smaller displays.
Snap Layouts is the flyout menu that lets you choose a window arrangement. Snap Groups is the memory feature. Once windows are snapped, Windows 11 remembers them as a set and shows them together in the taskbar and Alt + Tab.
No. Snap Groups persist only while all apps in the group remain open. If you close one app, the group breaks. After a restart, groups are gone, and you need to rebuild them.
