
According to ProcessMaker’s research on repetitive tasks in enterprise workplaces, the average employee performs over 1,000 copy-paste actions each week, yet most still work with a clipboard that holds exactly one item at a time. Every time you copy something new, whatever came before it is gone.
In 24 years of enterprise IT, I have watched teams lose time every day simply because Clipboard History was never turned on or they did not know how to use it. Learning how to use Clipboard History in Windows 11 takes two minutes and removes that friction permanently.
Whether you are looking to stop losing copied content mid-workflow, keep your most-used text snippets available across every restart, or paste the same content across multiple Windows devices without emailing it to yourself, you will find everything you need in this guide.
I will walk you through how to enable and use Clipboard History, how to pin and delete items, how to sync across devices, and how to get the most out of the full panel, including emoji, GIFs, and symbols.
I have also covered power-user workflows, how the feature works alongside Microsoft PowerToys Advanced Paste, and how to fix the most common issues when Clipboard History stops working. Every section in this guide is based on hands-on testing on a real Windows 11 machine, no guesswork, no filler.
If you are on Windows 11 25H2 and want to explore more of what changed in this update, our guide on the Windows 11 25H2 new Start menu covers every feature and setting in the redesigned Start experience.
Table of Contents
How to Enable Clipboard History in Windows 11
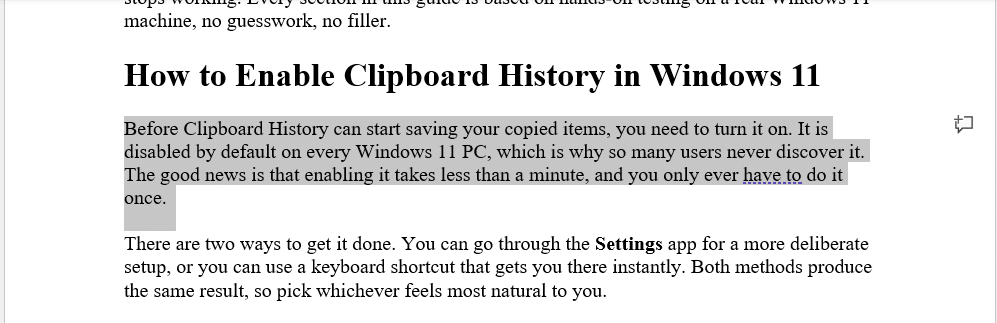
Before Clipboard History can start saving your copied items, you need to turn it on. It is disabled by default on every Windows 11 PC, which is why so many users never discover it. The good news is that enabling it takes less than a minute, and you only ever have to do it once.
There are two ways to get it done. You can go through the Settings app for a more deliberate setup, or use a keyboard shortcut to get there instantly. Both methods produce the same result, so pick whichever feels most natural to you.
Method 1: Enable Clipboard History Through Settings
This is the recommended route if you want to confirm the feature is on and optionally configure sync at the same time.
- Press Win + I to open Settings directly.
- Select System from the left navigation panel, then select Clipboard on the right side of the screen.

- Toggle on the Clipboard history switch so it turns blue, which confirms the feature is now active.

That is all there is to it. Windows will immediately begin capturing your copied items in the background. You do not need to restart your PC.
Note: If the Clipboard history toggle in Settings is greyed out and you cannot turn it on, your organization’s IT policy has likely disabled the feature through Group Policy. This is common in corporate environments where data security is tightly controlled.
Method 2: Enable Clipboard History Using Win + V
This is the fastest method and requires no navigation through menus at all.
- Press Win + V from anywhere on your desktop or inside any open app.
- Select Turn on in the prompt that appears, which reads “Turn on Clipboard history to copy multiple items to your clipboard.”
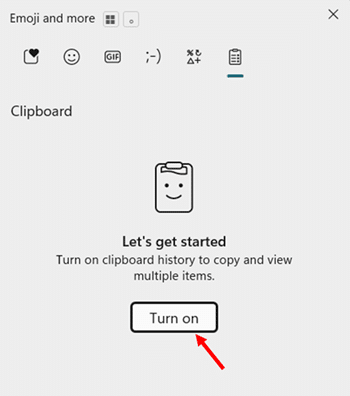
Windows enables the feature instantly and opens the Clipboard History panel in the same step, so you are ready to use it right away.
Note: If pressing Win + V does not open any panel, another application on your PC may have claimed that shortcut. Check any gaming software or keyboard customization apps you have installed and look for conflicting shortcut assignments.
How to Confirm Clipboard History Is Active
Once enabled, you can verify the feature is running at any time.
- Copy any piece of text using Ctrl + C.
- Press Win + V to open the Clipboard History panel and confirm the copied text appears in the list.

If the item shows up, Clipboard History is working correctly.
From this point forward, Windows silently logs everything you copy using Ctrl + C, right-click Copy, or Ctrl + X. Each item joins your clipboard list, and you access all of it whenever you need it by pressing Win + V.
Note: Clipboard History does not save items between restarts by default. If you shut down or restart your PC, your clipboard list clears automatically. The only items that survive a restart are those you have pinned, which we cover in detail in a later section.
How to Open and Use Clipboard History in Windows 11
Once Clipboard History is enabled, using it becomes second nature within a day or two. The entire experience lives behind one keyboard shortcut, and you never have to leave the app you are working in to access it. Here is everything you need to know to open the panel, browse your items, and paste exactly what you need.
How to Open the Clipboard History Panel
There is only one shortcut you need to remember for this.
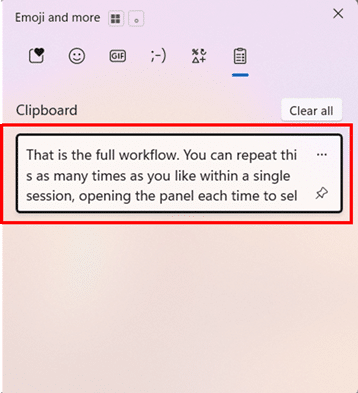
- Press Win + V from anywhere on your desktop or inside any open application, and the Clipboard History panel appears as a floating overlay in the lower-right area of your screen.
The panel displays your copied items as a scrollable list, with the most recently copied item sitting at the top. Text entries show a preview of the content, and images appear as small thumbnails. The panel stays open and in place until you click elsewhere on the screen or press Escape to dismiss it.
How to Paste an Item from Clipboard History
- Click inside the document, text field, or app where you want to paste your content, so your cursor is positioned at the right spot.
- Press Win + V to open the Clipboard History panel.
- Click the item you want to paste, and Windows inserts it at your cursor position and closes the panel automatically.
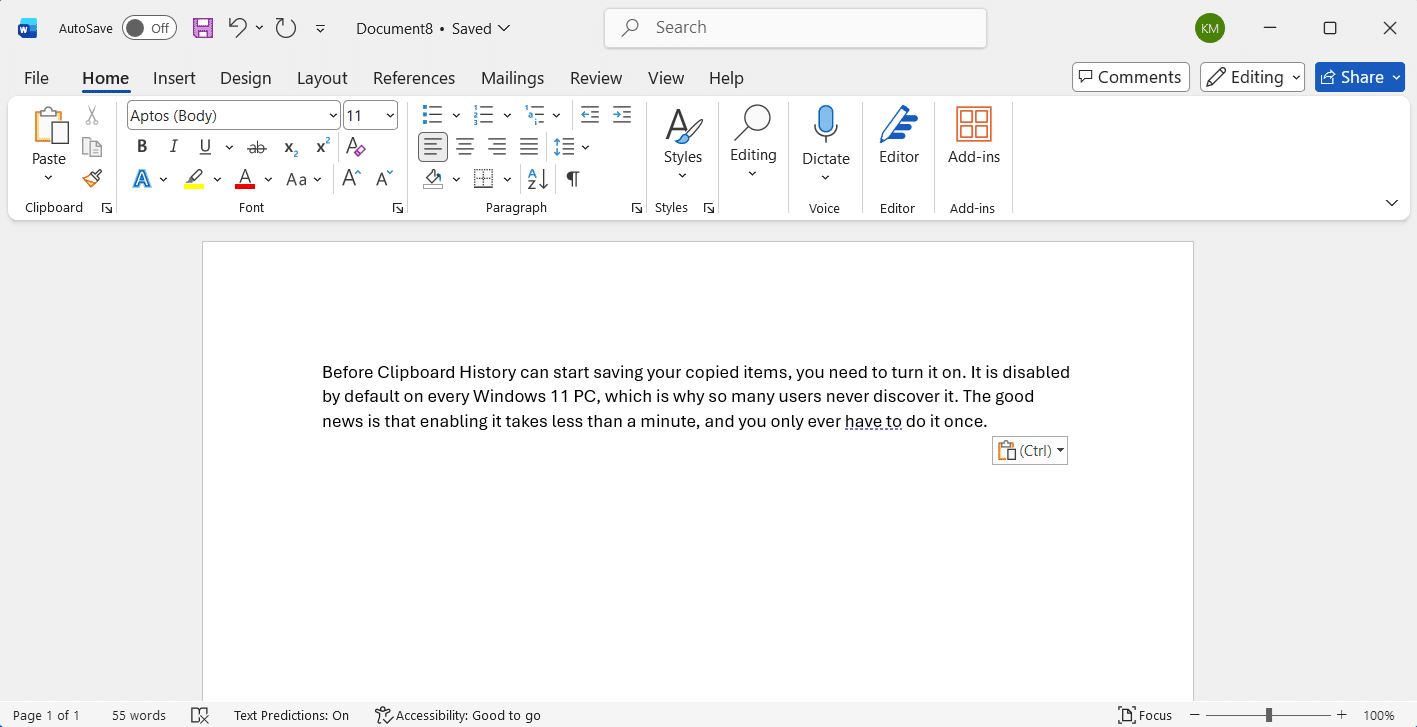
That is the full workflow. You can repeat this as many times as you like within a single session, opening the panel each time to select a different item without ever needing to switch back to your source document to re-copy anything.
How to Paste an Item Using Keyboard Navigation Only
If you prefer to keep your hands on the keyboard, the Clipboard History panel supports full keyboard navigation.
- Press Win + V to open the Clipboard History panel.
- Use the Arrow keys to move between items in the list, which highlights each entry as you navigate.
- Press Enter to paste the highlighted item at your cursor position.
- Press Delete while an item is highlighted to remove it from the list without pasting it.
This keyboard-only approach works well when you are already mid-sentence or mid-workflow and do not want to reach for the mouse.
How to Paste as Plain Text
When you copy text from a website, a Word document, or a formatted email, Windows captures all the original formatting, including fonts, colors, and spacing. Pasting that directly into another app can create messy, inconsistent results.
The Paste as Text option strips all formatting and inserts clean, plain text instead.
- Press Win + V to open the Clipboard History panel.
- Click the three-dot menu (…) on the item you want to paste.
- Select Paste as text from the options that appear, and Windows pastes the content with no formatting carried over.

This is particularly useful when pasting web content into a Word document, a CMS editor, or an email where you want the text to match your existing style rather than inherit the source formatting.
How to Paste Multiple Items in a Single Session
One of the most practical uses of Clipboard History is inserting several different copied items into a document without bouncing between windows.
- Copy all the items you need in advance using Ctrl + C, one after another, from whichever sources you are working from.
- Open your destination document or app and position your cursor where the first item should go.
- Press Win + V, select the first item you want to insert, and the panel closes after pasting.
- Move your cursor to the next insertion point in your document, press Win + V again, and select the next item.
Repeat step 4 for each additional item you need to paste. Because the panel remembers everything you copied, your earlier items remain available throughout the session, regardless of how many times you open and close the panel.
Note: Some security-conscious apps, like password managers, deliberately exclude their copied content from Clipboard History, so passwords you copy from these tools will not appear in the list by design.
Note: You may notice screenshots appearing in your Clipboard History panel even when you did not explicitly copy an image. This happens because pressing PrtScn routes the screenshot through the clipboard before displaying or saving it, so Windows logs it to the history automatically. The one exception is Win + PrtScn, which saves the screenshot directly to your Pictures\Screenshots folder without passing through the clipboard, so it will not appear in the panel.
For a complete guide on every screenshot method available in Windows 11, including keyboard shortcuts, Snipping Tool, and Xbox Game Bar, see our guide on how to take a screenshot in Windows 11.
How to Pin Items in Clipboard History in Windows 11
Clipboard History is useful for the current work session, but it has two hard limits that affect everyday use. The panel can hold up to 25 items, and everything clears when you shut down or restart your PC. If you depend on certain snippets of text day after day, those limits are a real problem.
Pinning solves both of them at once.
Why Pinning Matters
When you pin a clipboard item, it becomes permanent. It will not be pushed out when the 25-item list fills up, and it will not disappear when you restart your PC. Pinned items stay in your Clipboard History until you deliberately remove them, no matter how many times you copy new content or reboot your machine.
Think of pinned items as your personal snippet library sitting right inside the clipboard panel. Your most-used text is always one Win + V away, without needing a separate notes app, a text file, or any third-party tool.
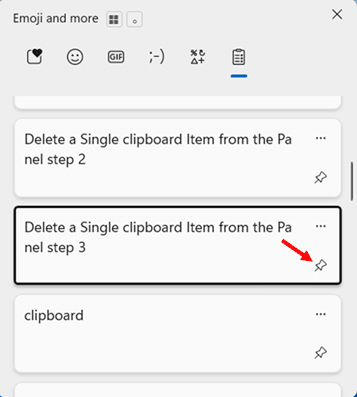
How to Pin an Item in Clipboard History
- Copy the text or image you want to pin using Ctrl + C or right-click and select Copy, then press Win + V to open the Clipboard History panel.

- Hover over the item you want to pin, and click the Pin item icon that appears in the lower-right corner of that entry. The pin icon turns dark to confirm the item is now pinned.

How to Find Your Pinned Items in the Panel
Pinned items stay in the position where they were when you pinned them. They do not automatically float to the top of the list in Windows 11. As you continue copying new content, fresh items appear above your pinned ones, which can push them further down the panel.
The quickest way to bring your pinned items back to the top is to clear all unpinned items from the panel.
- Press Win + V to open the Clipboard History panel. Select Clear all from the top of the panel

- This removed every unpinned item and leaves only your pinned entries visible at the top of the list.

This works well when you want fast access to your pinned snippets without scrolling through a long list of recent copies. Your pinned items are never affected by Clear all.
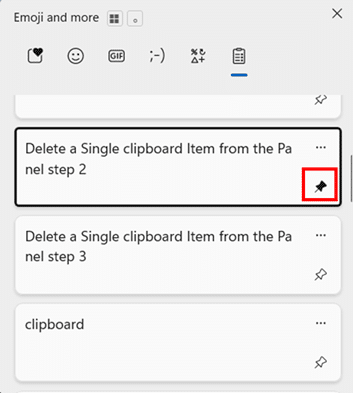
How to Unpin an Item in Clipboard
Unpinning an item removes its protected status. Once unpinned, the item behaves like any other clipboard entry and can be pushed out by newer copies or cleared on the next restart.
- Press Win + V to open the Clipboard History panel and locate the pinned item, which you can identify by its filled, dark-coloured pin icon.
- Click the Pin item icon again to toggle it off, and the pin turns light to confirm the item is now unpinned.
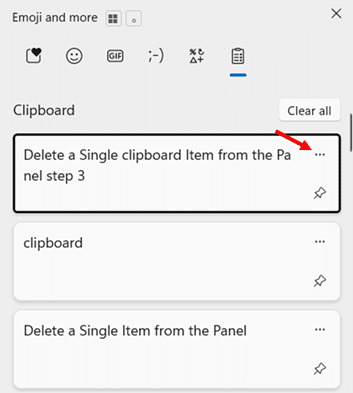
How to Delete a Pinned Item
The Clear all button and PC restarts do not remove pinned items. To delete a pinned item, you need to remove it manually.
- Press Win + V to open the Clipboard History panel and locate the pinned item you want to remove..
- Click the three-dot menu (…) on that item and select Delete to remove it from your Clipboard History permanently.

Avoid pinning sensitive information. Passwords, authentication codes, banking details, and personal identification numbers should never sit in your Clipboard History, pinned or otherwise. If your device is shared, left unlocked, or accessed remotely, that data is exposed to anyone who presses Win + V.
How to Delete Items from Clipboard History in Windows 11
Managing your Clipboard History is just as important as using it. Left unchecked, the panel quietly accumulates everything you copy throughout the day, including text you only need once, partial drafts, and, occasionally, sensitive content you would not want sitting there. Windows 11 gives you several ways to clean it up, from removing a single entry to wiping the entire history in one step.
Here are all the methods, clearly laid out.
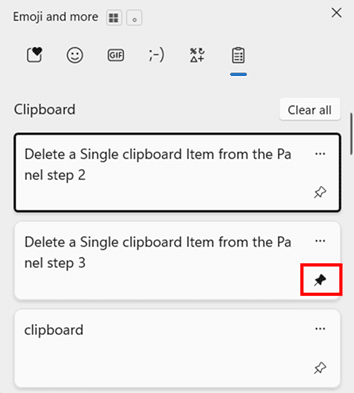
Method 1: Delete a Single Clipboard Item from the Panel
Use this to remove a specific entry from your clipboard list without affecting anything else.
- Press Win + V to open the Clipboard History panel.
- Locate the item you want to remove and click the three-dot menu (…) that appears on that entry.
- Select Delete from the options that appear, and Windows removes that item immediately while leaving the rest of your history intact.

This is the most precise method and the right choice when you have copied something sensitive and want to remove it without disturbing your other clipboard entries.
Method 2: Clear All Items Using the Panel
Use this to wipe the entire clipboard history without opening Settings quickly. This method removes all unpinned items in one action.
- Press Win + V to open the Clipboard History panel.
- Select Clear all from the top of the panel, and Windows removes every unpinned entry from your clipboard list immediately.
Important: The Clear all button does not remove pinned items. Your pinned entries stay in the panel untouched. To remove those, you need to delete them individually, which is covered below.
Method 3: Clear All Items in Clipboard Through Settings
Use this as an alternative to the panel method, or when you want to clear clipboard data and cloud-synced items at the same time.
- Press Win + I to open Settings, select System from the left panel, then select Clipboard on the right.
- Click the Clear button under the Clear clipboard data section, and Windows wipes all unpinned clipboard items from both the local history and any synced cloud data tied to your account.

This method produces the same result as Clear all from the panel, but also clears synced entries from Microsoft’s cloud, making it the more thorough option if you have clipboard sync enabled.
Method 5: Disable Clipboard History to Clear Everything
If you want a complete reset and do not mind losing all clipboard data, including pinned items, turning off and then back on Clipboard History achieves that.
- Press Win + I to open Settings, select System, then select Clipboard.
- Toggle Clipboard history to Off, which immediately clears all clipboard data, including pinned items, then toggle it back On if you want to continue using the feature.

Use this method only when you need a full wipe. It is more disruptive than the other options since it removes pinned items that you may have carefully built up over time.
How to Sync Clipboard History Across Devices in Windows 11
If you work across more than one Windows PC, clipboard sync is one of those features that quietly becomes indispensable once you start using it. Copy a URL, a paragraph, or a code snippet on your desktop, and it will be waiting for you on your laptop within moments. No email to yourself. No shared notes app. No switching tabs to look something up again.
Here is how to set it up, what it actually syncs, and what to watch out for before you turn it on.
What You Need Before You Start
Clipboard sync has a few requirements that are worth confirming before you begin.
- A Microsoft account. Sync does not work with a local Windows account. All devices you want to sync must be signed into the same Microsoft account or the same work account.
- Clipboard History is enabled on every device. Sync is a separate layer that sits on top of Clipboard History. If Clipboard History is off on any of your devices, sync will not function on that device.
- An active internet connection. Clipboard data travels through Microsoft’s cloud, so both devices need to be online for sync to work.
- Windows 10 (version 1809 or later) or Windows 11. Sync works across a mix of Windows 10 and Windows 11 devices as long as both are running supported versions.
How to Enable Clipboard Sync
Repeat these steps on every device you want to include in the sync.
- Press Win + I to open Settings, select System from the left panel, then select Clipboard.

- Confirm the Clipboard history toggle is switched On, as sync requires Clipboard History to be active first.
- Locate Clipboard history across your devices and toggle it On.
- Select Automatically sync text I copy mode from the two options that appear below the toggle.

Once enabled on all your devices, copied text items will begin appearing across them automatically, depending on which sync mode you selected.
How to Manually Sync a Specific Item
In manual sync mode, you choose which clipboard entries to send to your other devices one at a time.
- Press Win + V to open the Clipboard History panel on the device where you copied the item.
- Click the three-dot menu (…) on the item you want to sync, then select the Sync option to upload that item to the cloud and make it available on your other devices.
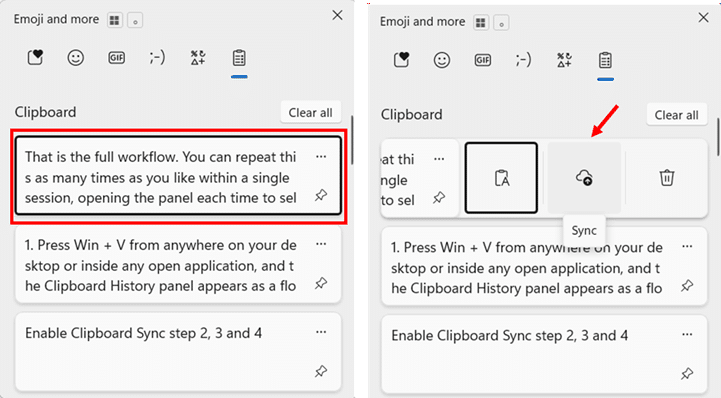
The item will appear in the Clipboard History panel on your other signed-in Windows devices the next time they check for updates, typically within a few seconds.
Automatic Sync vs Manual Sync: Which One to Choose
Windows 11 gives you two sync modes, and the right choice depends on how much you trust what you copy day to day.
Automatically syncs text that I copy, uploading every text item I copy to Microsoft’s cloud immediately. It then becomes available on all your other signed-in devices without any extra steps. This is the most convenient option and the right choice if your clipboard content is generally non-sensitive.
Never automatically sync text that I copy; it keeps everything local by default. Nothing leaves your device unless you deliberately choose to send it. This is the better option if you regularly copy sensitive content, work on a shared device, or want tighter control over what reaches Microsoft’s servers.
Note: Images do not sync across devices. If you copy a screenshot or image from an application, it will remain in your local Clipboard History but will not be sent to your other PCs.
How to Verify Sync Is Working
- Copy any short piece of text on your first device using Ctrl + C.
- Move to your second device, press Win + V to open the Clipboard History panel, and confirm the copied text appears in the list.
If the item does not appear within a minute or two, check that both devices are online, that both have Clipboard history and Sync across your devices toggled on in Settings, and that both are signed into the same Microsoft account.
How to Use Clipboard History with Emoji, GIFs, and Symbols in Windows 11
Most people think of Win + V purely as the clipboard shortcut and Win + . (period) as the emoji shortcut. What they do not realize is that both shortcuts open the same underlying panel in Windows 11, just with a different tab active. The Clipboard History tab sits right alongside the Emoji, GIF, Kaomoji, and Symbols tabs, making this one of the most underused multi-purpose productivity tools built into Windows.
Once you understand the full panel, you stop treating these as separate features and start using them together.
How to Open the Full Panel
There are two shortcuts that open the same panel.
- Press Win + . (period) from any text field or app to open the panel with the Emoji tab active by default.
- Press Win + V to open the same panel with the Clipboard tab active by default.
The panel overlays your current app without interrupting your workflow, and it stays open until you click outside it or press Escape.
The Five Tabs Inside the Panel
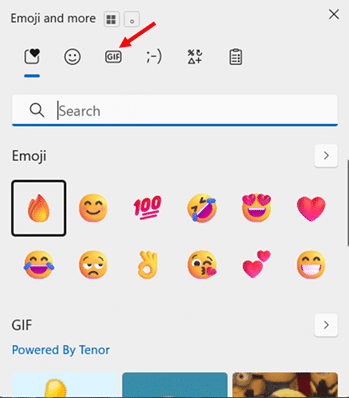
The panel is divided into five tabs displayed as icons across the top. Click any icon to switch between them instantly.
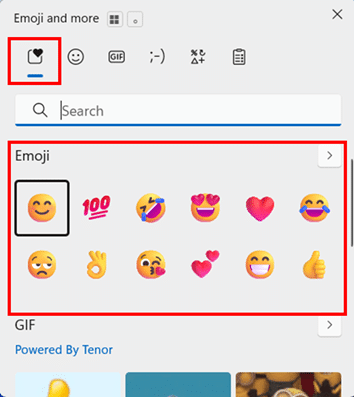
Emoji: The main tab, with thousands of emojis grouped into categories including smileys, people, animals, food, travel, objects, and symbols. A search bar at the top lets you type keywords like “check” or “thumbs” to filter results immediately without scrolling.
GIF: A searchable animated GIF library powered by Tenor. Type any keyword and matching animated GIFs load directly from the web. This works in messaging apps, Teams, Slack, Discord, and browser-based text fields. It does not work in plain-text editors or most word processors, since they cannot display animated images.
Kaomoji: A collection of Japanese-style text emoticons built entirely from keyboard characters, such as (¯\_(ツ)_/¯) or (ಠ_ಠ). Because they are plain text rather than images, kaomoji display correctly in every app, including environments where standard emoji do not render properly, such as code editors, terminal windows, and legacy email clients.
Symbols: A structured library of special characters organized into categories, including currency (£, €, ¥), punctuation, mathematical operators, Latin characters with accents, arrows, and geometric shapes. This replaces the need to memorize Alt codes or dig through the old Windows Character Map.
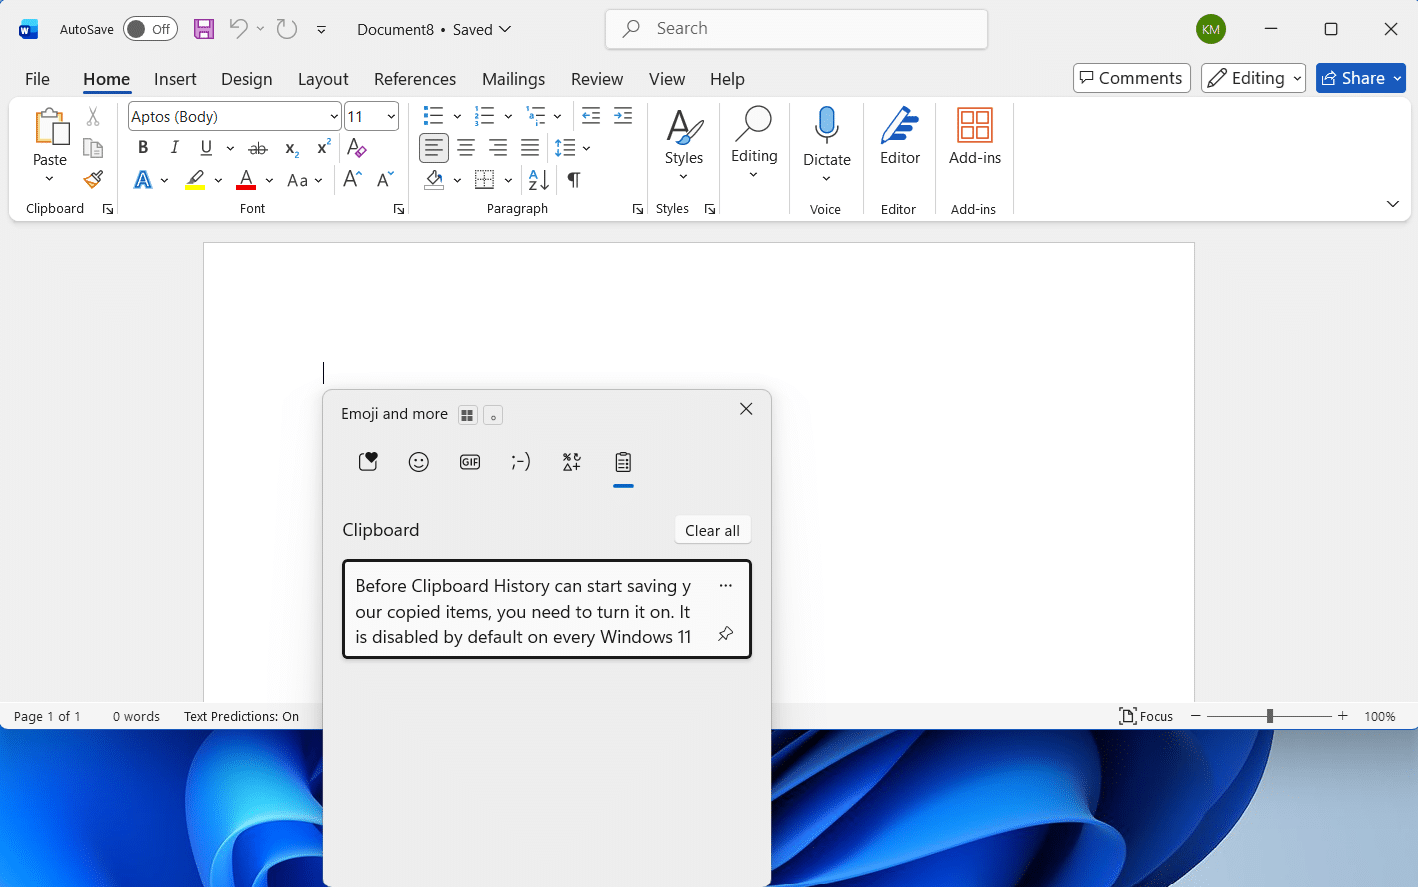
Clipboard: The same Clipboard History panel you access with Win + V, showing your last 25 copied items with pin and delete options. Switching to this tab from the emoji panel is useful when you want to paste a clipboard item and then immediately add an emoji in the same text field without pressing a second shortcut.
How to Insert an Emoji
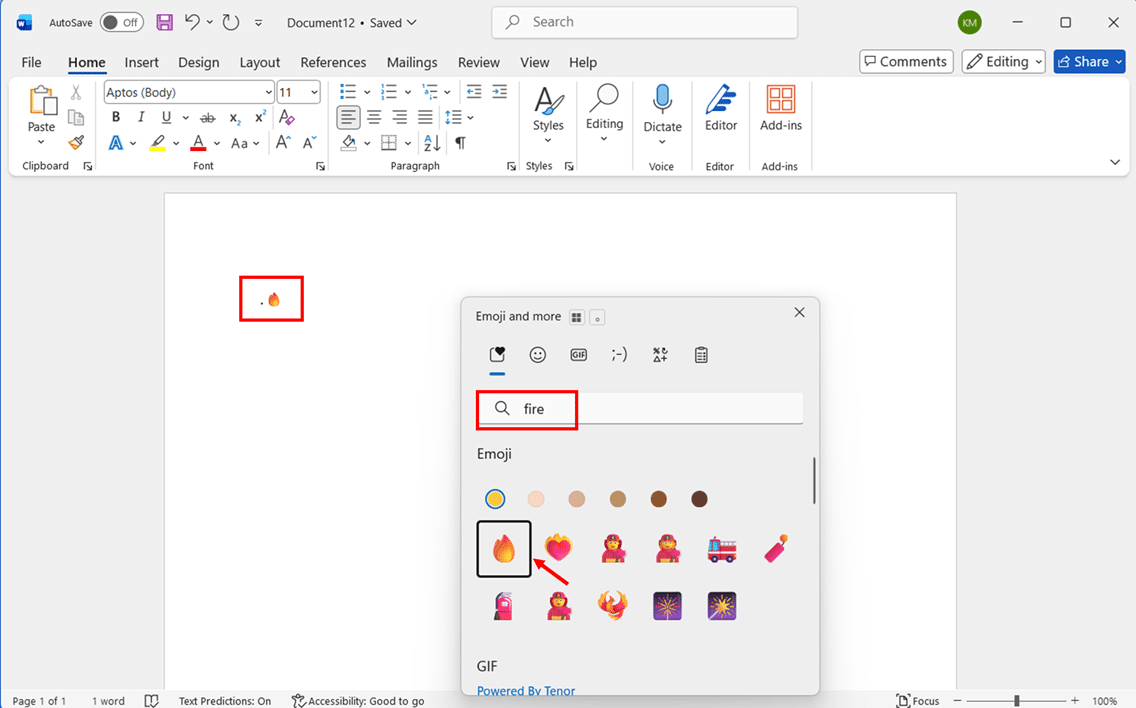
- Click inside any text field in any app, then press Win + . to open the panel.
- Start typing a keyword in the search bar such as “fire,” “calendar,” or “check,” and matching emoji appear instantly in the results below.
- Click the emoji you want, and Windows inserts it at your cursor position. The panel stays open so you can insert additional emoji without re-opening it.
Note: Windows 11 remembers your recently used emoji and surfaces them at the top of the Emoji tab each time you open the panel, so your most-used picks are always one click away.
How to Search for and Insert a GIF
- Press Win + . to open the panel and click the GIF tab icon at the top.
- Type a keyword in the search bar, such as “applause,” “celebration,” or “thinking,” and Tenor loads matching animated GIFs from the web.
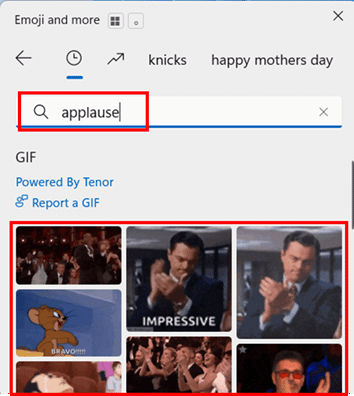
- Click the GIF you want to insert directly into the supported app at your cursor position.
How the Clipboard Tab and Emoji Tab Work Together
Here is a practical scenario that shows why having both in the same panel matters. Imagine you are composing a Teams message and want to paste a copied link, add a checkmark emoji immediately after it, and then paste a second clipboard item.
- Press Win + V to open the panel on the Clipboard tab and click the link to paste it.
- Click the Emoji tab icon at the top of the same panel, type “check” in the search bar, and click the checkmark emoji to insert it right after the link.
- Click the Clipboard tab icon again and select your second item to paste it.
All of this happens within a single panel without pressing any additional shortcuts or switching apps. That is the workflow most Windows users never discover because they treat Win + V and Win + . as two completely separate tools.
Conclusion
Clipboard History is one of those Windows 11 features that earns its place in your daily workflow within the first hour of using it.
You now have everything you need to enable, use, pin and sync Clipboard History in Windows 11. Beyond the clipboard, the same Win + V panel gives you direct access to emoji, animated GIFs, kaomoji, and Unicode symbols.
The keyboard shortcut Win + V is genuinely all you need to remember. Press it once, and you will press it every day from that point forward.
If you take one action after reading this, make it this: enable Clipboard History right now and pin the three or four snippets you copy most often, whether that is your email signature, a meeting link, or a frequently used URL. That single setup takes two minutes and starts saving time immediately.
If this guide helped you, or if you ran into a Clipboard History scenario I have not covered here, drop it in the comments below. I read every one and will address it directly.
Frequently Asked Questions (FAQs)
No. Clipboard History is disabled by default on every Windows 11 PC. You need to enable it manually before it starts saving your copied items. The fastest way is to press Win + V and select Turn on when prompted.
This is expected behavior. Windows clears all unpinned clipboard items every time you shut down or restart your PC. Only items you have pinned survive a restart. If you need certain snippets always to be available, pin them using the pin icon in the Win + V panel.
No. Clipboard History only starts recording when you enable it. There is no way to recover content copied before the feature was turned on, nor to recover unpinned items that were cleared during a restart.
You cannot. The 25-item limit is set by Microsoft and cannot be changed through Settings, the Registry, or Group Policy. If you need unlimited clipboard history, a third-party clipboard manager such as Ditto is the practical alternative.
Yes, with one caveat. Clipboard History stores everything you copy, including sensitive content such as passwords or personal details. Anyone who presses Win + V on your unlocked PC can see your full clipboard list. Clear your history regularly, never pin sensitive data, and consider using the manual sync option instead of automatic sync if you have sync enabled.
No. The feature runs as a lightweight background service and has no measurable impact on performance on modern hardware. It stores text, HTML, and small bitmap images in a local database file within your user profile.
The most common causes are that both devices are not signed into the same Microsoft account, the Sync across your devices toggle is not enabled on one of the devices, or both devices do not have an active internet connection. Clipboard sync only works with a Microsoft account and does not work with local Windows accounts.
No. The built-in Clipboard History panel has no search function. Finding an older item requires scrolling through the list manually. If searchable clipboard history is important to your workflow, a third-party clipboard manager such as Ditto provides full-text search across your entire clipboard history.
