Have you ever sent a crucial email only to realize your Signature still says “Best regards, [Your Name], Intern”? Oops! If you want to avoid that embarrassment and step up your email game, you’re in the right place. This guide will teach you how to change your email signature in Outlook, covering Windows, Mac, and the web versions.
You’ll have a professional signature that leaves a lasting impression by the end. Plus, we’ll throw in some pro tips to make your Signature stand out. Let’s dive in!
Table of Contents
Why It's Important to Have an Outlook Signature
An email signature isn’t just a sign-off; it’s your digital business card. It conveys professionalism, provides essential contact information, and reinforces your brand. A well-crafted email signature can leave a lasting impression and make it easier for recipients to contact you.
Key Benefits of an Email Signature
1. Professionalism
A consistent signature looks professional and shows attention to detail. It reflects your commitment to clear and effective communication, which is crucial in professional settings.
2. Branding
It reinforces your personal or company brand. Including your company logo, tagline, or branding colors helps build brand recognition. Every email you send becomes an opportunity to subtly promote your brand.
3. Contact Information
It makes it easy for recipients to contact you. By including your phone number, email address, and social media links, you provide multiple ways for people to reach you. This is especially important for networking and maintaining professional relationships.
4. Enhancing Credibility
Your email signature can enhance your credibility. Including your job title, company name, and other relevant credentials reassure recipients that your message is from a legitimate source. This is especially important in professional and business contexts where trust is essential. A well-designed signature can help establish authority and trustworthiness.
5. Establishing Identity
An email signature helps establish your Identity. It’s a quick way to let recipients know who you are, what you do, and how to reach you. This is particularly useful in large organizations where you might not be personally known to everyone you email. A clear, concise signature communicates your role and responsibilities, making it easier for colleagues and clients to understand your position and expertise.
How to Add or Change Signature in Outlook on Windows
Changing your email signature in Outlook for Windows is straightforward. Here’s a detailed, step-by-step guide to help even complete beginners.
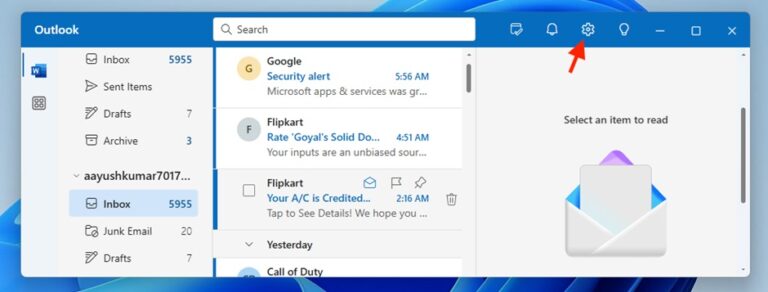
- Launch your Outlook application. If you don’t have it open, find it in your Start menu or desktop.

- Click on the ‘Settings‘ icon at the top right corner of the screen.
- In the Settings window that appears, go to the ‘General‘ tab from the left pane and click on the ‘Signatures‘ option. This will bring you to your Outlook Signatures settings, where you can add, delete, and change the email signatures.
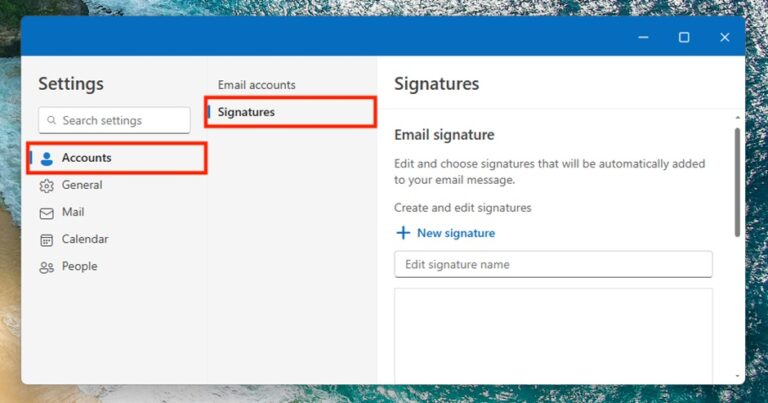
- In the Signatures tab, to add a new Signature, enter the name of the Signature in the ‘Edit signature name‘ field. This could be something like “Work” or “Personal“.

- Create your Signature by entering the details in the following template. You can format the text, add images, and even include links.
Best regards,
[Your Name]
[Your Position]
[Your Company]
[Phone Number]
[Email Address]
[Website URL]

- Once done, click on the Save button to save the Signature.

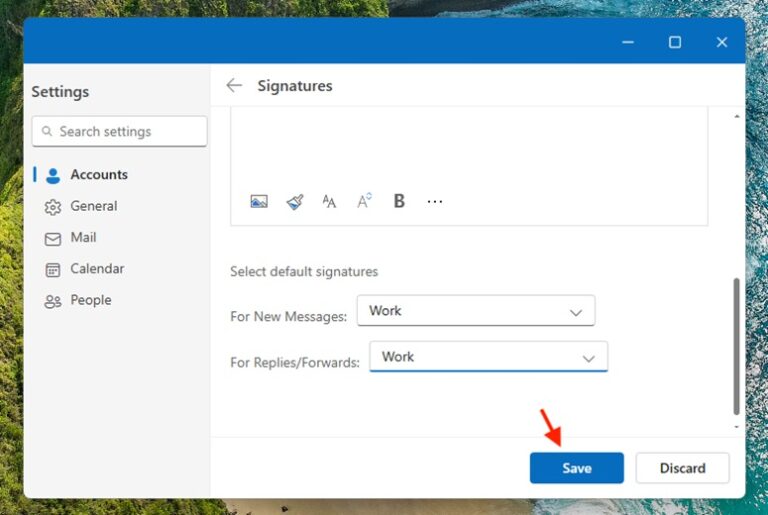
- Now, to set or change the Signature, scroll down a bit and come under the ‘Choose default signature‘ section. Here, choose the Signature for new emails and replies/forwards by clicking on their respective drop-down menus.
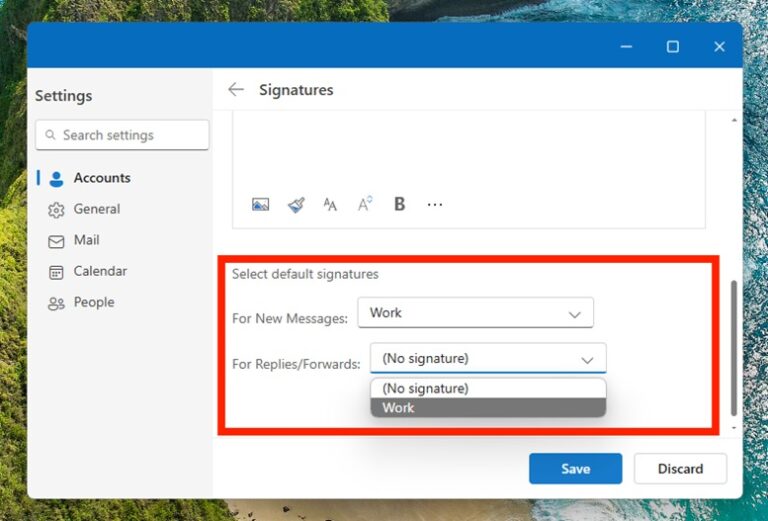
- Click ‘Save‘ to save your changes.
Each step in the process is crucial for different reasons. For example, naming your Signature helps you manage multiple signatures if you need different ones for different contexts (e.g., formal vs. informal communications). Adding a signature not only involves text but can also include images, links, and other elements to make it more informative and visually appealing.
Note: Sometimes, users encounter issues like formatting problems or images not displaying correctly. These can often be resolved by checking your settings, ensuring images are properly embedded, and verifying that your email client supports HTML formatting.
How to Add or Change Signature in Outlook for Mac
Mac users benefit from a slightly different user interface, but the steps are fundamentally similar. The Preferences menu is your gateway to customizing your Outlook experience. Creating and assigning a new signature ensures that your emails always have the correct sign-off. Here’s how you can do it.
- Launch your Outlook application.

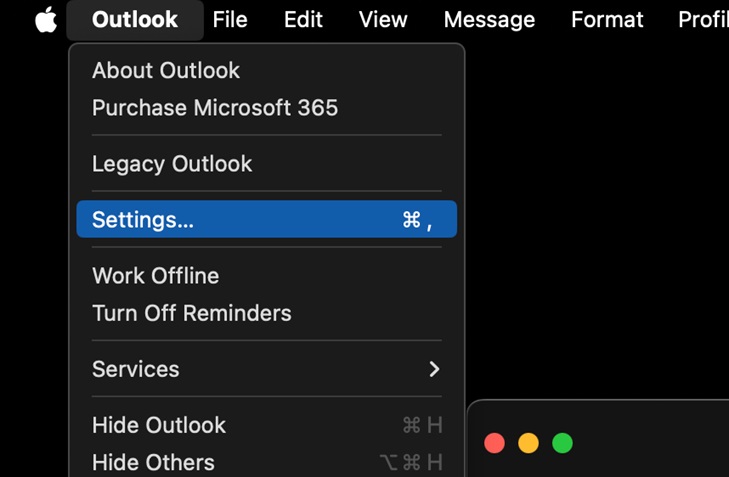
- Click on ‘Outlook‘ in the top menu and select ‘Settings‘. This opens the Preferences window.
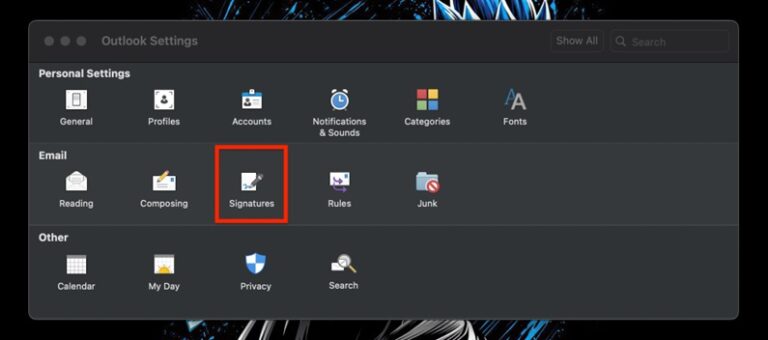
- In the Email section, click on ‘Signatures‘ to open the Signatures dialog box.
- Click the ‘+‘ button to add a new signature.
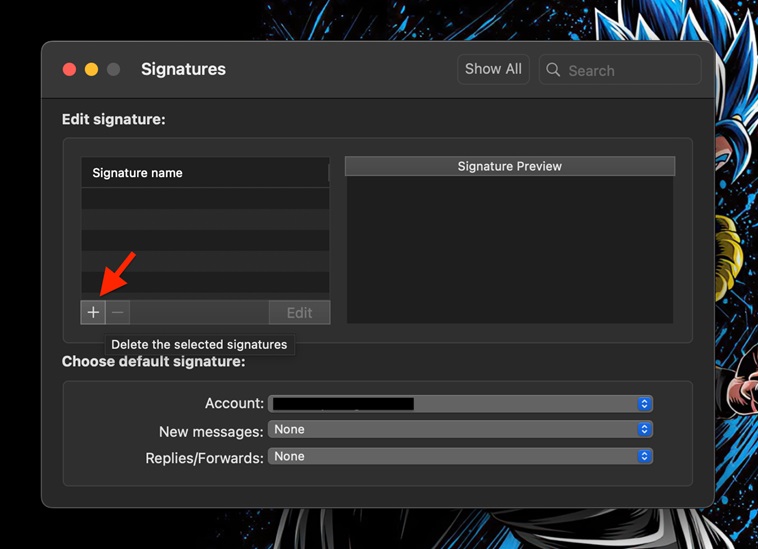
- Give your Signature a name in the ‘Signature Name‘ text files. I am going with the name “Work” as I will use this Signature for my work-purpose emails.

- Next, enter your signature details in the following text field. This is where you’ll put the actual signature data, such as the regards, your name, your designation, etc. Use the formatting tools to customize your Signature. Here’s an example:
Best regards,
[Your Name]
[Your Position]
[Your Company]
[Phone Number]
[Email Address]
[Website URL]

- Click on the “Save” button on the top-left of the window to save your Signature.

- To assign or change a signature to an email account, select the account under ‘Choose default Signatures.’ You can set different (or the same) signatures for new emails and replies/forwards by using the drop-down menus associated with the options.

- Close the Signatures window to save your changes.
Note: Just like on Windows, you might encounter formatting issues or problems with images. Ensure your email format is set to HTML, and test your Signature by sending a few emails to yourself and your colleagues to ensure everything displays correctly.
To understand other features of Outlook for Mac, Refer our blog What Every Mac User Should Know About Microsoft Outlook for Mac
How to Add or Change Signature in Outlook on the Web
Outlook on the web provides a simplified interface, making it easy to update your Signature from any device with internet access. This is particularly useful for those who travel frequently or use multiple devices. Using Outlook on the web, you can customize your email signature easily.
- Open Outlook.com in your web browser and log in to your Outlook account.
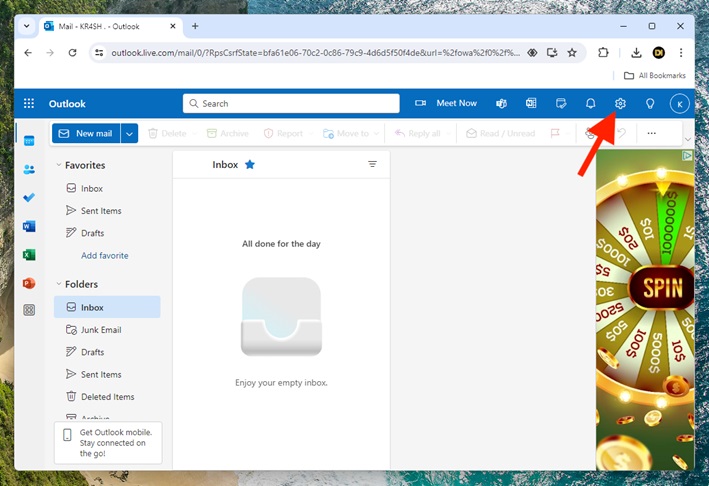
- Click on the gear icon (Settings) in the top right corner of the page.
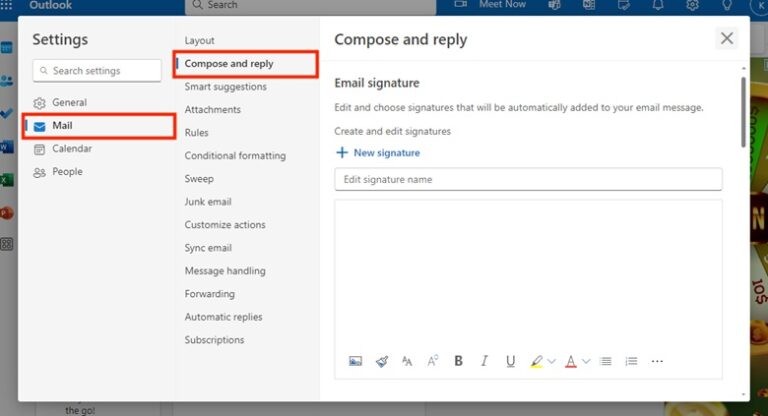
- In the Settings popup, switch to the ‘Mail‘ tab from the left and go to the ‘Compose and reply‘ secondary tab afterward. This is where you can add, delete, edit, and change your Signatures.
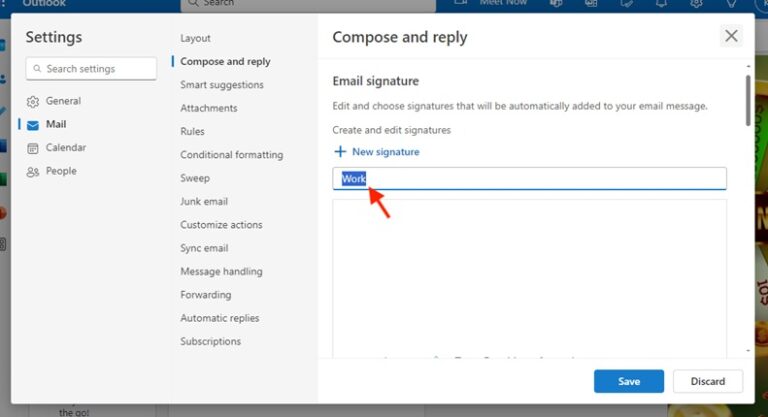
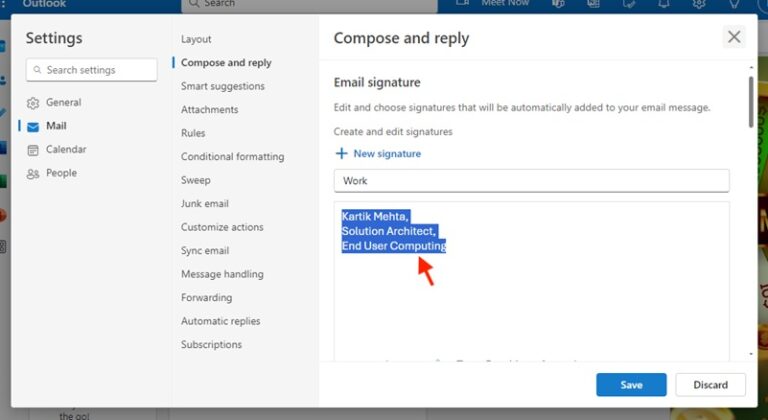
- To add a new signature, simply type the name of your Signature in the ‘Edit signature name‘ text field. e.g., “Work” or “Personal“.
- In the text field below, you’ll create your Signature by entering the details. The web version of Outlook also allows you to format the text, add images, and even include links. Here’s an example:
Best regards,
[Your Name]
[Your Position]
[Your Company]
[Phone Number]
[Email Address]
[Website URL]
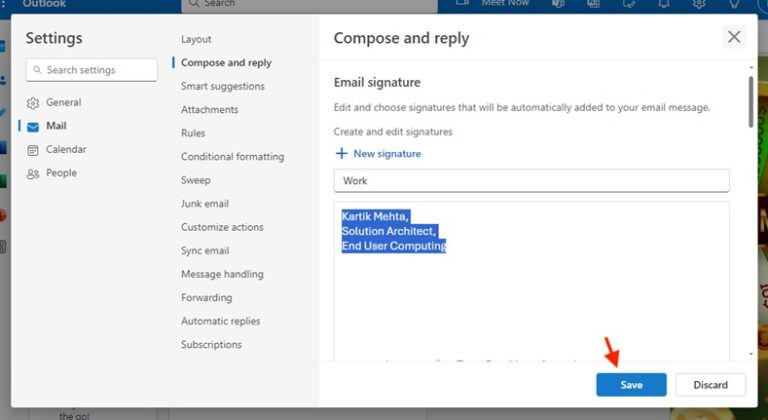
- Click on the Save button to save your Signature.
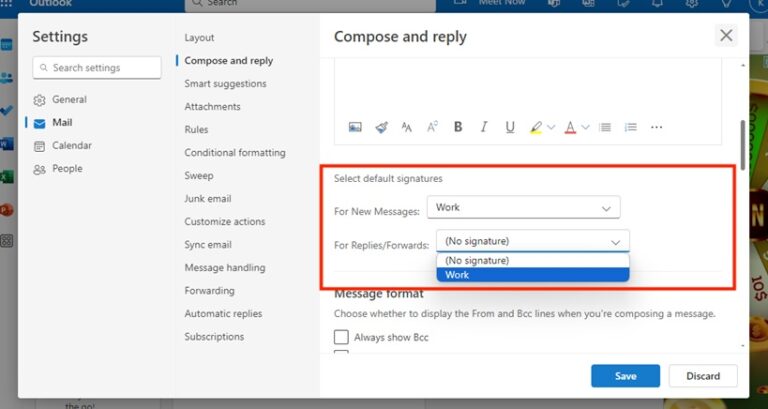
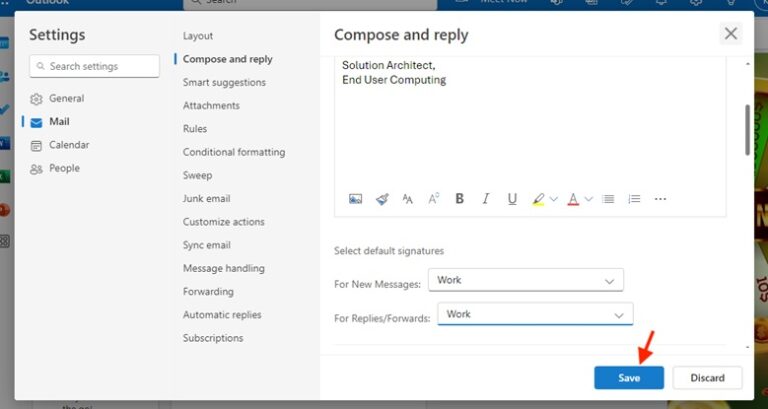
- To set or change the Signature, go to the ‘Choose default signature‘ section. Choose the Signature from the drop-down menus for new emails and replies/forwards.
- Finally, click on ‘Save‘ to save your changes.
Tip: Ensure you save your changes and select the correct default signature settings. If you experience any problems, clearing your browser cache or using a different browser can help.
Some Quality Pro Tips for Email Signature
1. Keep It Simple
- Contact Information: Include only essential contact details like your name, position, phone number, and email address. Avoid cluttering your Signature with too much information. Simplicity ensures that the most important details stand out and are easily accessible.
- Professional Formatting: Use professional fonts and avoid using too many colors. Stick to one or two colors that match your company’s branding. Ensure the font size is legible and consistent throughout the Signature.
2. Add Visual Elements
- Logo: Include your company logo to reinforce branding. A well-placed logo can enhance the visual appeal of your Signature and make it more memorable. Ensure the logo is of high quality and properly sized to avoid pixelation.
- Social Media Icons: Add icons linking to your professional social media profiles. Use recognizable icons for platforms like LinkedIn, Twitter, and Facebook. This not only promotes your social presence but also provides additional ways for recipients to connect with you.
3. Be Mindful of Size
- Compact Design: Keep your signature compact to avoid clutter. A lengthy signature can be overwhelming and may distract from the main content of your email. Aim to balance providing necessary information and maintaining a clean, organized look.
- Mobile-Friendly: Ensure it looks good on mobile devices. Many people read emails on their phones, so your Signature should be responsive and look good on smaller screens. Test your Signature on multiple devices to ensure it scales properly.
4. Test Your Signature
Send emails to yourself to see how your Signature looks in different email clients. This helps ensure consistency and that all elements of your Signature (text, images, links) display correctly across various platforms. It’s a good practice to send test emails to colleagues and gather feedback.
5. Advanced Customization
Those who want to go the extra mile should consider using HTML to create a more customized signature. This can include special fonts, colors, and layouts that aren’t available through the standard Outlook editor. HTML signatures allow for greater creativity and customization, giving you more control over the appearance of your Signature.
6. Keeping it Updated
Regularly update your Signature to reflect changes in your role, contact information, or branding. An outdated signature can confuse and reduce the effectiveness of your communication. Make it a habit to review and update your Signature periodically to ensure it always presents the most current information.
Signatures Examples
Formal Business Signature
Best regards,
John Smith
Marketing Manager ABC Corporation
Phone: (123) 456-7890
Email: john.smith@abccorp.com
Website: www.abccorp.com
Creative Professional Signature
Cheers,
Jane Doe
Graphic Designer XYZ Studio
Phone: (987) 654-3210
Email: jane.doe@xyzstudio.com
Instagram: @jane_designs
Portfolio: www.janedesigns.com
Conclusion
Changing your email signature in Outlook is a straightforward process that ensures your emails always carry the correct information and branding. Whether you’re using Outlook on Windows, Mac, or the web, following the steps outlined in this guide will help you create a professional and effective email signature. Remember, a great signature can leave a lasting impression, so take the time to
Frequently Asked Questions (FAQs)
Q1. Can I have multiple signatures in Outlook?
A: Yes, you can create multiple signatures and assign them to different email accounts or use them as needed.
Q2. How do I add a logo to my Outlook signature?
A: In the signature editor, click on the image icon to insert your logo. Ensure the image file is appropriately sized.
Q3. How do I add a logo to my Outlook signature?
A: In the signature editor, click on the image icon to insert your logo. Ensure the image file is appropriately sized. You might need to adjust the dimensions before uploading it to ensure it fits well within your Signature.
Q4. Can I change my Outlook signature on my mobile device?
A: Yes, you can change your Signature in the Outlook mobile app by going to the settings and selecting ‘Signature.’ Follow the prompts to create or update your Signature.
Q5. How often should I update my email signature?
A: Update your email signature whenever your contact information changes or if you want to refresh your branding. Regular updates ensure your information remains current and professional.
Q6. Is there a way to automatically update signatures across all devices?
A: Unfortunately, Outlook does not sync signatures across devices. You will need to update the Signature on each device manually. However, consistent format and template can make this process quicker and easier.
Q7. Can I use HTML to create my Outlook signature?
A: Yes, you can use HTML to create a more customized and visually appealing signature. This allows for advanced formatting, including custom fonts, colors, and layouts. You must access the HTML editor in the signature settings to input your HTML code.