For Mac users, Microsoft Outlook brings easy email organization, calendar management, and contact synchronization to Apple devices. While Outlook aims for consistency across Windows and Mac, there are important differences that Mac users should understand to maximize productivity. From tailoring Outlook’s aesthetics to managing disparities in features and add-in availability, becoming an Outlook power user requires learning its Apple ecosystem nuances.
However, Outlook’s stellar core features, from scheduling an email to setting out of office, setting email signatures, customizable searches, and robust mail management, remain reliable on Mac. Let’s explore the critical facets for Mac users to master, including setup, security, email migration, contacts, and beyond. With insider knowledge, you can unlock Outlook’s full potential on Mac.
Understanding the Differences Between Outlook for Mac and Windows

While Outlook aims to deliver a seamless email experience across platforms, users should understand some key differences between the Mac and Windows versions.
Outlook for Mac diverges in its user interface design, matching the aesthetics of other Mac apps with a cleaner, more minimalist layout. The Mac navigation pane consolidates folders into groups with collapsible sections. The ribbon of tools at the top streamlines features into simple icons and menus. These UI changes align Outlook with Apple’s design principles while prioritizing ease of use.
Under the hood, Outlook for Mac utilizes Apple’s own Calendar, mail, and contacts frameworks rather than Microsoft services. This allows tighter integration with Apple ecosystem apps like iCal and Address Book. Outlook for Windows leverages Microsoft’s core services.
Since Mac relies on Apple’s frameworks, some Outlook capabilities work differently. For example, Mac users cannot customize the Navigation Pane view, some rules and alerts function differently, and advanced search lacks certain Boolean operators. Feature limitations aim to match expected Mac behaviors.
Due to underlying framework differences, add-ins and extension availability also vary between the Mac and Windows versions. Some add-ins are exclusive to one version.
While the core Outlook features remain consistent, understanding where subtle variations occur due to Apple’s ecosystem streamlining can help Mac users master productivity and manage expectations. Focusing on the award-winning essentials of Outlook delivers a stellar experience on both major platforms.
Setting Up Your Microsoft Outlook on Mac: A Step-by-Step Guide
- First, download and install Outlook from the Mac App Store. Launch Outlook once installed. Next, add your email accounts by clicking the Add Account button and entering your credentials when prompted. Supported account types include Exchange, Office 365, Outlook.com, Gmail, iCloud, and other IMAP/POP configurations.
- Once your accounts are verified, select the option to download your email history from the last three months for continuous access. For Gmail, enable 2-factor authentication if prompted to sync inbox folders.
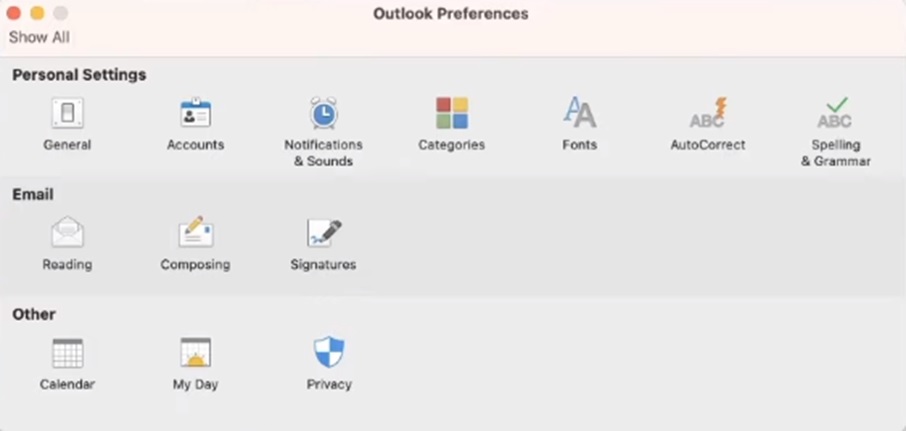
- Next, configure your sync settings. Go to Preferences > Accounts and select each account to customize options like sync frequency and number of downloaded messages. Enable offline access to read email without an internet connection.
- Personalize the navigation pane by dragging favorite folders into groups or adding shortcuts to frequently used mailboxes. Adjust viewing density, text size, default font, and themes under the Format menu.
- Enable security controls like two-factor authentication under Account Settings. Set up encryption and advanced security if your organization requires it.
That covers the key setup steps! Dive into the interface and start managing mail, contacts, and calendars. Refer to Outlook’s built-in Help menu for additional customization and workflow tips. With the basic setup complete, you can maximize productivity with Outlook
How to Sync Your iCloud Email and Calendar with Outlook on Mac?
For Mac users invested in Apple’s ecosystem, linking iCloud and Outlook enables convenient continuity across devices. Here is how to connect them:
- First, open Outlook and go to Preferences > Accounts. Click New Account and select iCloud. Sign in with your Apple ID and password when prompted.
- On the next screen, choose which data you want to sync: Mail, Contacts, Calendars, Reminders, and Notes. Enable any or all based on your preferences. This allows selective syncing if you don’t want every iCloud item in Outlook.
- Click Add Account. Enter your Apple password if requested to complete the setup.
- Once verified, your iCloud email and enabled data will sync into the designated folders under Accounts. You can now access your iCloud mail natively within Outlook on Mac.
- Open Calendar in Outlook and go to Preferences > Accounts to enable two-way calendar syncing. Select your iCloud account, click Calendar, and enable “Keep calendars in sync.” This sets up real-time calendar syncing between Outlook and iCloud.
- Additionally, go into iCloud’s web settings at icloud.com. Under Calendar, select Outlook for the “Default Calendar App” to complete linking.
- When creating events in Outlook on Mac, they will automatically appear in iCloud Calendar on your iPhone, iPad, and other devices. Events added on iCloud will similarly sync to Outlook.
Security Features in Microsoft Outlook for Mac

Outlook for Mac OS offers robust configurable security to protect your email, contacts, and Calendar. Here are some top privacy features:
- Encryption – Outlook uses industry-standard AES 128 or 256-bit encryption for securing email content and attachments during transmission. Encryption scrambles data to prevent unauthorized access.
- Two-Factor Authentication – For enhanced account security, enable two-factor authentication, which requires entering a unique code from your phone when logging in. This adds an extra layer of identity verification.
- Password Protection – Safeguard personal data by password-protecting individual Outlook folders. This restricts access to sensitive information sent via email.
- Resist Phishing – Outlook’s Phishing Protection detects spam emails using AI to secure your inbox. Enable it under Preferences > Protection.
- Block External Content – Blocking external content like images in emails prevents stealthy tracking and hides the sender’s IP address. Apply this setting at your discretion.
- Information Rights Management – Admins can enable IRM for email controls like revoking sent message access and restricting forwarding/copying/printing to maintain control over proprietary
- Secure Messages – Exchange administrators can enable end-to-end Outlook message encryption if extremely high confidentiality is required.
With robust default protection and added layers like two-factor login, Outlook keeps data secure against external threats. Protect sensitive organizational information by enabling available rights management and reversible message recall. Keep Outlook locked down.
Navigating and Organizing Your Contacts in Outlook for Mac
Leveraging the Calendar and Task Management Features in Outlook for Mac
Outlook for Mac provides robust tools for organizing your schedule and to-do items. Here’s how to maximize Outlook’s calendar and task management capabilities:
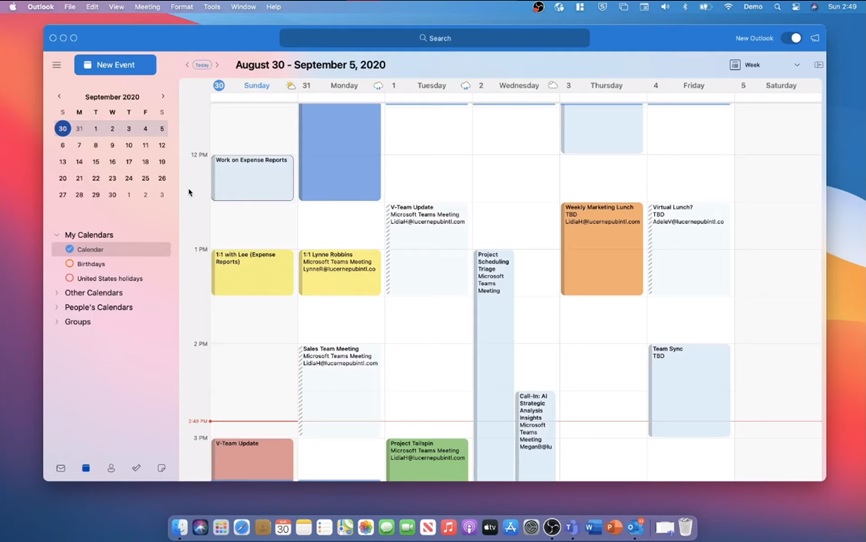
Calendar – Outlook’s Calendar simplifies scheduling appointments and events. Create new events by clicking a timeslot and entering details or dragging your mouse to designate the duration. Enter attendees, and Outlook will handle invites. Configure reminders to alert you about upcoming events. Import external calendars like sports team schedules for easy reference alongside your personal Calendar.
Color coding – Apply color categories to events and tasks to visually organize your Calendar. For example, mark work meetings in blue and personal events in red for quick recognition.
Adjust views – Switch between Daily, Weekly, Monthly, and Schedule view layouts. Schedule view condenses your Calendar to focus on upcoming events in a list format.
Share access – You can securely share your Outlook calendar with others by inviting collaborators and adjusting access permissions. This enables coordinating schedules with coworkers, families, and teams.
To-Do List – Outlook provides a handy To-Do toolbar for tracking tasks. Add new action items, assign due dates, mark priority status, and categorize tasks using flags. Rearrange tasks by drag and drop. Tick off completed items to keep your list organized.
With Outlook’s robust Calendar and task management toolkit, staying on top of your schedule and moving key objectives forward becomes more streamlined. Achieve productivity mastery by fully leveraging these Outlook assets.
Scheduling Meetings in Outlook for Mac
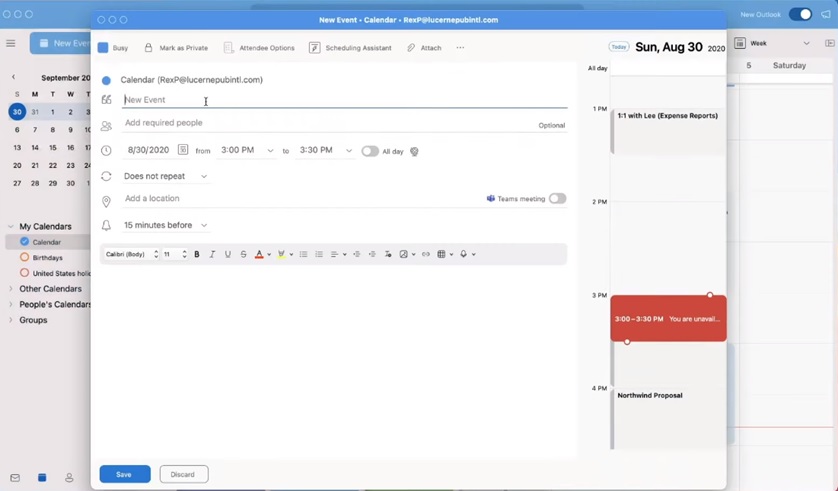
- Open the Calendar module and click on the desired date and time for your meeting. This will open a New Event window.
- Give the meeting a title and add location details if it will be held somewhere requiring attendance.
- Set the start time and duration. Defaults are 30 minutes, but you can adjust as needed.
- Under Add Attendees, enter the email addresses of everyone you want to invite. Outlook will send invites to their calendars.
- Click Scheduling Assistant to view attendee availability and find the best mutual time across schedules.
- Enable the Busy box to avoid conflicts with other appointments already on attendees’ calendars.
- Use Rooms Finder, to reserve conference rooms and equipment if needed.
- Add any agenda items under More Details to inform attendees of topics.
- Adjust Show As availability if you want the invite to display as Free, Busy, Tentative, or Out of Office to reflect flexibility.
- Set the reminder window to provide advance alerts about the meeting.
- Click Send to deliver the invites and add the meeting to your Calendar.
- Track RSVP responses at the top. Follow up with those who have yet to accept.
How to Recover Deleted Items in Outlook for Mac?

Accidentally deleting important emails, calendar events, or contacts in Outlook for Mac can be frustrating. Fortunately, Outlook offers multiple ways to salvage those deleted items before they are permanently erased.
- Deleted Items Folder – After deletion, emails, events, and contacts are moved to the Deleted Items folder, which acts like a temporary holding bin. Open this folder and highlight any retrievable items, then right-click and select Move > Inbox (for emails) or Move > My Contacts (for contacts) to restore.
- Undo option – Select Edit > Undo Delete immediately after deleting an item. This will only work for a few seconds after deletion.
- Timeline view – For emails, enable Timeline under View. Deleted messages will appear with a black background. Right-click these results and choose Move to recover emails.
- Search – Use Outlook’s Search tool to find deleted content by typing unique words from the messages or events you need to restore. Results will again appear on a black background if recoverable.
- Backup – If using Outlook’s cloud backup feature, you can restore deleted content from a previous point-in-time backup by rolling back.
Navigating and Organizing Your Contacts in Outlook for Mac
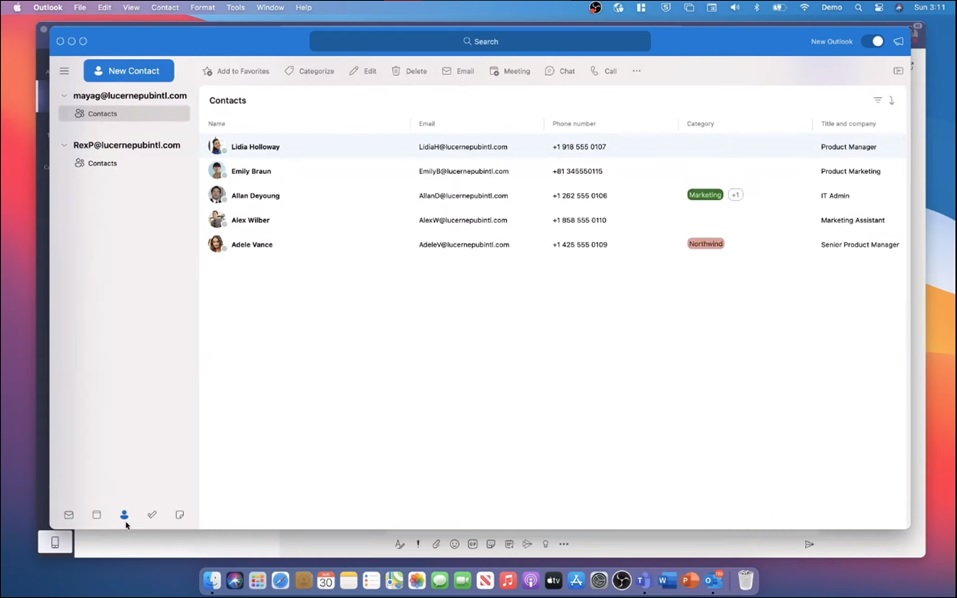
- Access contacts by clicking the Contacts icon in the lower left navigation pane. This opens your contact list sorted alphabetically by default.
- Create new contacts manually by clicking + in the upper left and filling in info like name, company, email, phone numbers, and postal address.
- Import contacts via CSV files or from social networks by going to File > Import. This quickly populates your connections.
- Categorize contacts using colored Labels like “Work” or “Family” for segmentation. Just click the Label icon when editing a contact.
- Sort your contacts using criteria like date added or company name by clicking column headers. Reverse the sort order by clicking again.
- Use the Groups feature to organize contacts by teams, departments, projects, etc. Right-click on a contact and select Add to Group.
- Search contacts quickly in the upper right search bar. Search by name, company, email, or other info.
- View your most frequent contacts in the Frequent Contacts section for quick access.
- Enable Relationship History to automatically compile past email exchanges and attachments with a contact.
- Adjust views using icons at the bottom to display contacts as cards, lists, or groups, depending on preference.
How to Archive Emails in Outlook for Mac
Maintaining an organized inbox and accessible contact database in Outlook for Mac is critical for productivity. Two key tasks facilitating email and contact management are properly archiving old emails you want to keep and importing/exporting contacts to share info if needed.
Let’s walk through the straightforward processes for archiving emails, importing contacts from external files, and exporting your contacts from Outlook step-by-step:
Archiving Emails in Outlook for Mac
Email archiving lets you file away older messages you don’t need in your inbox but still want to access. This clears out your inbox without permanently deleting content. Follow these instructions to archive emails:
- Select the individual emails or email conversation threads you wish to archive in your inbox by checking the box beside each one. You can select multiple messages.
- Once your desired emails are selected, right-click on any highlighted messages.
- In the right-click menu, choose the option for Archive.
- A window will open asking you to Pick a folder to move the message(s) to. Select Archive if you have an existing general archive folder already set up. Otherwise, click New Folder to create a dedicated archive folder in your preferred location, like under the Inbox folder.
- Give your archive folder a descriptive name if creating a new one, like “Archived Emails 2022,” and click OK.
- Finally, click the Archive button to move selected emails into the designated archive folder.
Importing and Exporting Contacts in Outlook for Mac
Importing Contacts to Outlook for Mac
Importing contacts enables quickly bringing your external contact list into Outlook. Here is how to import contacts from a CSV file:- Go to File > Import in the menu bar.
- In the Import window, select vCard (vcs) as the file format for the import.
- Click the Choose File button and browse to select the CSV file containing the contacts you want to import.
- If needed, map the destination fields in Outlook to the corresponding data columns in your import file.
- Finally, click the Import button to pull contacts from the external file.
Exporting Outlook Contacts to Share
If you want to export Outlook contacts to share or synchronize elsewhere, here is how to export them into a file:- Go to File > Export in the menu bar.
- Select vCard as the export file format.
- For Export to, pick Export to File.
- Give your export contacts file a name and choose where to save it.
- Check the box for the Contacts folder that contains the contacts you want to export.
- Verify the box Export contacts from is populated with the correct folder name.
- Click the Export button to finish generating the exported CSV contacts file.
Conclusion
Mac users can unlock Outlook’s full potential by learning its Apple-specific nuances. Understanding differences in interface, features, add-ins, and frameworks compared to the Windows version allows for workflow optimization. While Outlook leverages Apple’s native apps for continuity, focus on its robust core strengths like customizable searches, encrypted messaging, and calendar sharing that shine equally across platforms.
With our guide’s tips on setup, iCloud syncing, contacts, archiving, security protections, and more now under your belt, you can master Outlook on Mac as your centralized hub for email, scheduling, and organization. Outlook’s award-winning functionality smoothed seamlessly into the Apple ecosystem provides a stellar user experience. So, embrace Outlook for Mac to get the most from its integration with your iCloud accounts and other Apple services while enjoying top-notch productivity on your Mac.
