How to Check PC Specs in Windows 11: Complete Guide

How to Check PC Specs in Windows 11

Let me show you how to check PC specs in Windows 11 and why it matters to keep your computer running at its best. When you understand your system’s capabilities, you can make informed decisions about software compatibility, plan timely upgrades, and diagnose performance issues before they become problems.

As someone who’s spent years analyzing computer systems and helping users optimize their performance, I can tell you that understanding your PC specifications through Windows 11’s built-in tools is one of the most effective ways to maintain peak performance without relying on third-party software. These methods give you everything from basic system information to professional-grade hardware analysis, all using tools already available on your computer.

Whether you’re looking to verify game compatibility, monitor system health, or prepare for upgrades, you’ll find everything in this guide. I’ll walk you through six official methods to check your PC specifications in Windows 11, from the user-friendly Settings app to professional tools like PowerShell. I’ll show you which method to use for different situations, explain how to interpret the information you find, and help you understand what these specifications mean for real-world performance.

For a complete guide on multiple ways to get help in Windows 11, check out my detailed article “How to Get Help in Windows 11

Table of Contents

Understanding PC Specifications

Your computer’s specifications define its capabilities and limitations. Each component serves a distinct purpose; understanding these components helps optimize your system’s performance.

Processor (CPU)

The processor executes instructions and calculations for all computer operations. Key specifications include: Core count determines how many tasks can be processed simultaneously. Clock speed (GHz) indicates how quickly the processor performs calculations. Cache size affects how efficiently the processor accesses frequently used data.

Memory (RAM)

RAM provides temporary storage for active programs and data. Capacity, measured in gigabytes (GB), determines how many programs can run simultaneously. Speed (MHz) affects how quickly data moves between RAM and other components. Memory timing impacts responsiveness and data transfer efficiency.

Storage Devices

Storage devices retain data permanently. HDDs offer large capacity at a lower cost, with performance measured by RPM and cache size. SSDs provide faster access speeds, measured in MB/s, for reading and writing data. Interface type (SATA/NVMe) affects maximum transfer speeds.

Graphics Cards (GPU)

Graphics cards handle visual processing tasks. VRAM capacity determines texture handling capabilities. Core clock speed affects rendering performance. Memory bandwidth influences frame rates and visual quality. Modern GPUs include specialized features for gaming and content creation.

Component Integration

Components work together as an integrated system. Your processor needs sufficient RAM to handle multiple tasks. Storage speed affects program loading times and system responsiveness. Graphics performance depends on both GPU capabilities and CPU processing power.

Understanding these specifications helps you identify performance bottlenecks, plan upgrades, and select components that match your computing needs.

Method 1: How to Check PC Specs in Windows 11 Using Settings App

The Windows 11 Settings app provides the most user-friendly way to check your system specifications. Microsoft designed this method for everyday users, making it the perfect starting point for understanding your computer’s capabilities. Let’s walk through each step while understanding what the information means for your computer’s performance.

Accessing System Settings App

  1. Press the Windows key + I on your keyboard, to open the Settings application in Windows 11.
Accessing System Settings App step 1
  1. Look at the left sidebar of your Settings window and click on System, which acts as the central hub for all your computer’s core configurations.
  1. Scroll down the System menu until you reach About at the bottom, then select it to view your computer’s fundamental information.
Accessing System Settings App step 3

Understanding Device Specifications in Setting App

  1. In the About section, locate the Device specifications heading, where you’ll find essential information about your computer’s hardware.
Understanding Device Specifications in Setting App step 1
  1. Look for your processor information, which shows the exact model of your CPU (for example, “Intel Core i7-12700K” or “A MD Ryzen 7 5800X”).
Understanding Device Specifications in Setting App step 2
  1. Find the Installed RAM entry, which displays your computer’s memory in gigabytes (GB) – this number directly affects how many programs you can run simultaneously.
  1. Check the System type entry to see whether your computer is running a 64-bit or 32-bit version of Windows, which determines software compatibility and memory accessibility.
Understanding Device Specifications in Setting App step 4

Examining Windows Specifications in Windows 11 Setting App

  1. Scroll down to find the Windows specifications section containing important information about your operating system.
Examining Windows Specifications in Windows 11 Setting App step 1
  1. Look for the Edition entry to confirm which version of Windows 11 you’re running (Home, Pro, Enterprise, etc.).
  1. Check the Version number to ensure you’re running the latest Windows 11 update for optimal performance and security.
  1. Note the Installed on date, which helps track how long you’ve been using your current Windows installation.

Exploring Display Adapter Properties in Setting App

  1. Return to the System menu and select Display from the right-hand panel.
Exploring Display Adapter Properties in Setting App step 1
  1. Scroll down and click on Advanced display settings to access detailed information about your monitor and graphics capabilities.
Exploring Display Adapter Properties in Setting App step 2
  1. Select Display adapter properties for your display to open a new window with comprehensive graphics information.
  1. Review the Adapter tab to find your graphics card model, dedicated video memory, and current display settings.

Understanding Additional System Details in Windows 11 setting

  1. Back in the About section, look for Related Links 
Understanding Additional System Details in Windows 11 setting step 1
  1. Click on Advanced System Settings to open the System Properties window, which provides additional technical details about your computer.
  1. Select the Advanced tab and click Settings under Performance to access visual effects and processor scheduling options.

Common Questions and Solutions for Windows 11 Settings App

  1. If any specifications appear as “Unknown” or seem incorrect, select Windows Update from the main Settings menu and check for updates.
Common Questions and Solutions for Windows 11 Settings App 1
  1. For graphics cards showing generic names like “Display Adapter,” update your drivers through Device Manager by right-clicking the Start button and selecting it.
Common Questions and Solutions for Windows 11 Settings App 2
  1. If system information isn’t displaying properly, restart your computer and try reassessing the Settings app.

Next Steps After Checking Specifications

  1. Use the Copy button in the About section to create a text file with your specifications for future reference.
Next Steps After Checking Specifications step 1
  1. Research your components online to understand their capabilities and potential upgrade paths.
  1. Use this information when downloading new software to ensure compatibility with your system.

Method 2: How to Check PC Specs in Windows 11 Using System Information (MSINFO32)

The System Information tool (MSINFO32) is Windows 11’s built-in diagnostic powerhouse, offering significantly more detail than the Settings app. Think of it as your computer’s complete medical record, containing everything from basic hardware specifications to intricate system configurations. Let’s explore how to use this powerful tool effectively.

Accessing System Information

  1. Press the Windows key + R on your keyboard to open the Run dialog box, your gateway to advanced Windows tools.
  1. Type “msinfo32” in the Run dialog box and press Enter; this launches the System Information tool directly.
  1. Wait a few moments while the tool gathers detailed information about your system – you’ll see a progress bar as it analyzes your computer’s components.

Navigating the System Summary in System Information (MSINFO32)

  1. Examine the System Summary section in the left pane, which provides an overview of your computer’s core specifications.
Navigating the System Summary in System Information step 1
  1. Look for the Processor entry, which displays comprehensive CPU information, including model, speed, and the number of cores.
  1. Find the BIOS Version/Date entry to understand your motherboard’s firmware version, which is crucial for system stability.
  1. Review the Installed Physical Memory (RAM) entry, which shows total and available memory amounts.

Exploring Hardware Resources in System Information App

  1. Expand the Hardware Resources category in the left pane to examine how your system manages component communications.
  1. Select Conflicts/Sharing to verify that all hardware components are working together without conflicts.
  1. Review IRQs to see how your system manages hardware interrupt requests, which is important for device compatibility.

Examining Components in System Information

  1. Navigate to the Components section in the left pane to access detailed information about specific hardware.
  1. Select Display to view comprehensive graphics card information, including driver versions and display capabilities.
  1. Check Network to examine your network adapters and their configurations.
Examining Components in System Information step 3
  1. Review Storage for detailed information about your drives, including model numbers and capacities.

Understanding Software Environment in System Information

  1. Explore the Software Environment section to examine installed programs and system drivers.
  1. Select System Drivers to review all active device drivers and their current status.
  1. Check Startup Programs to see which applications launch automatically with Windows.
  1. Review Services to understand the background processes supporting your system.
Understanding Software Environment in System Information step 4

Exporting System Information

  1. Click File in the top menu, then select Export to save your system information.
Exporting System Information step 1
  1. Choose a location for the text file and give it a meaningful name, including the date.
  1. Save this report for future reference or troubleshooting purposes.

Making the Most of System Information

  1. Create regular exports to maintain a history of your system’s configuration.
  1. Use the information to verify hardware changes after upgrades.
Exporting System Information step 2
  1. Reference the data when seeking technical support or troubleshooting issues.

The System Information tool provides an invaluable resource for understanding your computer’s configuration in detail. By mastering its use, you can diagnose issues, plan upgrades, and effectively maintain your system’s health. Remember that this tool’s strength lies in its comprehensiveness – take time to explore each section thoroughly for a complete understanding of your system.

Method 3: Using PowerShell for Advanced System Analysis

PowerShell represents Windows 11’s advanced command-line interface, offering sophisticated system analysis capabilities through object-oriented commands. Unlike Command Prompt, PowerShell handles data as structured objects, enabling more detailed analysis and complex data manipulation.

Accessing PowerShell

  1. Press Windows key + X and select Windows Terminal (Admin) to open an elevated terminal window with administrative privileges.
Accessing PowerShell step 1
  1. Click the dropdown arrow in the terminal window and select PowerShell to open PowerShell window in case by default Command Prompt window opens.
  1. Verify you’re running as administrator by looking for the “Administrator:” prefix in the window title.
Accessing PowerShell step 3

Basic System Information PowerShell Cmdlet

  1. Type “Get-ComputerInfo” and press Enter to display a comprehensive overview of your system’s hardware and software configuration.
Basic System Information PowerShell Cmdlet 1
  1. Enter “systeminfo” for a detailed text-based report of your system’s properties and configurations.
  1. Use “Get-CimInstance Win32_OperatingSystem” to view detailed information about your Windows installation.
Basic System Information PowerShell Cmdlet 3

Processor Information PowerShell Cmdlets

  1. Enter “Get-CimInstance Win32_Processor | Format-List” to display every available detail about your CPU.
Processor Information PowerShell Cmdlets 1
  1. Type “Get-WmiObject Win32_Processor | Select-Object Name, NumberOfCores, NumberOfLogicalProcessors” to see your processor’s core configuration.
Processor Information PowerShell Cmdlets 2
  1. Use “Get-CimInstance Win32_Processor | Select-Object LoadPercentage” to monitor current CPU usage.
Processor Information PowerShell Cmdlets 3

Memory Analysis PowerShell Cmdlets

  1. Execute “Get-CimInstance Win32_PhysicalMemory | Format-Table Manufacturer,BankLabel,Capacity,Speed -AutoSize” to view RAM specifications.
Memory Analysis PowerShell Cmdlet 1
  1. Type “Get-Process | Sort-Object WorkingSet -Descending | Select-Object -First 10” to see the top 10 memory-consuming processes.
  1. Use “Get-CimInstance Win32_OperatingSystem | Select-Object FreePhysicalMemory,TotalVisibleMemorySize” to check available memory.
Memory Analysis PowerShell Cmdlet 3

Storage Information PowerShell Cmdlets

  1. Enter “Get-PhysicalDisk | Format-Table FriendlyName,MediaType,Size,HealthStatus” to view physical disk information.
  1. Use “Get-Volume” to display information about all volumes, including size and free space.
  1. Type “Get-Disk | Format-Table Number,FriendlyName,Size,PartitionStyle” to see disk configuration details.
Storage Information PowerShell Cmdlet 3

Graphics Card Information Using PowerShell Cmdlets

  1. Execute “Get-CimInstance Win32_VideoController | Format-List Name,VideoProcessor,DriverVersion,CurrentRefreshRate” for graphics card details.
Graphics Card Information Using PowerShell Cmdlet 1
  1. Use “Get-CimInstance Win32_VideoController | Select-Object VideoModeDescription” to view current display settings.
  1. Type “wmic path win32_VideoController get name,VideoMemoryType,VideoProcessor” for additional graphics information.

Network Configuration PowerShell Cmdlets

  1. Enter “Get-NetAdapter” to view all network adapters and their status.
Network Configuration PowerShell Cmdlet 1
  1. Use “Test-NetConnection” to verify network connectivity and diagnose connection issues.
Network Configuration PowerShell Cmdlet 2
  1. Type “Get-DnsClientServerAddress” to view DNS server configurations.
Network Configuration PowerShell Cmdlet 3

Advanced System Analysis Using PowerShell Cmdlets

  1. Execute “Get-WmiObject Win32_BIOS” to retrieve BIOS/UEFI information.
Advanced System Analysis Using PowerShell Cmdlet 1
  1. Use “Get-CimInstance Win32_motherboardDevice | Format-List” for detailed motherboard specifications.
Advanced System Analysis Using PowerShell Cmdlet 2
  1. Type “Get-PnpDevice -PresentOnly | Where-Object { $_.InstanceId -match ‘^USB’ }” to list all connected USB devices.

Exporting System Information

  1. Enter “Get-ComputerInfo | Export-CSV -Path ‘C:\SystemInfo.csv’” to save system information to a CSV file.
  1. Use “Get-CimInstance Win32_ComputerSystem | Out-File -FilePath ‘C:\SystemDetails.txt’” to export to a text file.

Method 4: Command Prompt System Analysis

The Command Prompt offers a traditional, straightforward approach to gathering system information. While simpler than PowerShell, it provides quick, reliable access to system details through well-established commands. Let’s explore using this powerful tool to analyze your PC’s components.

Accessing Command Prompt

  1. Press the Windows key + X to open the Quick Link menu, then select Windows Terminal (Admin) to ensure full command access.
Accessing Command Prompt step 1
  1. When the Terminal opens, click the dropdown arrow next to the tab and select Command Prompt to switch from the default PowerShell interface.
  1. Verify your administrative access by looking for “Administrator:” in the window title – this confirms you can execute all necessary commands.
Accessing Command Prompt step 3

Gathering Basic System Information Using Command Prompt

  1. Enter “systeminfo” into the Command Prompt and press Enter. This command generates a comprehensive report covering your hardware and Windows configuration.
Gathering Basic System Information 1
  1. Look for the “System Manufacturer” and “System Model” entries at the top of the output to identify your computer’s make and model.
Gathering Basic System Information 2
  1. Examine the “Processor” section to find your CPU specifications, including model name and speed.

Analyzing Hardware Components using Command Prompt

  1. Type “wmic cpu get name,numberofcores,maxclockspeed” to receive detailed processor information, including core count and maximum speed.
Analyzing Hardware Components using Command Prompt 1
  1. Use “wmic memorychip get capacity,speed,manufacturer” to examine your RAM configuration, showing the size and speed of each memory module.
Analyzing Hardware Components using Command Prompt 2
  1. Execute “wmic diskdrive get size,model” to view information about your storage devices, including capacity and manufacturer.
Analyzing Hardware Components using Command Prompt 3

Examining Memory Configuration Using Command Prompt

  1. Run “wmic memphysical get maxcapacity,memorydevices” to check your motherboard’s maximum supported RAM and number of memory slots.
Examining Memory Configuration Using Command Prompt 1
  1. Enter “wmic pagefile list /format:list” to review your virtual memory settings and usage.
Examining Memory Configuration Using Command Prompt 2
  1. Use “wmic OS get FreePhysicalMemory,TotalVisibleMemorySize /Value” to view memory utilization.

Storage System Verification Using Command Prompt

  1. Execute “wmic logicaldisk get size,freespace,caption” to check available space on all drives.
Storage System Verification Using Command Prompt 1
  1. Type “chkdsk” to verify the health of your drive and file system integrity.
Storage System Verification Using Command Prompt 2
  1. Use “fsutil fsinfo drives” to list all available drives in your system.

Creating System Reports Using Command Prompt

  1. Generate a complete system report by typing “systeminfo > systemreport.txt” which saves the output to a text file.
  1. Create a hardware-specific report with “wmic computersystem get * > hardware.txt
  1. Save storage information using “wmic diskdrive get * > storage.txt

Method 5: Using DirectX Diagnostic Tool (DxDiag) for System Analysis

The DirectX Diagnostic Tool, known as DxDiag, is Windows 11’s specialized utility for analyzing display, sound, and gaming capabilities. Think of it as your computer’s entertainment system inspector, capable of providing detailed information about multimedia components and helping diagnose related issues. Let’s explore how to use this powerful tool effectively.

Launching DxDiag

  1. Press the Windows key + R to open the Run dialog box, your quick-access portal to Windows utilities.
Launching DxDiag step 1
  1. Type “dxdiag” into the Run dialog box and click OK to launch the DirectX Diagnostic Tool.
Launching DxDiag step 2
  1. Wait while DxDiag performs its initial system analysis – you’ll see a progress bar as it examines your components.
Launching DxDiag step 3

Understanding the System Tab in DirectX Diagnostic Tool step 1 and 2

  1. Examine the System tab that appears by default, showing your basic Windows configuration and computer specifications.
  1. Look for the System Manufacturer and System Model entries to identify your computer’s make and model.
Understanding the System Tab in DirectX Diagnostic Tool step 1 and 2
  1. Check the BIOS information to verify your system’s firmware version and date.
  1. Review the DirectX Version number, which indicates your system’s multimedia capabilities.
Understanding the System Tab in DirectX Diagnostic Tool step 4

Analyzing Display Capabilities DirectX Diagnostic Tool

  1. Click the Display tab to access comprehensive information about your graphics hardware.
  1. Look for the Name entry, which shows your graphics card’s make and model.
Analyzing Display Capabilities DirectX Diagnostic Tool 2
  1. Check the Manufacturer information to identify whether you have an NVIDIA, AMD, or Intel graphics solution.
Analyzing Display Capabilities DirectX Diagnostic Tool 3
  1. Review the Chip Type entry to understand your graphics processor’s architecture.
  1. Examine the Display Memory section to see both dedicated and shared video memory.
Analyzing Display Capabilities DirectX Diagnostic Tool 5
  1. Look through the Feature Levels to understand which DirectX features your card supports.
Analyzing Display Capabilities DirectX Diagnostic Tool 6

Examining Sound Capabilities in DirectX Diagnostic Tool

Navigate to the Sound tabs in DxDiag – you’ll see separate tabs labeled Sound 1, Sound 2, etc., for each audio device installed.

For each Sound tab, examine:

  1. Device section parameters:
  • Device Name: Identifies the specific audio hardware or sound card model
  • Manufacturer ID: Technical identifier for the device manufacturer
  • Device ID: Unique identifier for the specific audio device in your system
  • Device Type: Indicates whether it’s an output (speakers/headphones) or input (microphone) device
  • Default Device Status: Shows if this is your primary audio device for Windows
  • Hardware ID: Technical identifier used by Windows to recognize the device’s specific model/version
Examining Sound Capabilities in DirectX Diagnostic Tool 1
  1. Driver section parameters:
  • Driver Name: The software that controls your audio device
  • Driver Version: Current version number of the installed driver
  • Driver Date: When the current driver was released
  • Driver Provider: Company that created the driver software
  • Driver Status: Whether the driver is working correctly
  • Digital Signature Status: Verifies if the driver is properly signed for security
  1. Look for warning messages or problems in the Notes section at the bottom of each Sound tab.

Generating a Diagnostic Report in DirectX Diagnostic Tool

  1. Click the Save All Information button at the bottom of the DxDiag window to create a comprehensive report.
Generating a Diagnostic Report in DirectX Diagnostic Tool 1
  1. Choose a location for your report and give file a meaningful name including the date. Click Save.
Generating a Diagnostic Report in DirectX Diagnostic Tool 2
  1. Open the saved text file to review all diagnostic information in a single document.
Generating a Diagnostic Report in DirectX Diagnostic Tool 3

Conclusion

Understanding your PC’s specifications doesn’t have to be complicated. We’ve explored five reliable methods in Windows 11, each serving a unique purpose in system analysis. From the user-friendly Windows Settings interface that gives us quick access to basic information to the PowerShell Cmdlets that provide deep hardware insights, each method offers a different level of detail and complexity to match your needs.

I recommend starting with Windows Settings for basic checks and then moving to System Information when you need more detail. PowerShell and Command Prompt offers powerful automation capabilities if you’re comfortable with command-line interfaces. For gaming and graphics concerns, DxDiag is your go-to solution.

Remember, you don’t need to master all six methods – choose the ones that best match your technical comfort level and information needs. The key is understanding which tool to use when, allowing you to efficiently gather the information you need to maintain, troubleshoot, or upgrade your system.

Frequently Asked Questions (FAQs)

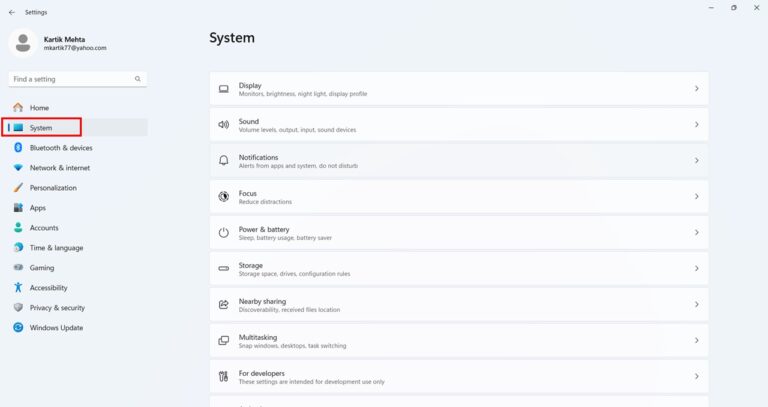
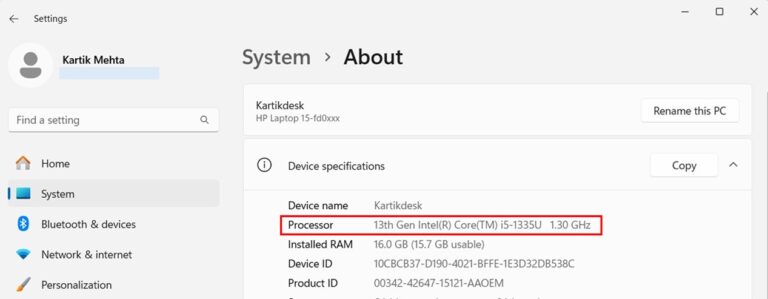
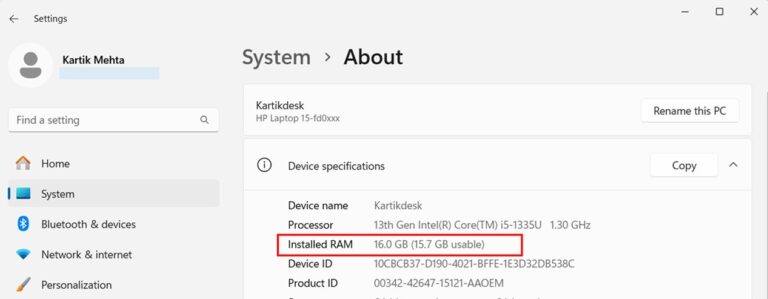
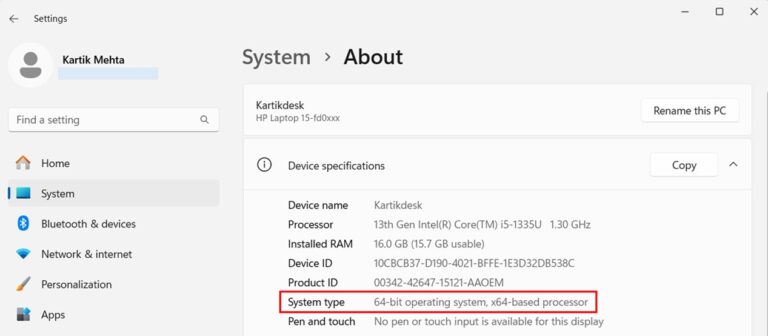
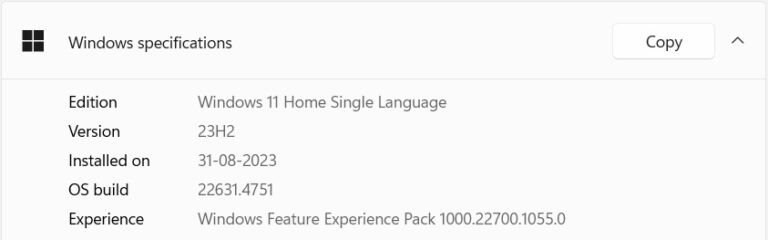
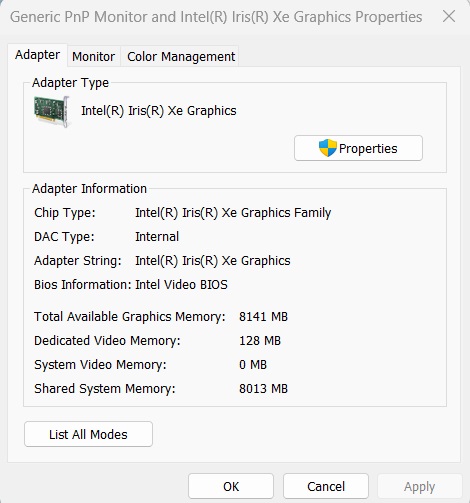
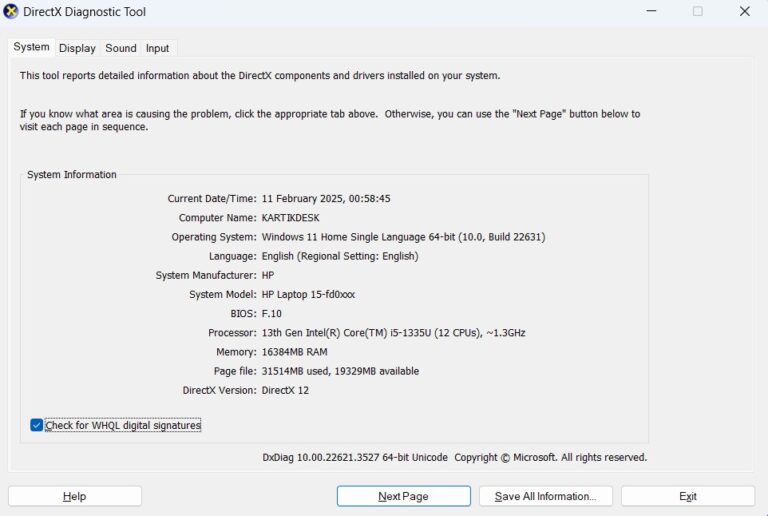
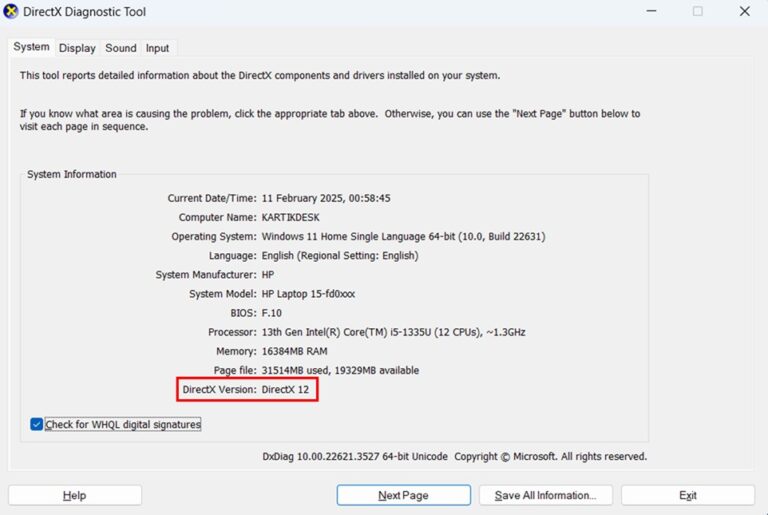
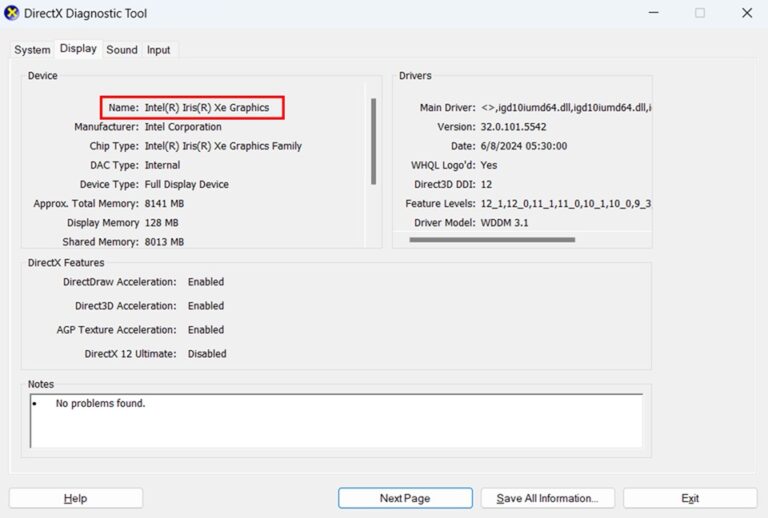
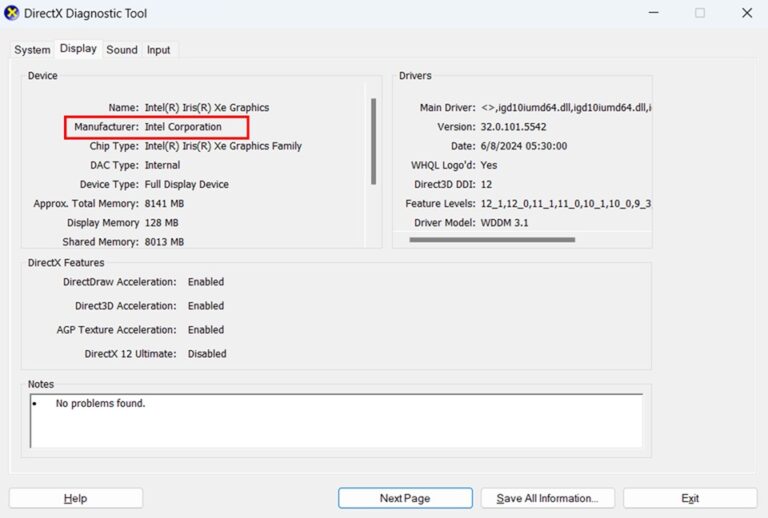
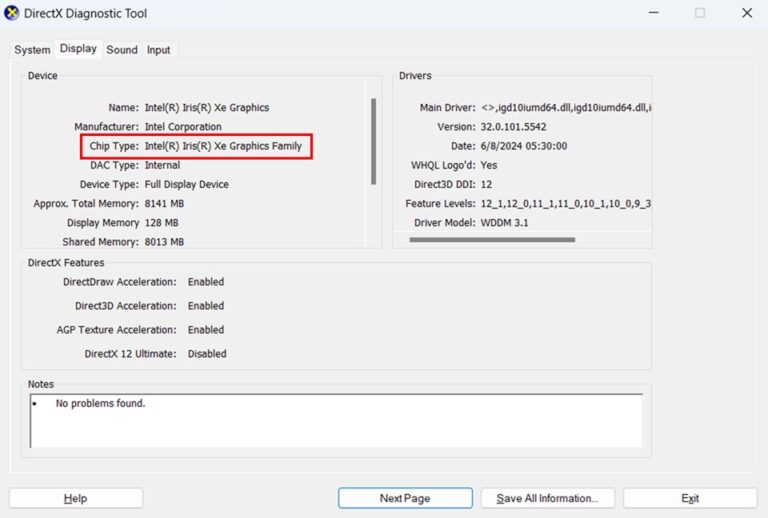
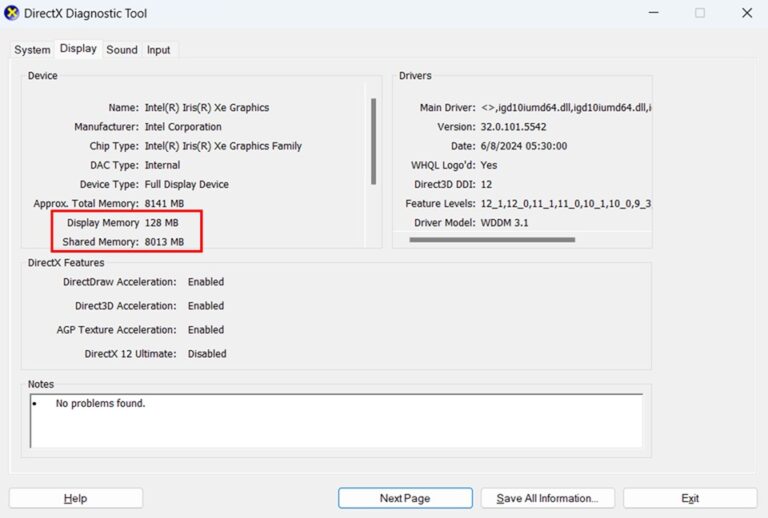
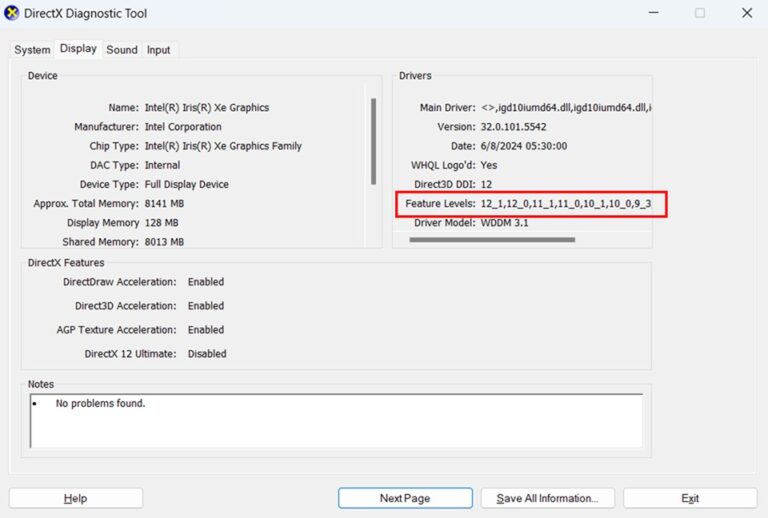
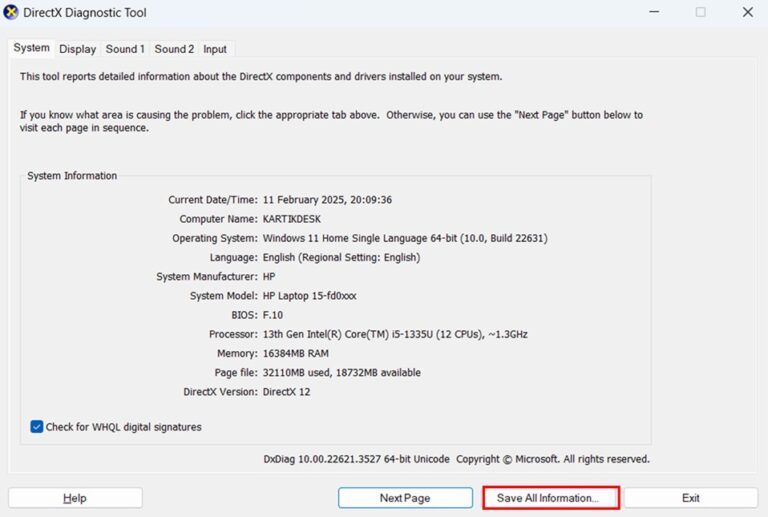
Start with Windows Settings (Method 1) to check your basic specifications for gaming compatibility. However, I recommend using DxDiag (Method 4) as it focuses explicitly on graphics and gaming-related specifications. DxDiag shows your graphics card model, available video memory, and supported DirectX features – precisely what you need to compare against game requirements. It’s like having a specialized gaming passport for your PC, showing all the relevant capabilities for running games.

I recommend checking your specifications in three scenarios: after system updates that might affect hardware drivers, when you notice performance changes, and before installing new software with specific requirements. Regular monthly checks using System Information can help you track changes in your system’s configuration.

Your system reserves some RAM for basic operations and integrated graphics (if you have them). For example, a 16GB system might show 15.5GB usable RAM. This is normal and doesn’t indicate a problem with your memory.

Yes, checking specifications before major updates help ensure compatibility and provides a reference point if issues arise. Use System Information to create a baseline record of your configuration before updating.

Windows Settings provides the quickest way to check basic specifications. Just press Windows key + I, click System, and scroll to About. You’ll see your processor, RAM, and Windows version right away. This takes about 10 seconds and requires no technical expertise.

  • Leave a Comment

    Your email address will not be published. Required fields are marked *

    Scroll to Top