
Have you ever wanted how to record a screen on Windows 11 to create a tutorial video to help a friend use a program? Or record your gaming exploits to share online.
How to screen record in Windows 11? Screen recording allows you to capture video of your Windows 11 desktop. Screen recording is easy on Windows 11. The operating system has built-in tools to record videos. You don’t need to download and install third-party software.
In this guide, you’ll learn multiple methods to record your screen on Windows 11. I’ll cover the basics so you can quickly get started. And provide tips for customizing settings to fit your needs. Let’s dive in!
Table of Contents
How to record your screen in Windows 11 with the Xbox Game Bar?
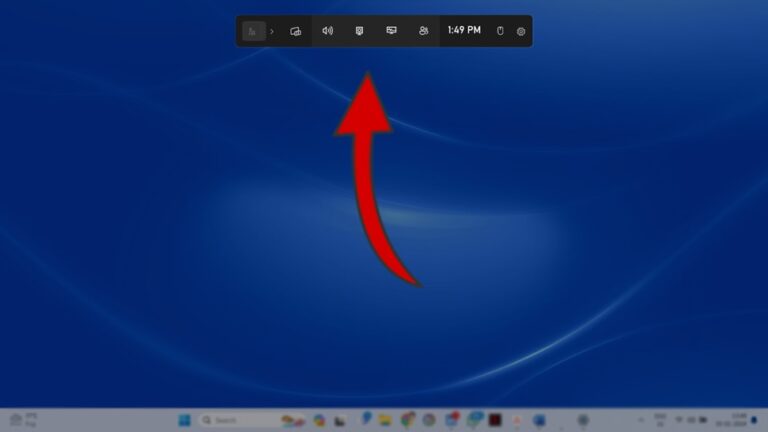
The Xbox Game Bar provides a quick and easy built-in tool for basic screen recording on Windows 11. You can easily access it by pressing the Windows key + G keyboard shortcut.
Here are the step-by-step instructions to record your screen using the Xbox Game Bar:
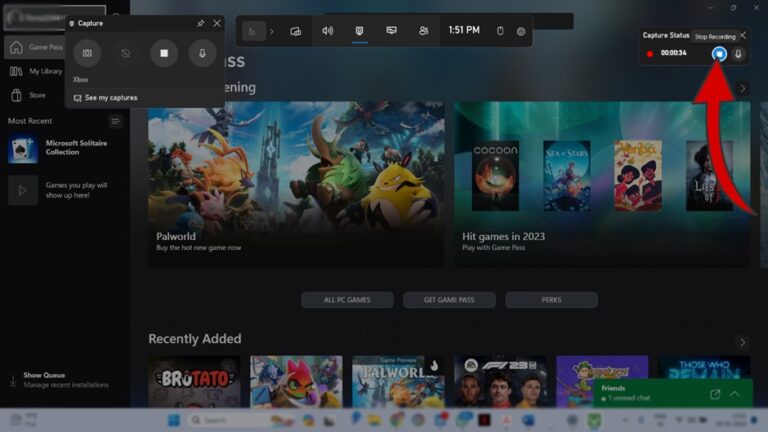
Step 1: Press the Windows key + G shortcut on your keyboard to launch the Xbox Game Bar.
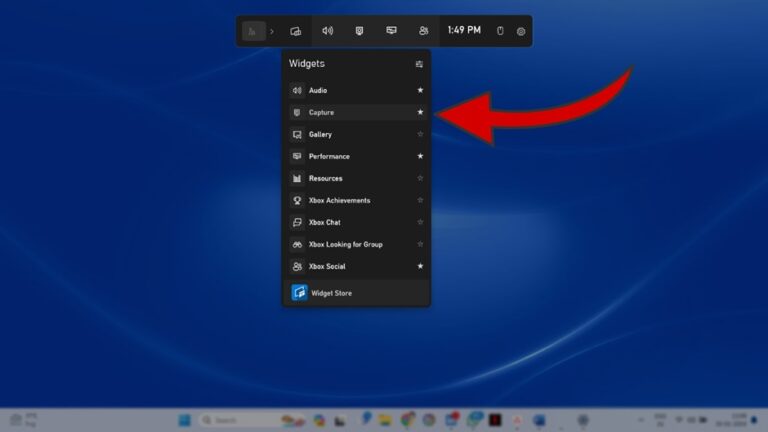
Step 2: Locate and click the Capture option in the widget menu pane to bring up the recording menu.
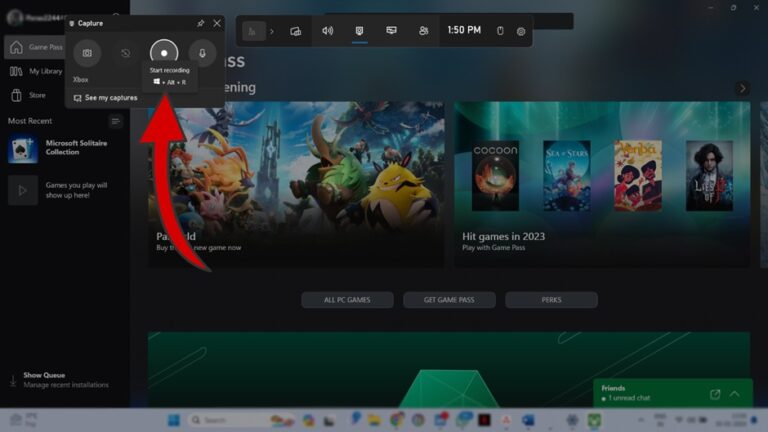
Step 3: Now click on the round recording button on the capture widget to begin recording.
Step 4: A recording progress notification will pop up on the side. You can use this to check the duration of the recording.
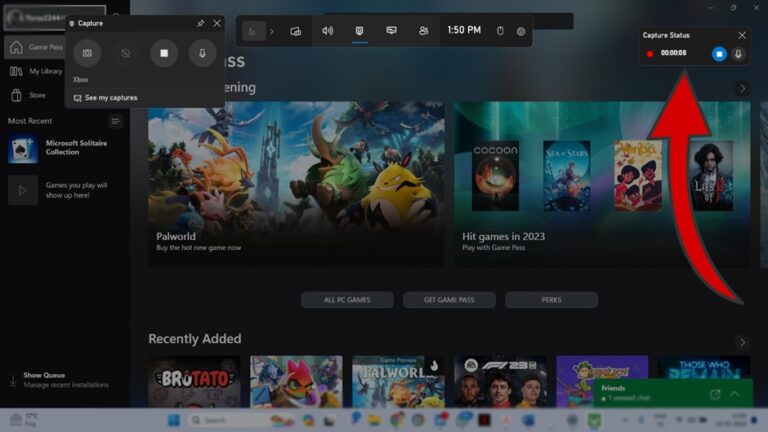
Step 5: Click on the stop Icon on the Capture status notification to stop the recording.
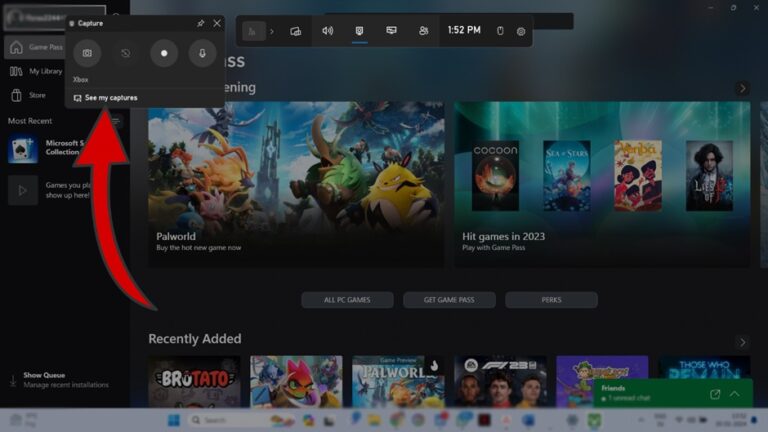
Step 6. Now, click on See My Captures to browse your recordings.
Step 7: This will bring a playback window of your screen recording.
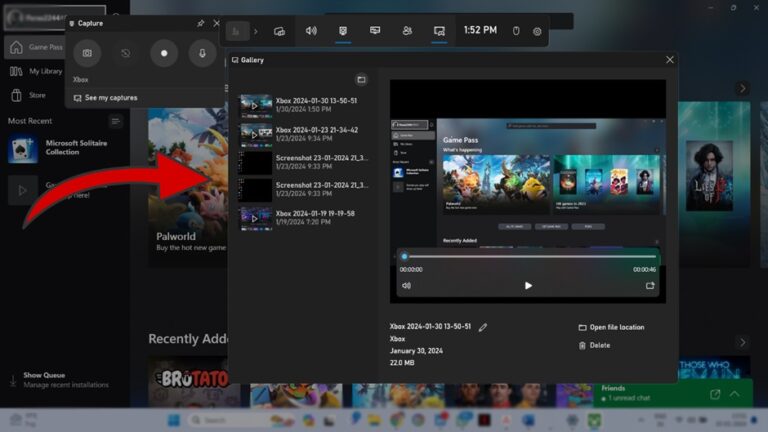
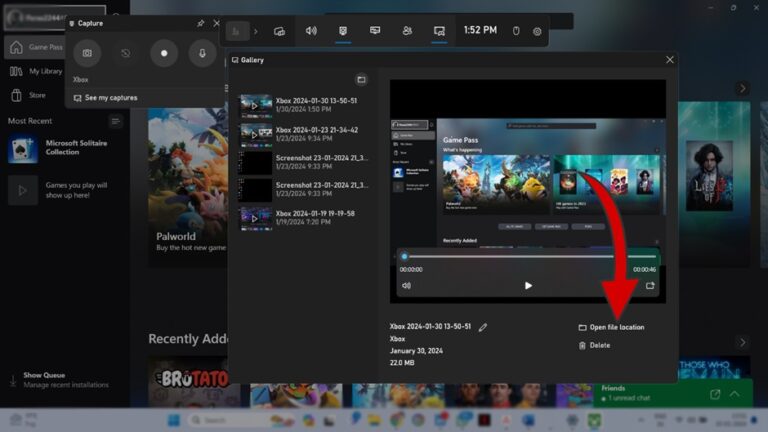
Step 8: Now click on “Open File Location” to navigate to the file directory.
The Xbox Game Bar provides a fast way to capture gaming action or record quick how-to clips. But it lacks advanced still recording features and options of true screencasting software. Still, having this basic recorder built-in can help you avoid downloading unnecessary third-party tools when your needs are simple.
Use Xbox Game Bar to Record:
- Short gaming highlights
- Software glitches
- Quick tutorials
- Video calls/web meetings
Tips for Better Game Bar Recording:
- Use shortcuts to start recording, then focus on the demo
- Review all settings using the gaming widget icon
- Disable Game Mode if it causes performance issues
- Open apps ahead so recordings flow smoothly
Keep recordings short and trim excess footage afterward using native Windows Photos app video tools. Or leverage free video editing software like Shotcut or OpenShot for advanced slicing capabilities.
Pro Tip: You can launch the Game Bar using keyboard shortcuts to start screen recording and stop recordings quicker without fumbling for buttons. This allows you to stay focused on the screen demonstration.
Give the built-in Xbox Game Bar a shot next time you need to quickly capture gaming victories to share online or record short how-to clips and software issues. It removes the hassle, so you can jump right into creating.
How to Record a Screen in Windows 11 with the snipping tool?
Snipping Tool may sound basic, but this built-in Windows app is surprisingly capable of capturing screenshots and recordings. As the name suggests, it’s designed for quick video “snips” to share tutorials or capture issues.
Follow these step-by-step instructions to record your computer screen using the Snipping Tool:
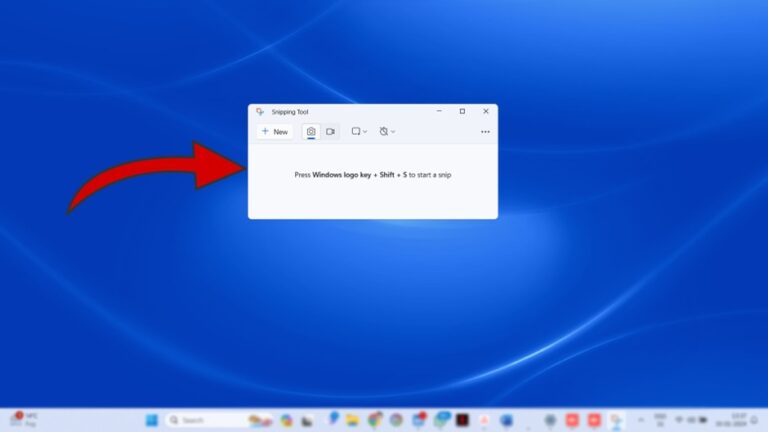
Step 1: Open the Snipping Tool app by typing the name into the Windows search bar or selecting the scissors icon in the search. Alternatively, use the keyboard shortcut Windows key + Shift + S to trigger the snipping tool.

Step 2: The Snipping Tool menu bar will pop up on the screen.
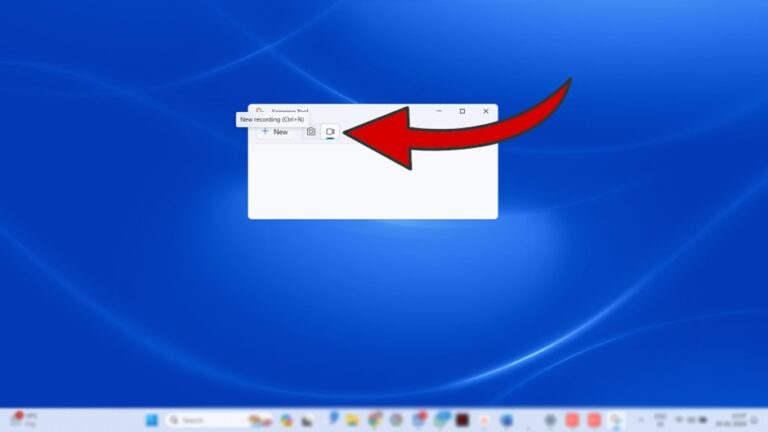
Step 3: Select Video mode to activate recording capabilities.
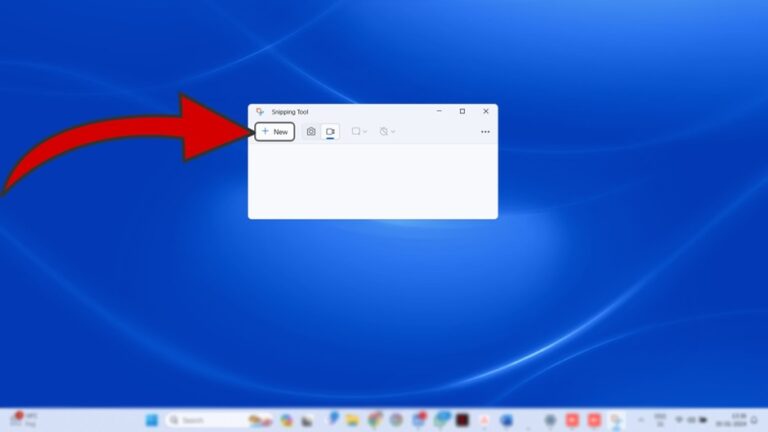
Step 4: Now click “New” to begin recording.
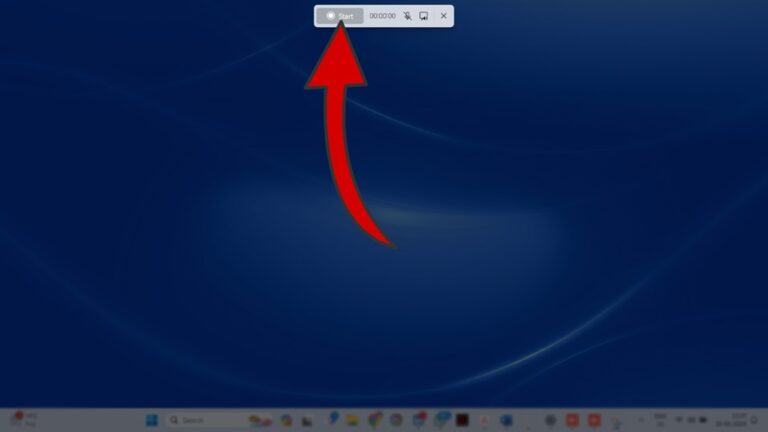
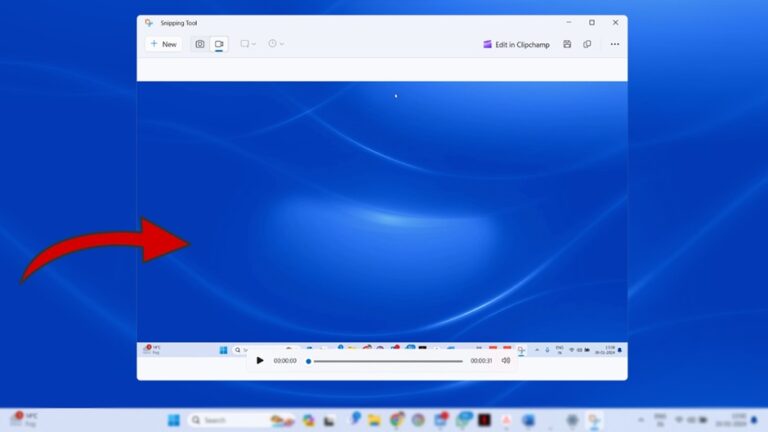
Step 5: Now select the screen area to record, and a toolbar to begin recording will appear. Click on the “Start” button to begin screen recording.
Step 6: Once you stop recording the screen, The Snipping Tool will automatically open the freshly recorded video on the Previewer. You can use this to watch the recording before saving.
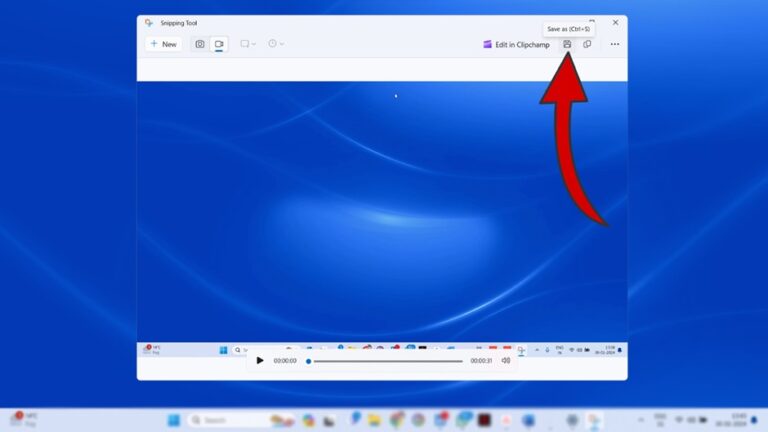
Step 7: Click on the “Save As” icon on the top to save the recording in your preferred location.
While designed for simple, quick clips, Snipping Tool packs competent recording abilities on par with basic standalone apps. The latest updates enable capturing smooth-flowing videos for tutorials, product demos, and other desktop activities.
Use Snipping Tool to Record:
- Short how-to clips
- Quick software glitches
- Accessibility demonstrations
- Rough concept videos
Tips for Better Snipping Tool Videos:
- Use the keyboard shortcut to launch faster
- Select portion of the screen to record
- Disable pen mode for clean video
- Export MP4 to retain quality
Trim recordings using the Photos app editor to remove excess footage. Crop the frame if needed to eliminate distracting background elements. Even add annotations highlighting key areas before exporting the final cut.
For advanced edits like transitions, audio mixing, or special effects – leverage free video software like Shotcut or OpenShot. These open-source editors provide extra polish professional tutorials demand and this is very well of an answer to the question – How to screen record in Windows 11?
Pro Tip: Use the keyboard shortcut Windows + Shift + S to instantly launch the Snipping Tool, preconfigured and ready for screen recording. This bypasses fumbling in menus to start captures faster.
Don’t underestimate the little Snipping Tool next time you need to record software issues quickly, create rough concept demos, or produce basic tutorial clips. It removes the hassle, so you can jump straight into producing handy videos.
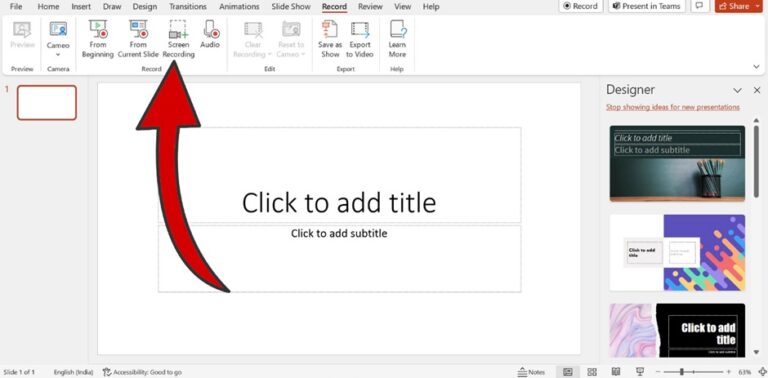
How to Record a Screen in Windows 11 with the PowerPoint
Here’s a clever trick – PowerPoint’s presentation recording feature doubles as a smooth screen recorder! It captures crystal clear on-screen video complete with voice narration.
Follow these step-by-step instructions to record videos using PowerPoint:
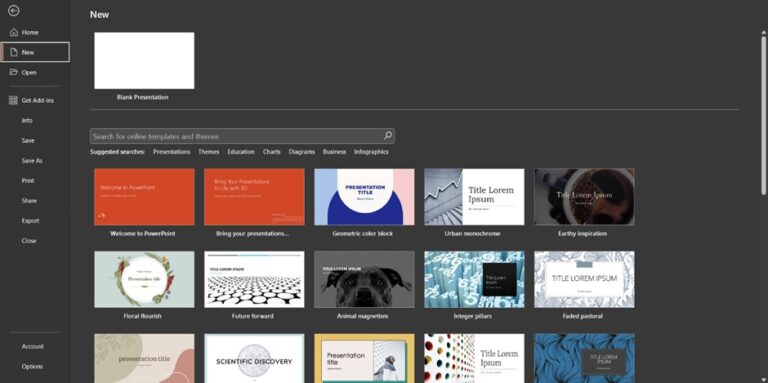
Step 1: Open the PowerPoint app and create a new presentation if you don’t already have one open. You can use an existing presentation, too.
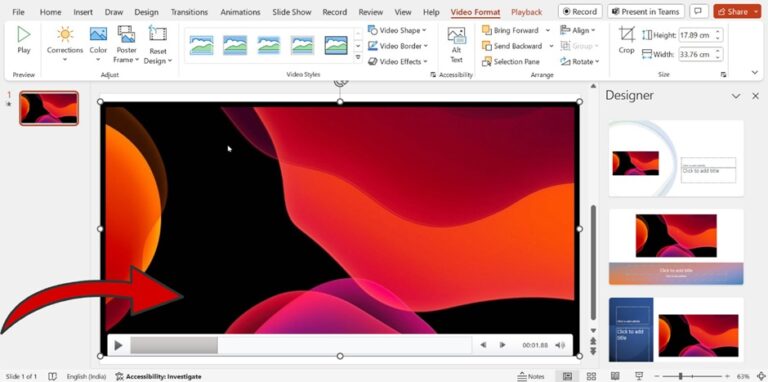
Step 2: Select the record tab at the top to bring up the context menu underneath.
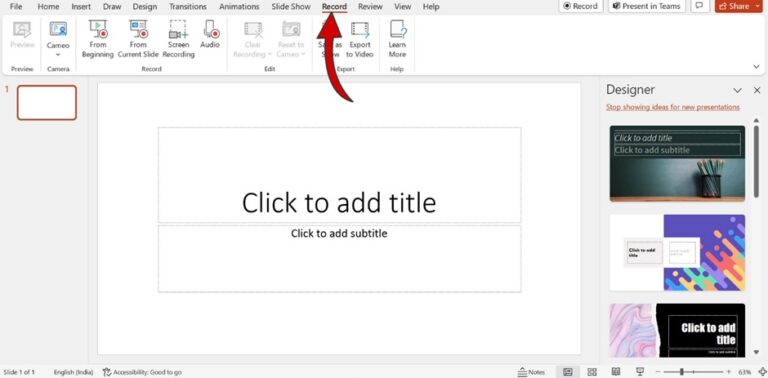
Step 3: Choose the option “Screen Recording”.
Step 4: A small Recording pane will appear. And ask you to select the screen area to record.
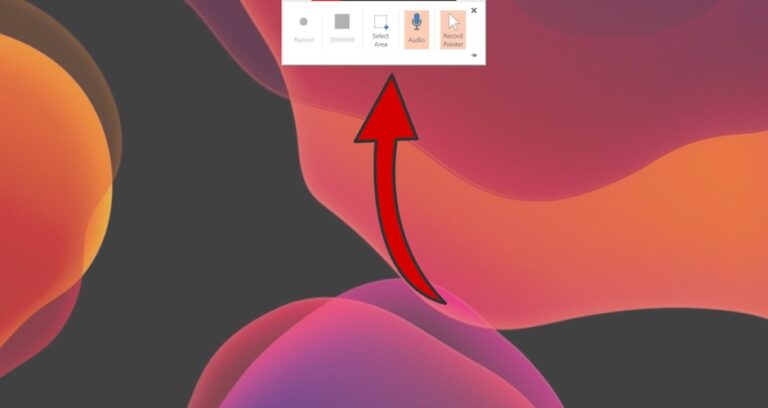
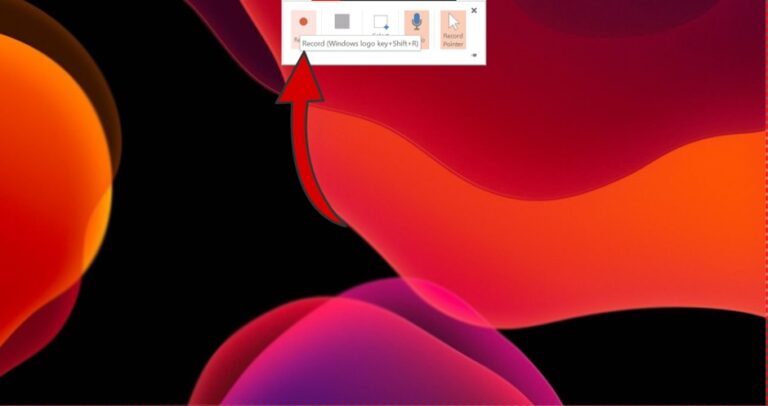
Step 5: Select the screen area and click on “Record”.
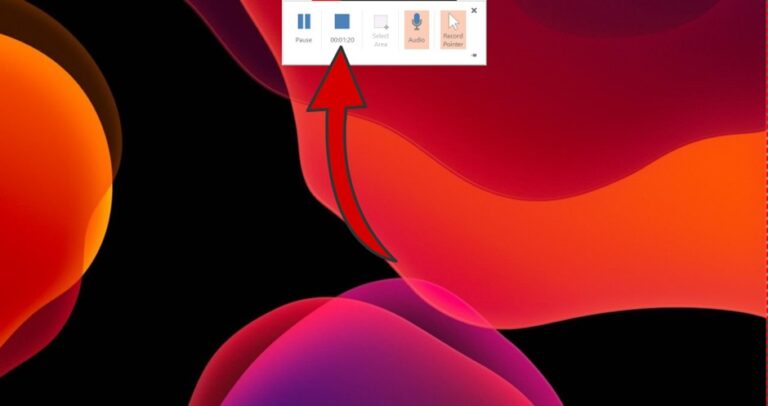
Step 6: Click the square Stop button when you have completed walking through the tutorial video quality or demo. The recording will stop and preview within PowerPoint.
Step 7: The video will appear in your PowerPoint slide.
PowerPoint makes it easy to record professional, full-motion video tutorials and demonstrations directly within the app! Amazingly, Microsoft includes robust tools free with Windows and Office suites.
Use PowerPoint to create:
- Step-by-step software tutorials
- Engaging in video lessons and lectures
- Smooth product demos and presentations
- Training videos for class or work
Unlike Snipping Tool, PowerPoint records smooth-flowing video ideal for demonstrations requiring significant motion. And it automatically includes narration audio captured from your microphone as you talk through steps.
PowerPoint saves footage right within your presentation file. So it’s easy to go back and edit or tweak videos anytime. Insert new slides to add voiceovers or breaks between segments effortlessly. This flexibility makes it a powerful tool for DIY video creators.
For best results, take advantage of the features in the Recording pane:
- Pause – Temporarily stop recording to switch apps or insert voiceovers
- Start New Recording – Create multiple videos, then stitch them together nicely
- Insert Slide – Add new slides to incorporate voiceovers or scene changes
- Edit Slides – Trim and polish individual slide recordings
With PowerPoint doing the heavy lifting, you can focus creativity on producing engaging, professional tutorials and videos!
Pro Tip: For best results, use the Recording pane toolbar to pause, insert slides, and stitch together multiple recording segments. This expands creative possibilities.
PowerPoint harnesses capabilities you never knew were lurking in this common office app. Use it as a secret weapon for effortlessly crafting all kinds of creative videos. Let your ingenuity run wild!
Use a Third-Party Screen Recording Tool
You can use many third-party screen recording tools to record your screen in Windows 11. Some of the most popular ones are:
- Fraps
- Bandicam
- OBS Studio
- QuickTime Player
To use a third-party screen recorder, download and install it, then run it. The steps to record your screen vary depending on the tool you use.
Conclusion
As you can see, Windows 11 offers easy built-in screen recording – no third-party apps required! The methods above enable capturing desktop activity to share or create tutorials.
I recommend the Xbox Game Bar for quick game captures. Use the Snipping Tool for short video snips. Take advantage of PowerPoint for polished, flowing video tutorials and presentations.
Hopefully, you feel empowered to record video on Windows 11 for any needs! Let your creativity run free, making tutorials, gaming videos, and more!
Frequently Asked Questions (FAQs)
Here are answers to some common questions about screen recording on Windows 11:
Q1 How do I record internal computer audio?
To capture system audio like music, alerts, game sounds, and other audio coming from your computer while screen recording, enable the Record audio option in Xbox Game Bar settings under the Captures tab or check the box in Snipping Tool before starting your recording. PowerPoint automatically detects and includes all internal audio playing on your computer as you screen record windows for video tutorials or demonstrations.
Q2 Can I edit screen recordings?
Yes, PowerPoint’s built-in video editing tools make it easy to trim, cut, and polish recordings after capturing without needing third-party software. You can remove unwanted sections, stitch segments together, insert slides, and export a refined final video. Otherwise, recordings save as standard MP4, MOV, or AVI files, which you can import into free advanced video editing software like Shotcut, OpenShot, or DaVinci Resolve for more robust slicing, transitions, effects, annotations, and professional grading.
Q3 What video format do built-in recorders use?
By default, the Xbox Game Bar saves screen recording video captures as MP4 files for convenient sharing and playback. Snipping Tool records using high-quality MPEG-4 video format. PowerPoint lets you export finished recordings as common formats like MP4, MOV, AVI, WMV, or even animated GIFs, picking the file type that best meets your playback needs.
Q4 Where are screen recordings saved on my PC?
Windows 11 automatically stores recorded desktop videos from Xbox Game Bar, Snipping Tool, or PowerPoint Presenter in your main Videos > Captures folder. But you can customize the save location used within each recording tool’s settings menu if desired, choosing another hard drive location or external storage for storing substantial game footage or lengthy video tutorials.
Q5 Does screen recording impact PC performance?
Yes, recording your screen utilizes extra CPU, GPU, memory, and storage resources, which may mildly impact gaming speeds, fps rates, or application performance. Try closing other programs and browsers first to maximize available system resources for smoother recordings. Enable Game Mode on laptops to temporarily optimize Windows for demanding gameplay recording. Or consider upgrading to a desktop rig with beefier specs tailored for gaming and streaming simultaneously.
