I will reveal how to turn off Sticky Keys in Windows 11 and why it matters for uninterrupted gaming and productivity. As someone who’s spent years helping users customize their Windows experience, I can tell you that understanding how to manage accessibility features like Sticky Keys is one of the most effective ways to prevent frustrating interruptions during intensive keyboard use.
Whether you’re looking to stop those annoying popups while gaming, configuring a workstation for maximum productivity, or customizing accessibility features for specific users, this guide provides all the necessary solutions. I’ll walk you through adjusting Windows Settings, modifying Control Panel options, editing Registry keys, and even using PowerShell for more advanced control for Sticky keys.
Struggling with Bluetooth connectivity in Windows 11? For a detailed walkthrough on enabling Bluetooth connections in Windows 11, complete with screenshots and step-by-step instructions, visit my comprehensive guide How to turn on Bluetooth in Windows 11
Table of Contents
Understanding Sticky Keys in Windows 11
What Are Sticky Keys?
Sticky Keys is an accessibility feature in Windows 11 that allows users to press keyboard shortcuts one key at a time rather than press multiple keys simultaneously. This feature primarily serves users with physical limitations who might find it difficult or impossible to hold down multiple keys simultaneously.
When Sticky Keys is activated, you can press modifier keys like Ctrl, Alt, Shift, or the Windows key, and they’ll remain active until you press the next key. For instance, instead of pressing Ctrl+C together to copy something, you can press Ctrl, release it, and then press C.
Think of Sticky Keys as a helpful assistant that holds down your modifier keys for you. This can be incredibly valuable for users with dexterity challenges, one-handed typists, or those who experience pain when performing certain finger combinations.
How Sticky Keys Functions in Windows 11
In Windows 11, Microsoft has maintained the core functionality of Sticky Keys while updating its integration with the new operating system design. When enabled, Sticky Keys works across all applications and programs, including the desktop, file explorer, browsers, and even games.
The feature operates in two primary modes:
- Standard Mode: When you press a modifier key, it remains active for the next keypress only.
- Lock Mode: By pressing a modifier key twice in succession, you can “lock” it in the active state until you press it again to unlock it.
What makes Sticky Keys particularly noticeable is its activation method. By default, Windows 11 enables you to turn on Sticky Keys by pressing the Shift key five times in rapid succession. This quick-access method is designed to make the feature readily available to those who need it without navigating through menus. Still, it’s also the reason many users encounter Sticky Keys unexpectedly.
Common Scenarios When Users Want to Disable Sticky Keys
While Sticky Keys serves an important accessibility purpose, there are several common scenarios where users might want to turn off this feature:
Gaming Sessions: Many games require rapid, repeated pressing of the Shift key for actions like sprinting or dodging. This can inadvertently trigger the Sticky Keys prompt, interrupting gameplay at critical moments.
Intensive Keyboard Work: If you’re typing quickly or using keyboard shortcuts frequently, you might accidentally press Shift five times, prompting the Sticky Keys dialog to appear.
Shared Computers: In environments where computers are shared, such as libraries or labs, you might want to disable Sticky Keys to prevent confusion for other users unfamiliar with the feature.
Performance Optimization: Some users turn off all non-essential features to maximize system performance, particularly on older hardware running Windows 11.
Personal Preference: Many users who don’t need the accessibility feature prefer to have it turned off to avoid unexpected popups.
Method 1: Turning Off Sticky Keys Through Windows 11 Settings
Windows 11 offers a centralized Settings app with comprehensive control over accessibility features, including Sticky Keys. This method is ideal for users who want to permanently change how Sticky Keys functions on their system. The Windows 11 Settings approach gives you more granular control than simply responding to the popup dialog.
Accessing Windows 11 Accessibility Settings
- Click the “Start” button; this opens the Windows 11 Start menu with your pinned apps and recommendations.
- Click the “Settings” app icon in the pinned apps section or the alphabetical list after clicking “All apps.” The Settings icon resembles a gear and provides access to all system configuration options.

- Click the “Accessibility” option in the left sidebar of the Settings window. This category contains all accessibility-related features and options for users with different needs.

- Click the “Keyboard” option under the Accessibility settings. This section contains all keyboard-related accessibility features and controls, including Sticky Keys, Filter Keys, and Toggle Keys.

Disabling Sticky Keys Feature Completely
- Check the “Sticky, Filter and Toggle Keys” section on the keyboard accessibility settings page. This section contains controls for the Sticky Keys, Filter Keys and Toggle Keys feature and related options.

- Set the main “Sticky Keys” toggle switch to the “Off” position to completely disable the feature on your system.

Turning off Only the Keyboard Shortcut
If you want to keep Sticky Keys available but prevent accidental activation, you can turn off just the keyboard shortcut:
- Click the “Sticky Keys” section on the keyboard accessibility settings page to expand it. This section contains controls specifically for the Sticky Keys feature and related options.

- Toggle the “Keyboard shortcut for Sticky Keys” option to the “Off” position under the Sticky Keys section. This prevents the five-time Shift key press from activating Sticky Keys while keeping the feature available through settings for users who need it.

Method 2: Using Control Panel to Disable Sticky Keys
While Windows 11 emphasizes the modern Settings app, the classic Control Panel still exists and offers additional configuration options for accessibility features like Sticky Keys. Some users prefer the Control Panel interface for its comprehensive set of options and familiar layout. This method is beneficial if you need access to legacy settings or are more comfortable with the traditional Windows interface.
Accessing the Control Panel in Windows 11
- Click the “Start” button on your taskbar or press the Windows key on your keyboard. This opens the Start menu where you can access search functionality.
- Type “Control Panel” in the search field. As you type, Windows will display matching results, with Control Panel typically appearing at the top of the list.

- Click the “Control Panel” app result that appears. This launches the classic Control Panel interface with all its configuration options.
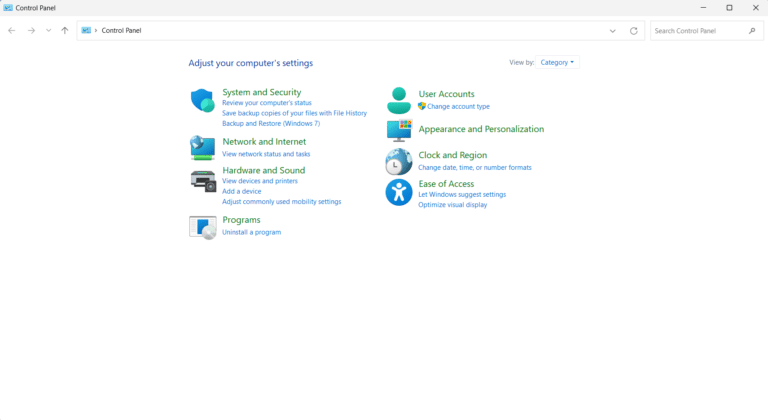
Navigating to Ease of Access Center in Control Panel
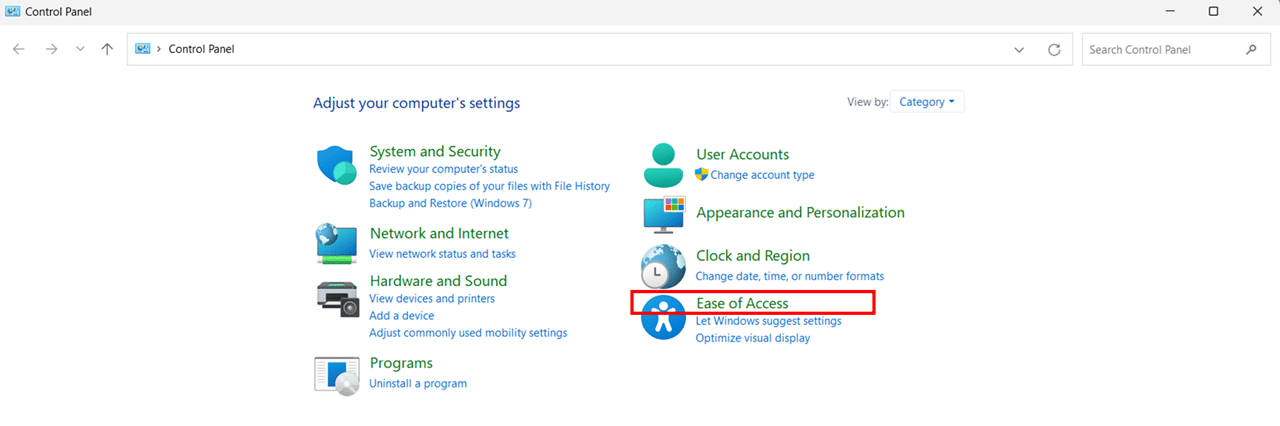
- Click the “View by” dropdown in the top-right corner of the Control Panel window and select “Category” if it’s not already selected. This organizes Control Panel items into logical categories for easier navigation.
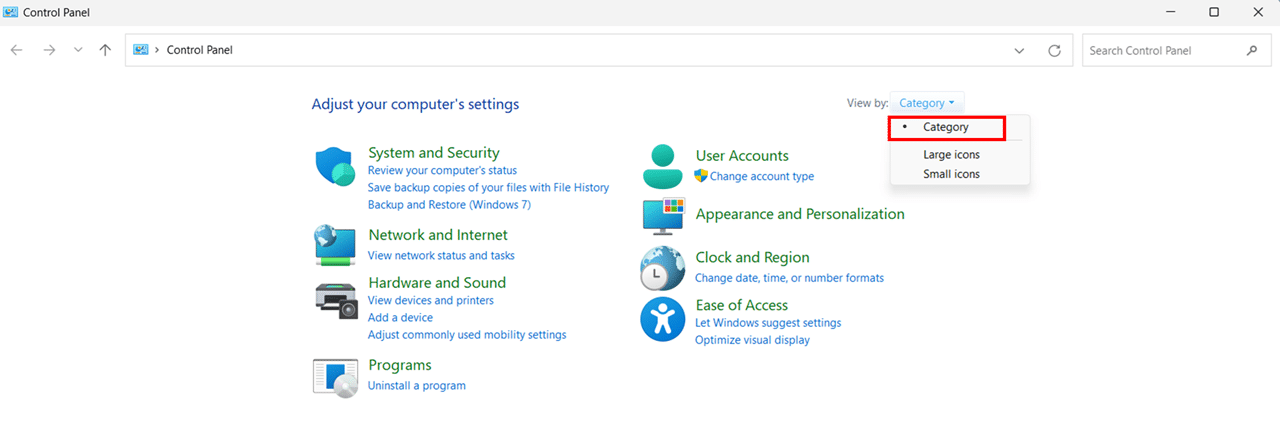
- Click on “Ease of Access” in the Control Panel home screen. This category contains accessibility-related settings designed to make Windows easier to use for people with various needs.
- Click the “Ease of Access Center” link on the Ease of Access page. This opens the central hub for accessibility settings
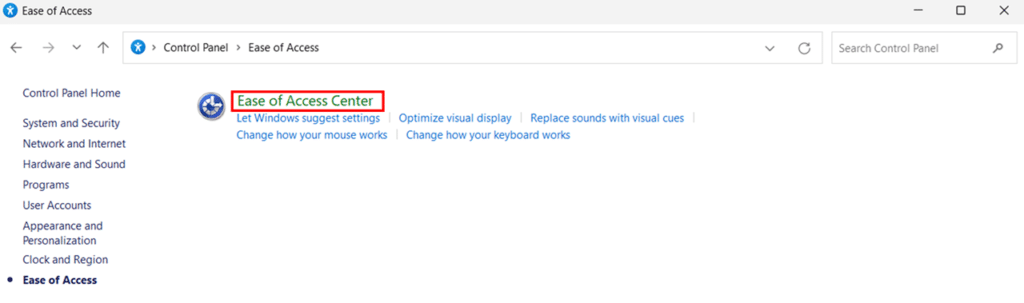
- Click on “Make the keyboard easier to use” in the Ease of Access Center. This option contains all keyboard accessibility settings, including Sticky Keys, Filter Keys, and Toggle Keys options.

Turn Off Sticky Keys in the Control Panel
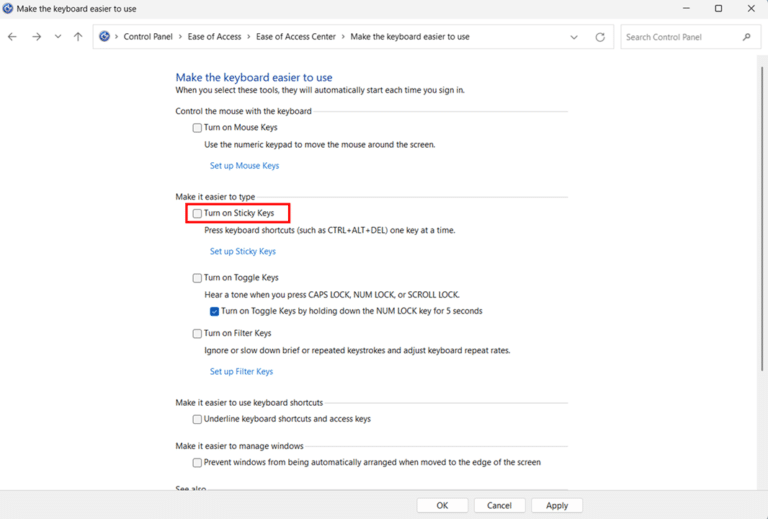
- Uncheck the “Turn on Sticky Keys” checkbox at the top of the Sticky Keys section. This will turn off the Sticky Keys feature completely
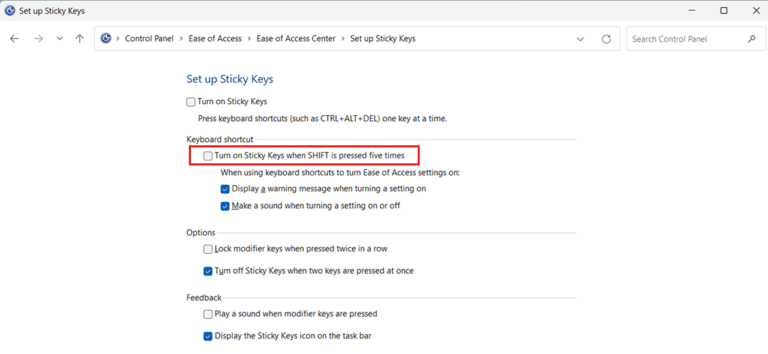
- Click on the “Set up Sticky Keys” link in the “Make it easier to type” section. This opens a dedicated configuration page with more detailed options for Sticky Keys.
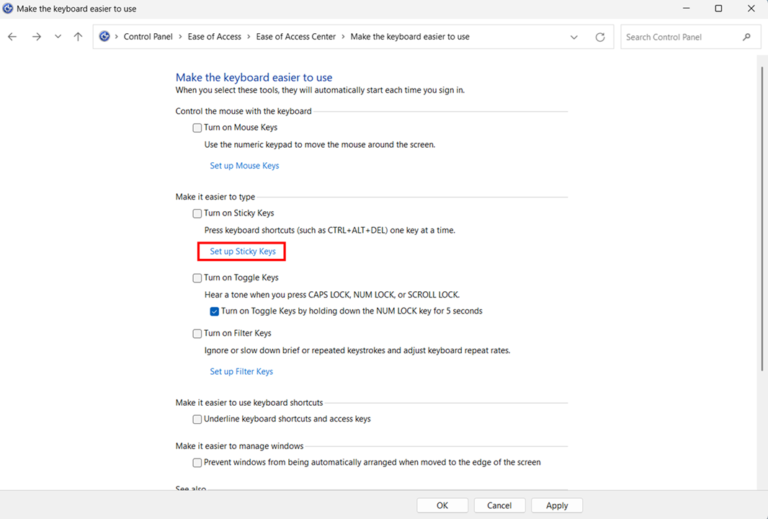
- Uncheck the “Turn on Sticky Keys when SHIFT is pressed five times” checkbox below the main option. This prevents the five-time Shift key press from activating Sticky Keys
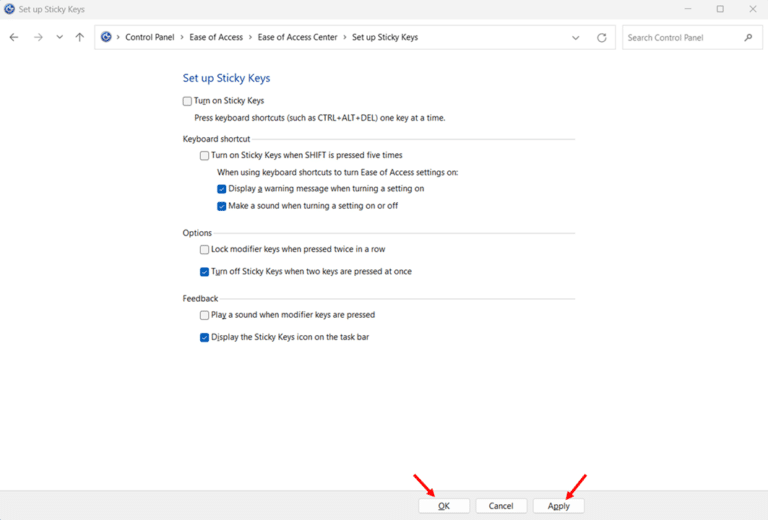
- Click the “Apply” button at the bottom of the dialog to implement your changes without closing the dialog. This allows you to confirm your settings are working before finalizing.
- Click the “OK” button to save your settings and close the dialog. This returns you to the previous screen while keeping your new settings in effect.
Using Run Dialog for Direct Access to Open Control Panel
For power users who prefer even quicker access to these settings:
- Press the “Windows key + R” on your keyboard to open the Run dialog. This provides direct command access to Windows features without navigating through menus.
- Type “control access.cpl” in the text field of the Run dialog. This command opens the the Control Panel.
- Press “Enter” or click “OK” to execute the command. The Control Panel will open.
Using the Control Panel to disable Sticky Keys provides access to some legacy options that might not be as prominently featured in the Windows 11 Settings app. This approach can be beneficial for users who need fine-grained control over accessibility features or who are more familiar with the traditional Windows interface.
Method 3: Registry Modifications to Prevent Sticky Keys
Modifying the Windows Registry offers a powerful solution for users seeking the most permanent and thorough way to disable Sticky Keys in Windows 11. The Registry is a database that stores configuration settings and options for the Windows operating system. By directly modifying registry keys related to Sticky Keys, you can turn off the feature at a system level that persists across updates and user sessions.
Important Warning About Registry Modifications
Before proceeding with any registry modifications, it’s crucial to understand that improper changes to the Registry can cause system instability or even prevent Windows from booting correctly. This method should be cautiously approached and recommended for advanced users comfortable with system-level changes.
Creating a Registry Backup
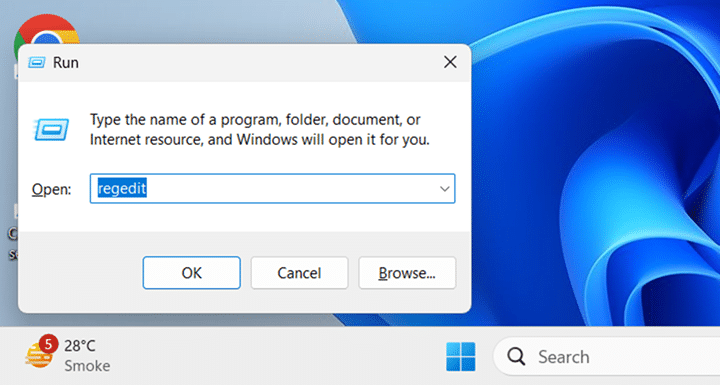
- Press the “Windows key + R” on your keyboard to open the Run dialog. This provides a quick way to launch programs by name without navigating through menus.
- Type “regedit” in the text field of the Run dialog and press Enter or click “OK.” This launches the Registry Editor, the tool used to view and modify the Windows Registry database.
- Click the “File” menu in the top menu bar of the Registry Editor window, then select “Export” from the dropdown menu. This opens a dialog to save a backup of your Registry in case you need to restore it later.
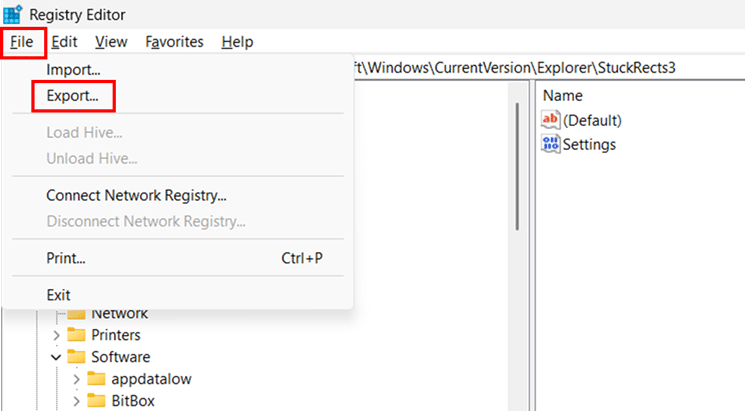
- Enter a descriptive name like “Registry_Backup_Before_Sticky_Keys_Change” in the file name field and select a location where the registry backup to be save. This helps identify the backup file’s purpose if you need to restore it.

- Ensure the “Export range” is set to “All” at the bottom of the dialog and click the “Save” button. This creates a complete backup of your Registry that can be imported if problems occur.

Modifying Registry Values to Turn Off Sticky Keys
- Click in the address bar near the top of the Registry Editor window and type “HKEY_CURRENT_USER\Control Panel\Accessibility\StickyKeys”, then press Enter. This takes you directly to the registry location containing Sticky Keys settings.
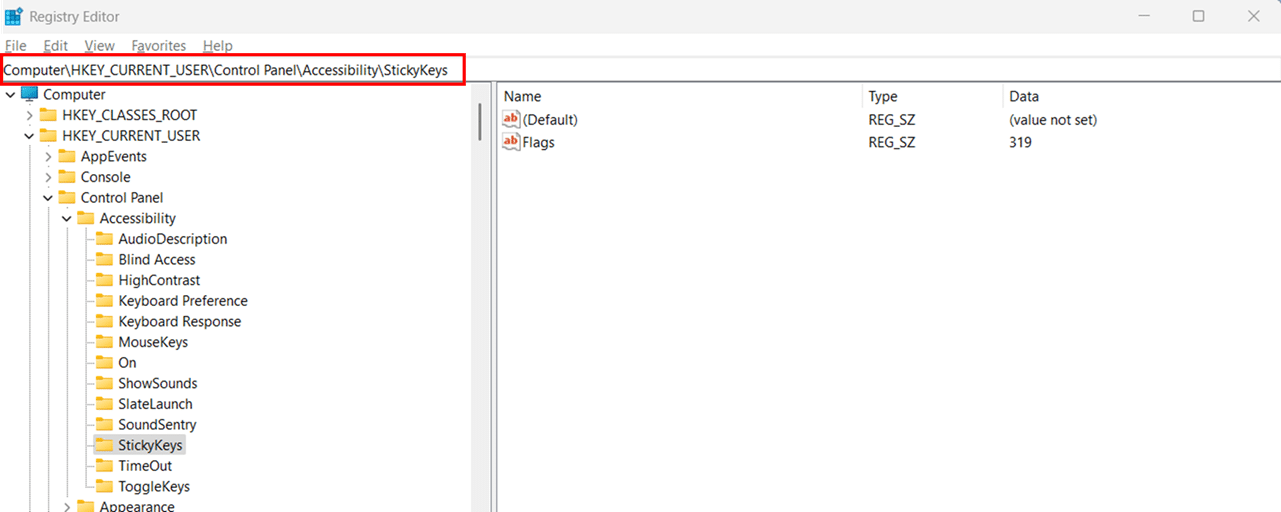
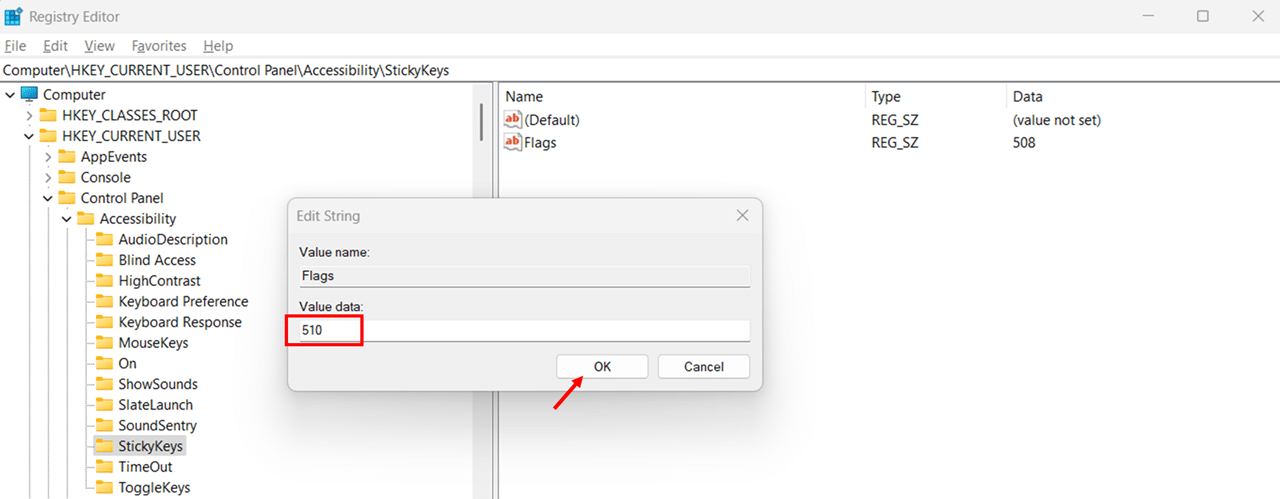
- Double-click the “Flags” value in the right pane of the Registry Editor. This opens a dialog box
- Change the value data from whatever it currently is to “510” and click “OK.” This disables the Sticky Key.
Modifying Registry Values to Disable Sticky Keys and Keyboard shortcut for Sticky Keys
- Click in the address bar near the top of the Registry Editor window and type “HKEY_CURRENT_USER\Control Panel\Accessibility\StickyKeys”, then press Enter. This takes you directly to the registry location containing Sticky Keys settings.
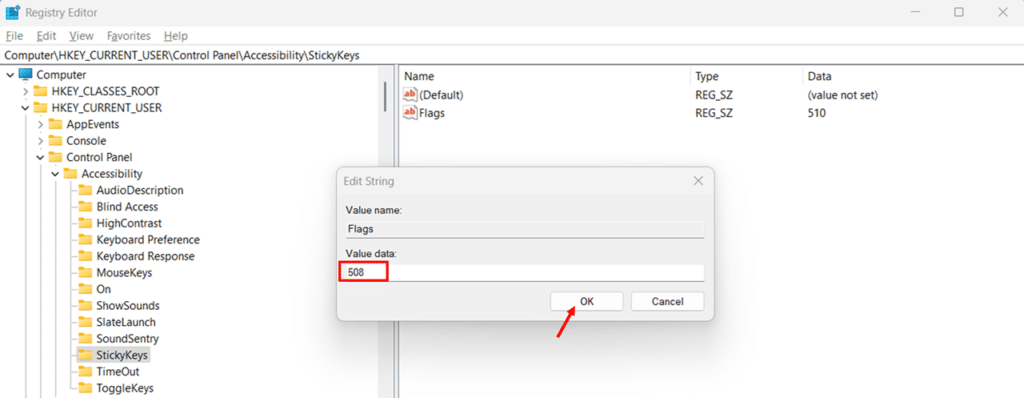
- Double-click the “Flags” value in the right pane of the Registry Editor. This opens a dialog box
- Change the value data from whatever it currently is to “508” and click “OK.” This disables the Sticky Key.
Method 4: Turn Off Sticky Keys Using PowerShell Scripts
Turn Off Sticky Keys Only Using PowerShell Script
- Click the “Start” button on your taskbar or press the Windows key on your keyboard. This opens the Start menu where you can access search functionality.
- Type “PowerShell” in the search field. As you type, Windows will display matching results.

- Look for “Windows PowerShell” or “PowerShell” in the results list. Instead of clicking directly, right-click on it to reveal additional options.
- Select “Run as administrator” from the context menu that appears. This launches PowerShell with elevated privileges.

- Click “Yes” when the User Account Control (UAC) prompt appears asking if you want to allow the app to make changes to your device. This security measure ensures only authorized users can run programs with administrative rights.
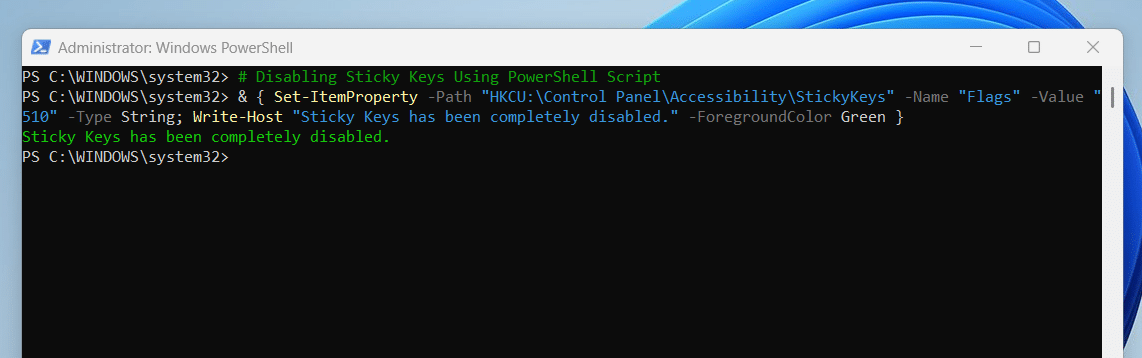
- Copy the following PowerShell script, which sets the Sticky Keys registry flag value to 0, completely turning off all Sticky Keys functionality:
# Disabling Sticky Keys Using PowerShell Script
& { Set-ItemProperty -Path “HKCU:\Control Panel\Accessibility\StickyKeys” -Name “Flags” -Value “510” -Type String; Write-Host “Sticky Keys has been completely disabled.” -ForegroundColor Green }
- Right-click in the PowerShell window to paste the script and press “Enter” to execute it. This modifies the Registry to turn off all Sticky Keys functionality, including the feature and keyboard shortcut.
Turn Off Sticky Keys and Keyboard Shortcut Using PowerShell Script
- This launches PowerShell with elevated privileges. Please follow the steps 1-5 in above section “Turn Off Sticky Keys only Using PowerShell Script”
- Copy the following PowerShell script, which sets the Sticky Keys registry flag value to 504, turning off both the Sticky Keys feature and its keyboard shortcut while keeping other settings enabled:
# Disabling Sticky Keys and Its Keyboard Shortcut Using PowerShell Script
& { Set-ItemProperty -Path “HKCU:\Control Panel\Accessibility\StickyKeys” -Name “Flags” -Value “504” -Type String; Write-Host “Sticky Keys feature and keyboard shortcut have been disabled while preserving other settings.” -ForegroundColor Green }
- Right-click in the PowerShell window to paste the script and press “Enter” to execute it. This modifies the registry value to turn off Sticky Keys functionality and the keyboard shortcut while keeping other settings intact.

- Press the “Shift” key five times quickly to test your changes. No Sticky Keys dialog should appear, confirming the keyboard shortcut has been disabled.
Conclusion
Taking control of Sticky Keys in Windows 11 gives you a smoother, interruption-free computing experience, whether gaming or working on important projects. I’ve shown you multiple approaches—from using the Windows Settings app to modifying registry values and running PowerShell scripts—each offering different levels of permanence and customization to fit your needs.
I recommend starting with the Windows Settings method if you’re looking for a straightforward solution or using the PowerShell script if you want a quick, thorough fix. Remember that while these accessibility features might seem annoying when triggered accidentally, they serve an important purpose for users with physical limitations. By customizing rather than disabling them, you create the perfect balance between functionality and convenience for your unique computing style.
Having trouble changing file formats in Windows 11? Check out my detailed guide on How to Change File Type in Windows 11 with multiple methods, complete with screenshots and step-by-step instructions.
Frequently Asked Questions (FAQs)
No, disabling Sticky Keys won’t affect other accessibility features. Windows 11 treats each accessibility feature as a separate component with individual settings. Filter Keys, Toggle Keys, Mouse Keys, Narrator, Magnifier, and other accessibility tools will continue to function according to their own settings. However, using the PowerShell script provided in Method 5 also disables Toggle Keys and Filter Keys for a comprehensive solution. If you need those features, modify the script to remove those specific commands.
Under normal circumstances, your Sticky Keys settings should persist through standard Windows updates. Settings modified through the Windows Settings app are stored in your user profile and are preserved during updates. Registry modifications are also typically maintained. However, major feature updates (like the annual Windows updates) sometimes reset certain accessibility settings as part of the upgrade process. Additionally, group policies might override your settings after updates if you’re using a managed computer in a work or school environment. After significant updates, it’s worth checking your Sticky Keys settings to ensure they remain configured to your preferences.
The PowerShell script provided in Method 4 offers the quickest and most thorough solution. Copy and paste it into an Administrator PowerShell window for immediate results that persist across sessions.
Several factors can prevent Sticky Keys settings from saving properly:
- Insufficient permissions: If your Windows user account lacks administrator privileges, it may be unable to modify certain system settings permanently.
- Corrupted user profile: If your Windows user profile has become corrupted, settings changes might not persist.
- Group Policy restrictions: In corporate or educational environments, system administrators may use Group Policy to enforce specific accessibility settings.
- Fast Startup interference: Windows Fast Startup feature can sometimes prevent certain settings from being properly saved between sessions.
- System file corruption: If critical Windows system files are damaged, settings may not save correctly.
To resolve these issues, try running Settings as administrator, create a new user profile to test if the issue persists, disable Fast Startup, or use the Registry or PowerShell methods, which modify system settings directly at a lower level.
The popup appears when you press Shift five times quickly, which often happens accidentally during gaming when using Shift for actions like sprinting or dodging.