I have been using Windows since the Windows XP days and have used all its different ways to create shortcuts. Especially with the new Windows 11, there are so many ways to create these desktop shortcuts for your essential files, folders, programs, and even websites, which can be overwhelming.
In this comprehensive guide, we’ll explore Windows 11 desktop shortcuts and multiple methods for creating them, from the classic drag-and-drop technique to more advanced context menu options.
But we won’t stop there. We will also go over expert tips for managing shortcuts and keeping your desktop organized and clutter-free.
Let’s dive in and transform your Windows 11 experience!
For more understanding on Windows 11 you can refer tips and tricks for Windows 11 and What’s new in Windows 11
Table of Contents
Method 1. Create Shortcut Using Desktop Context Menu
This is the classic method for creating shortcuts in Windows. It uses the in-built option to create a new shortcut via the desktop context menu. This is how it’s done.
This method is especially beneficial for:
- Creating shortcuts to items that might not be easily accessible through the Start Menu or File Explorer
- Setting up shortcuts to websites or network locations
- Creating shortcuts with custom commands or parameters
One significant advantage of this method is its flexibility. It allows for the creation of shortcuts to items that might not be easily accessible through other means, such as system tools, network locations, or specific file types.
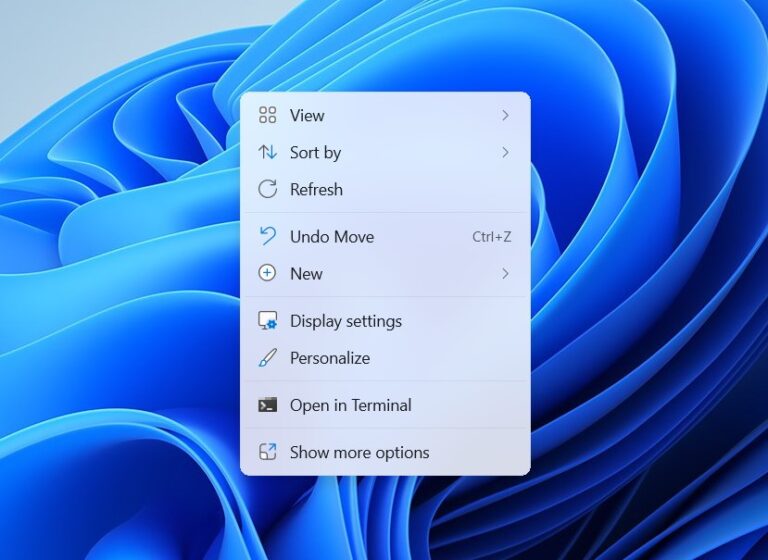
- To access the context menu, right-click an empty space on your desktop. The area you click on must be free from icons or other shortcuts.
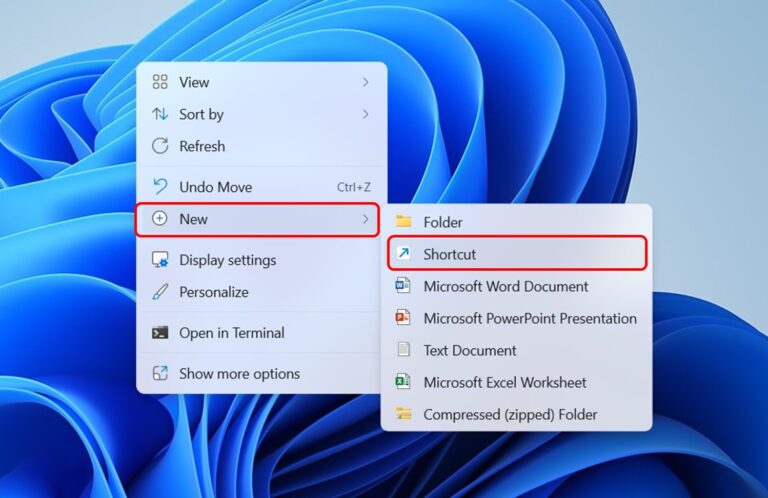
- In the context menu, click on the “New” option followed by the “Shortcut” option from the following sub-menu that appears. This will launch the Windows Shortcut Wizard, a handy tool to help you easily create shortcuts.
- After the Shortcut Wizard opens, you’ll see a dialog box asking you to specify the item’s location for which you want to create a shortcut. This is where you tell Windows what to launch upon opening the shortcut.
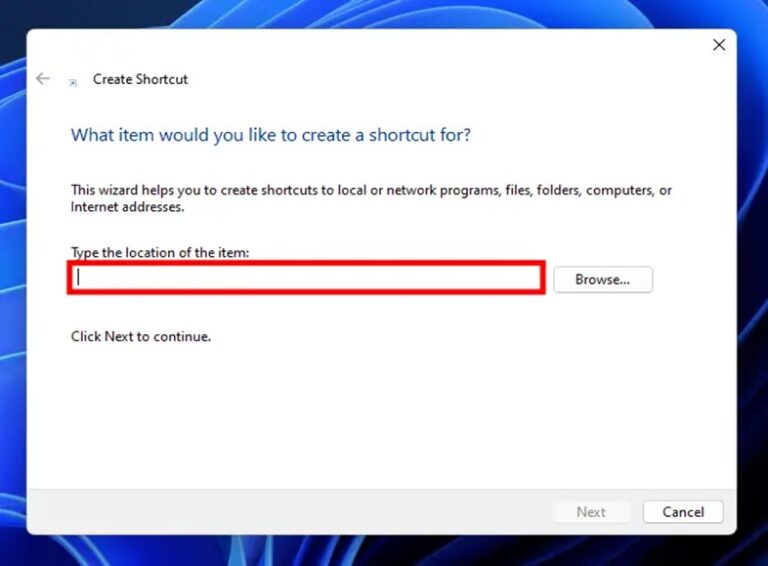
- Most Windows users reading this guide are probably unsure of the exact path of the file. Hence, I recommend hitting the “Browse” button. This will open a file explorer popup window, allowing you to navigate to the item you want to link your shortcut to.

If you have the specific location of the file, folder, or program, you can enter it directly into the text field. An instance of this would be entering “C:\Program Files\AppName\App.exe” to make a shortcut for a particular program.

- After choosing a location, click the “Next” button to move on to the last part.

- Now, you’ll be asked to name your desktop shortcut. Enter the shortcut’s name in the text field and click the “Finish” button. This will create the shortcut on your desktop where you right-clicked on your desktop.

Method 2. Create Shortcut Using Start Menu
Browsing the application to create its shortcut via the context menu can be hectic. Since accessing the apps from the Start Menu is extremely simple, why not directly use it to make the desktop shortcut for your required app? Yes! This is very possible, and here’s how.
Note: The list of apps seen in the Start Menu also includes the shortcuts of the apps available on your PC. It’s just that they are not on the desktop but on the Start Menu. We will use these Start Menu shortcuts to create the desktop shortcuts.
This method is especially handy for:
- Popular applications that appear in your Start Menu
- Microsoft Store apps that might not have a traditional file location
- Quickly creating shortcuts without navigating through File Explorer
One thing to note is that some system applications or Microsoft Store apps might not allow shortcut creation through this method. In such cases, you may need to explore alternative approaches or use the pin to Start or taskbar options as workarounds.
- Click the Start button as a Windows logo icon on the taskbar.
Once the Start Menu is open, click on the “all apps” button to see a complete list of all the apps installed on your PC.

Tip: You can also press the Windows key on your keyboard to open the Start Menu quickly.
- Scroll through the list of installed programs and locate the app whose shortcut you want to create.

Tip: You can also use the search bar at the top of the Start Menu to find the app more quickly.
- After locating the program, right-click on it to bring up a context menu. In the context menu, select “More.” Then click on the “Open file location” option.

This action will open a File Explorer window and take you directly to the location where the program’s shortcut used by the Start Menu is stored. This step is crucial because the Start Menu doesn’t allow you to create a desktop shortcut directly.
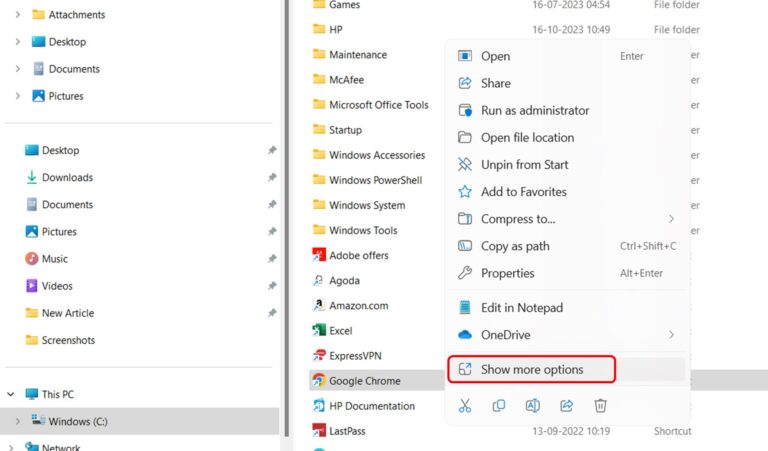
- In the File Explorer window, right-click on the shortcut to bring up the context menu. Windows 11 often hides some options in a secondary menu. Click “Show more options” to reveal additional commands.
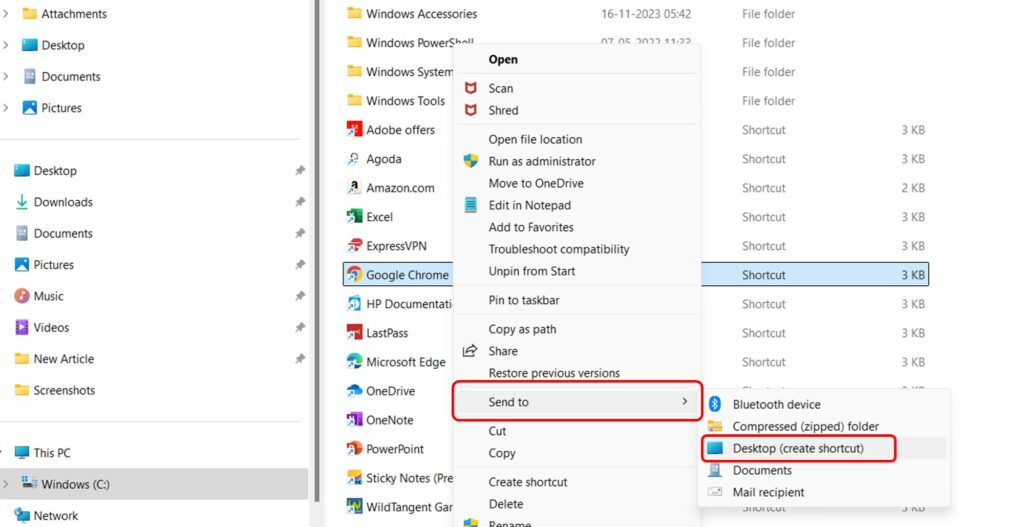
- In the extended context menu, hover over the “Send to” option, and then select “Desktop (create shortcut).” This will immediately create a shortcut for the program on your desktop.
The Start Menu is particularly useful when creating shortcuts for applications not readily accessible through File Explorer.
Method 3. Create a Shortcut Using the File Location
This method is my favorite as it requires the fewest steps to create a shortcut. The only requirement is that you know the location of the file, folder, or program’s executable file (.exe). If your situation meets this requirement, follow the below steps to quickly create the desktop shortcut.
This method is particularly advantageous in several scenarios:
- When you need to create a shortcut to a specific file within a program (e.g., a frequently accessed Excel spreadsheet)
- For creating shortcuts to items in system folders or other locations not easily accessible through the Start menu
- When you want to ensure you’re creating a shortcut to the correct version of a program (in case multiple versions are installed)
By mastering this method, you’ll have even more flexibility in creating shortcuts in Windows 11. This will allow you to optimize your workflow regardless of where your important files and applications are stored on your system.
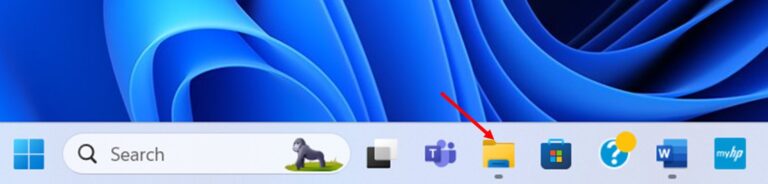
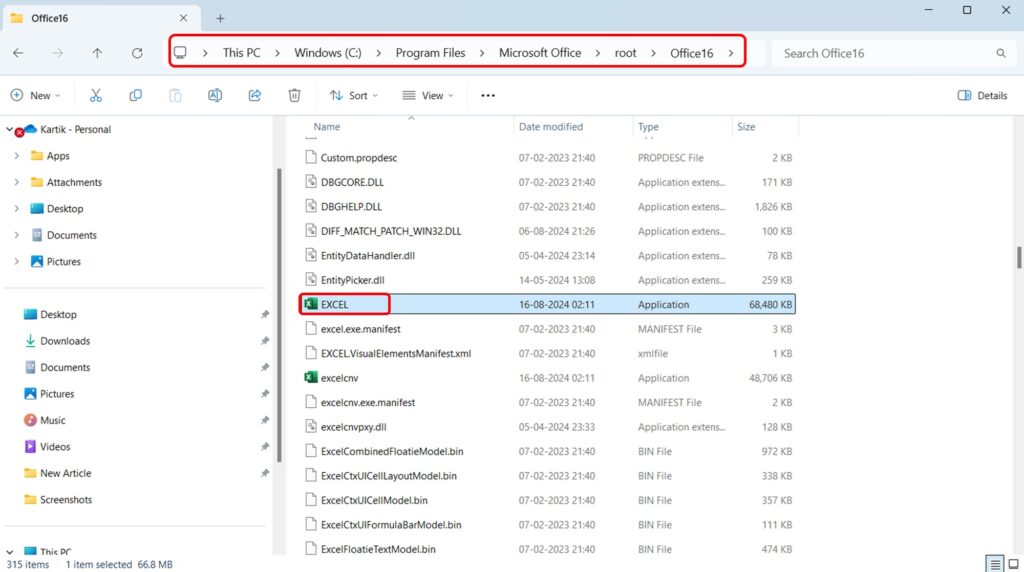
- First, launch the File Explorer on your PC by clicking on its icon on the taskbar, or press the Windows + E on your keyboard and locate the file, folder, or program you want to create a shortcut for.
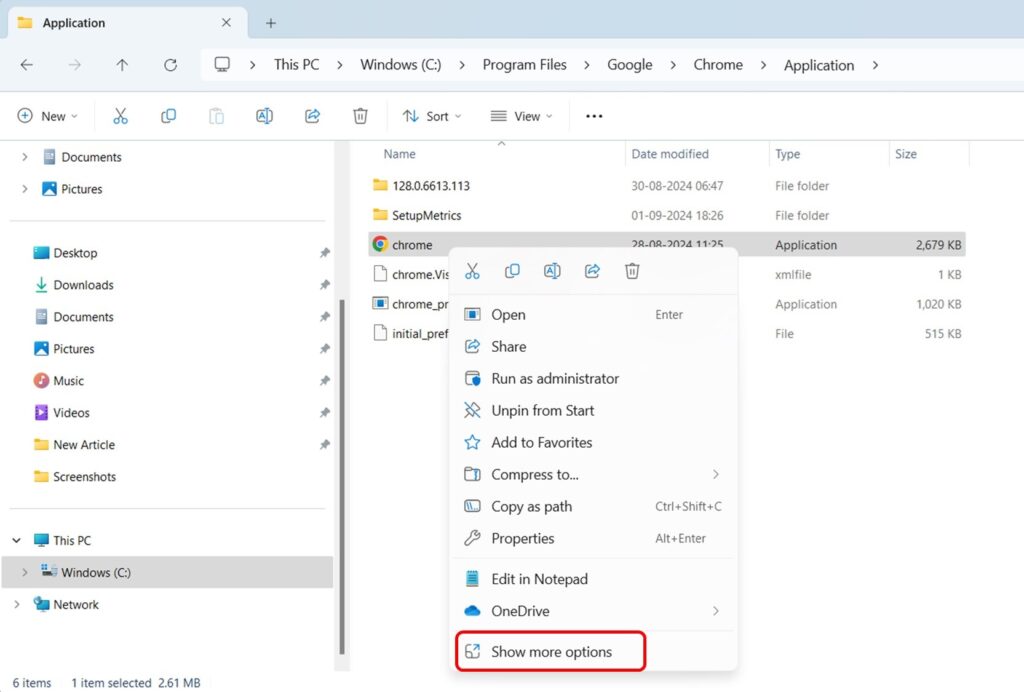
- For example, if you’re going to make a shortcut for a program, look under This PC > Local Disk (C:) > Program Files or Program Files (x86).

- Once you’ve located the file, folder, or program, right-click on it and select “Show more options” from the context menu that appears. This will open the whole context menu.
- Hover your mouse over the “Send to” option and click on the “Desktop (create shortcut)” option.
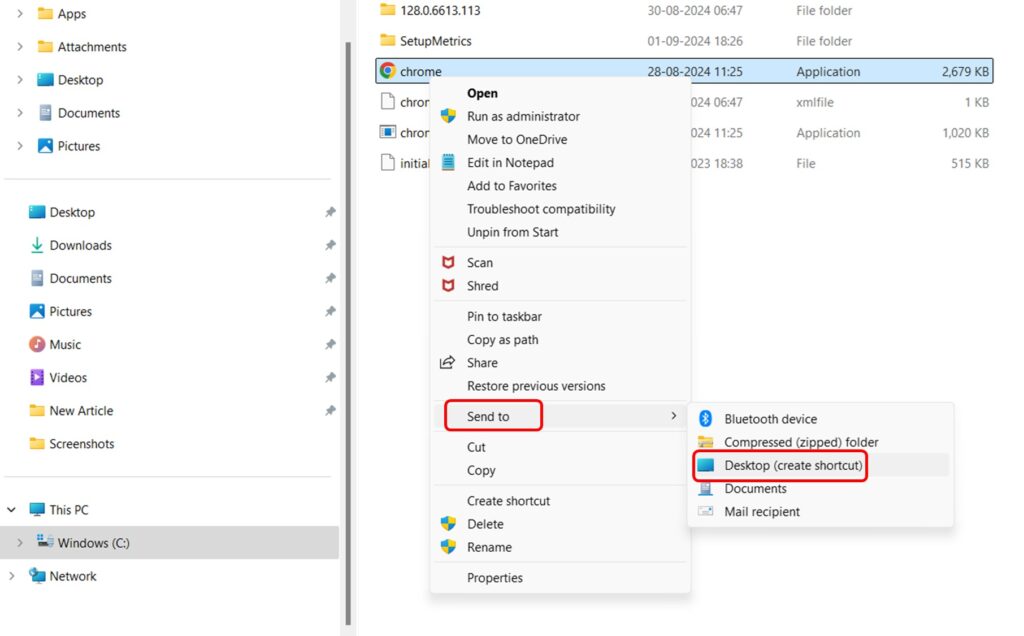
Instantly, a shortcut will appear on your desktop, using the same name as the original file, folder, or program.
Method 4. Create Website Shortcuts
If you frequently visit certain websites, creating a desktop shortcut can save you valuable time by giving you quick, one-click access directly from your desktop.
You’ll need to use your web browser to create a website shortcut. The process typically involves dragging the icon from the address bar (often called a favicon) to your desktop. Alternatively, some browsers offer shortcut creation options through their menu systems.
This method is particularly useful for:
- Frequently visited websites like email services, social media platforms, or work-related tools
- Web applications that you use regularly, such as online document editors or project management tools
- Creating a clean, organized desktop interface for web-centric workflows
It’s important to note that the exact process might vary slightly depending on your browser (Chrome, Firefox, Edge, etc.). Still, the general principle remains the same across all modern browsers.
Expert Tips:
- For a more app-like experience, consider using your browser’s “Create shortcut” option (if available) and choose to open the website in its own window without browser controls.
- Use meaningful names for your web shortcuts to distinguish them from regular application shortcuts easily.
- Group related web shortcuts into folders on your desktop for better organization (e.g., “Work Tools,” “Social Media,” “News Sites,” etc.).
- If you use multiple browsers, you can modify the shortcut’s target property to specify which browser opens a particular web shortcut.
Creating website shortcuts can transform your desktop into a personalized launchpad for your online activities, seamlessly blending your local and web-based workflows in Windows 11.
Here’s how to create a desktop shortcut in Microsoft Edge
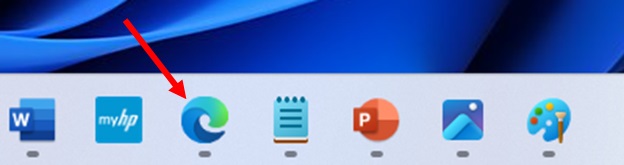
- Launch the Microsoft Edge web browser on your computer. You can do this by clicking the Edge icon on your taskbar, Start Menu, or searching for it using the Windows search bar.
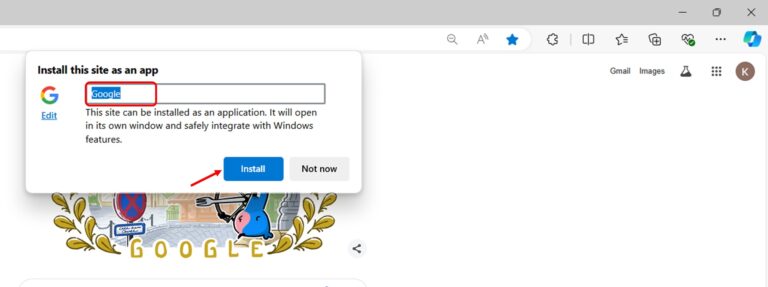
- Once Microsoft Edge is open, enter the URL of the website in the address bar you want to create a shortcut for, and press Enter. For illustration, I have put “www.google.com” in the address bar.

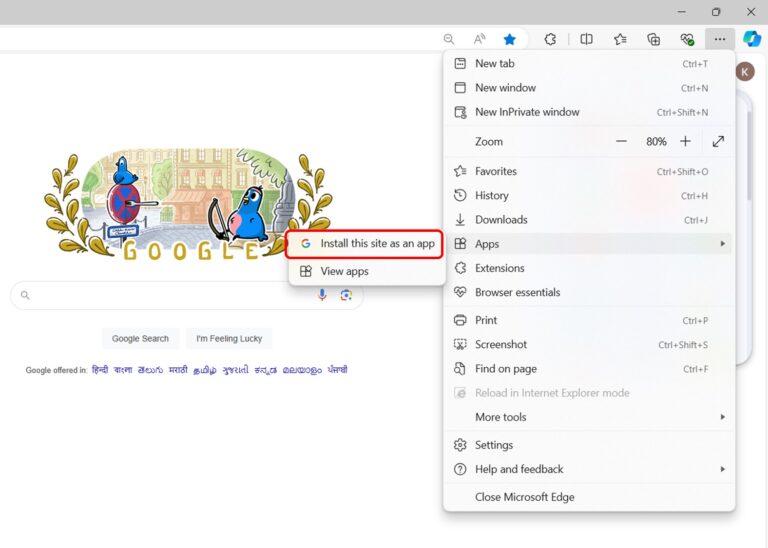
- In the upper-right corner of the Microsoft Edge window, click on the horizontal three dots (aka Horizontal Ellipsis).

- You’ll see a list of options. Click on the Apps option and select the “Install this site as a web app” option.
- You can keep the default site name or change and then click on Install
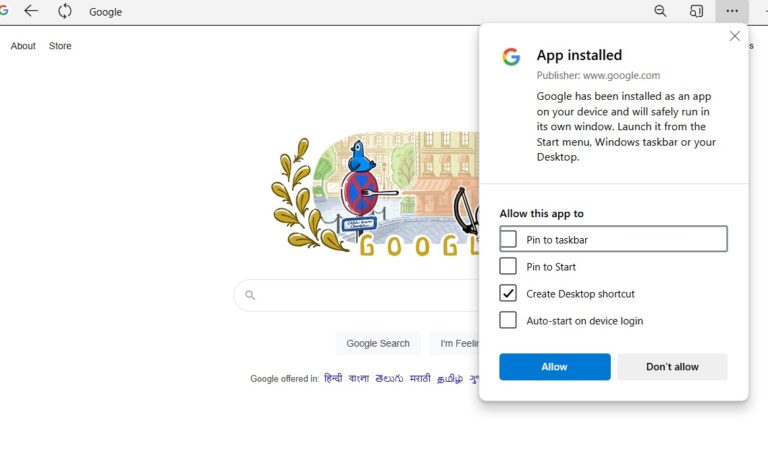
- Once the web app is installed, Edge will automatically open the web app and ask you to allow this app to:
- Pin to Taskbar
- Pin to Start
- Create Desktop Shortcut
- Auto-start on device login
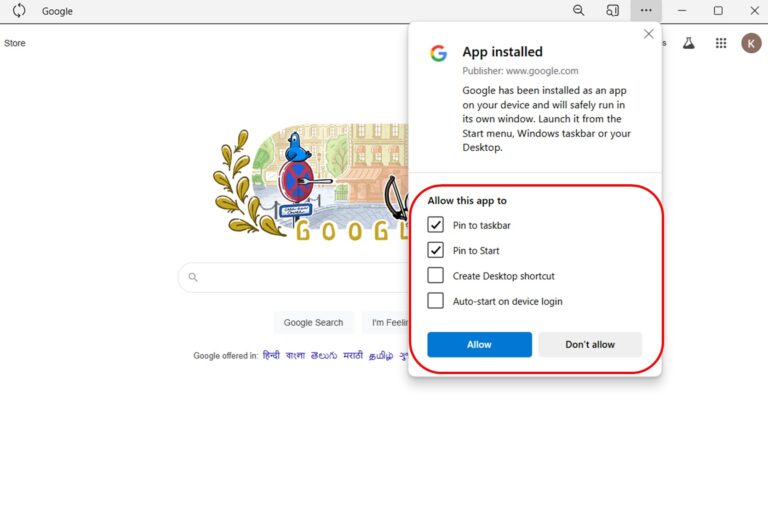
- Simply, tickmark the Create Desktop icon and click on the Allow button. You can also tick other options alongside the desktop icon one as per your choice.
This will create a desktop shortcut for your website.

Method 5. Drag and Drop to Create a Desktop Shortcut
The drag-and-drop method for creating shortcuts in Windows 11 is perhaps one of the most intuitive and user-friendly approaches. Do you remember the previous method of creating a shortcut using the file explorer? This drag-and-drop one is even quicker and works for all files, folders, and programs.
There are two main ways to use this method:
- For applications: You can drag icons directly from the Start Menu to your desktop.
- For files and folders: You can drag items from File Explorer to your desktop.
This method is particularly useful for:
- Quickly creating shortcuts for items you can see in your Start Menu or File Explorer
- Visually organizing your desktop as you create shortcuts
- Creating shortcuts for files and folders from various locations on your computer
Here’s how you can do it step by step.
- First, find the file, folder, or program you want to create a shortcut.
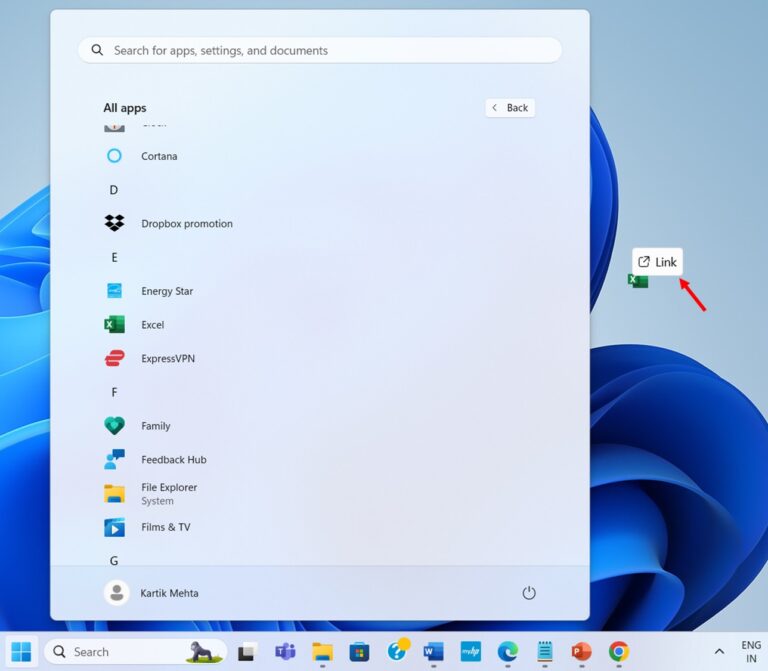
If you’re looking for a program, you can use the Start Menu to get it quickly. Click the Start button (or press the Windows key) to open the Start Menu, click on “all apps,” and scroll through your list of installed programs.

If you are looking for a specific file or folder, open File Explorer by clicking the folder icon in your taskbar or pressing Windows + E on your keyboard.
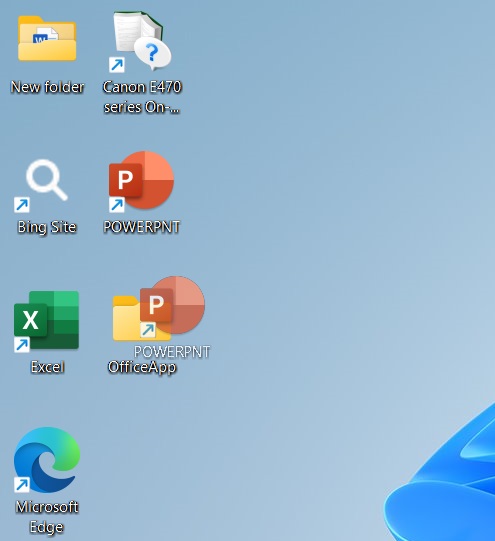
- Once you’ve located the item, left-click on it and hold down the mouse button. This action selects the item and prepares it for movement. While holding the mouse button, drag the item to an empty space on your desktop and release the click.
Tip: Make sure the File Explorer is not full screen; otherwise, you won’t be able to drop the item on the desktop.
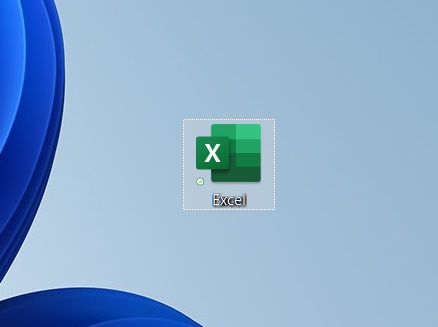
- After dropping the item on your desktop, you will see a new icon. That’s your shortcut. That’s how simple it is to make a desktop screenshot using drag-and-drop.
What Can You Shortcut on Desktop in Windows 11?
The shortcut functionality is one of the most helpful things one can have in an Operating System. It is so beneficial that you might be wondering if your specific kind of item can be linked to the desktop as a shortcut. To clear up this confusion, here’s a list of some commonly used things you can create shortcuts of.
- Programs and Applications: You can create shortcuts to your most-used programs or applications.
- Files and Folders: If you use some specific locations or files quite often, you can create their shortcuts right on the desktop. These can be your project folders or essential documents.
- Websites: As mentioned earlier, you can create shortcuts to your favorite or frequently used websites, allowing instant access without opening your browser first.
- System Functions: You can even create shortcuts for system functions, like shutting down or restarting your computer, adjusting volume settings, or opening specific system settings.
- Network Locations: For advanced users whose work revolves around accessing network drives or shared folders, Windows 11 allows the option to create for them as well.
- Cloud Storage: Cloud storages are used quite often nowadays, and Microsoft understands this, allowing you to create shortcuts for online storage like OneDrive, Google Drive, or Dropbox to quickly access your files stored online.
The possibilities are endless, and customizing your desktop with shortcuts can significantly improve your workflow and efficiency.
Tips for Managing Desktop Shortcuts in Windows 11
Even with careful management, users may occasionally encounter issues with their desktop shortcuts in Windows 11. Understanding how to troubleshoot these common problems can save time and frustration.
Automatically Organizing Shortcuts:
Windows 11 offers a convenient feature for automatically organizing desktop shortcuts, ideal for users who prefer a tidy workspace without constant manual arrangement. This functionality sorts icons based on various criteria such as name, size, item type, or date modified. When enabled, the system continuously maintains this order, automatically positioning new shortcuts in their appropriate places.
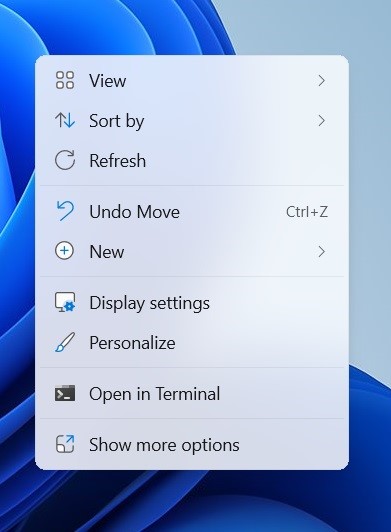
- Right-click on an empty area of the desktop

- Hover over “View” in the context menu. Click on “Auto arrange icons” to enable the feature

- To sort icons by specific criteria:
- Right-click on an empty area of the desktop again
- Hover over “Sort by” and Choose your preferred sorting method (Name, Size, Item type, Date modified)

Backing Up Your Desktop Layout:
Backing up the desktop layout is a wise precaution, especially for users who spend considerable time organizing their shortcuts. While Windows 11 doesn’t have a built-in feature specifically for this, users can manually copy their desktop contents to a safe location. Alternatively, creating a system restore point before making significant changes to the desktop layout can provide a fallback option.
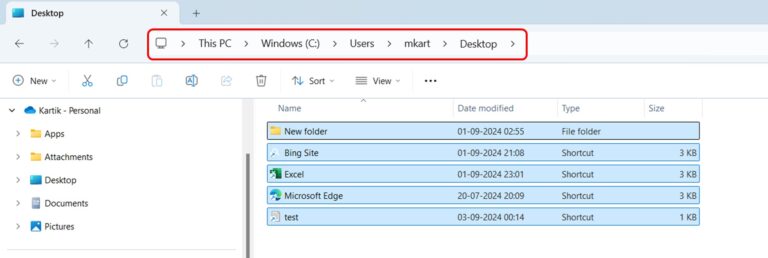
- Press Win + E to open File Explorer. Navigate to C:\Users[YourUsername]\Desktop
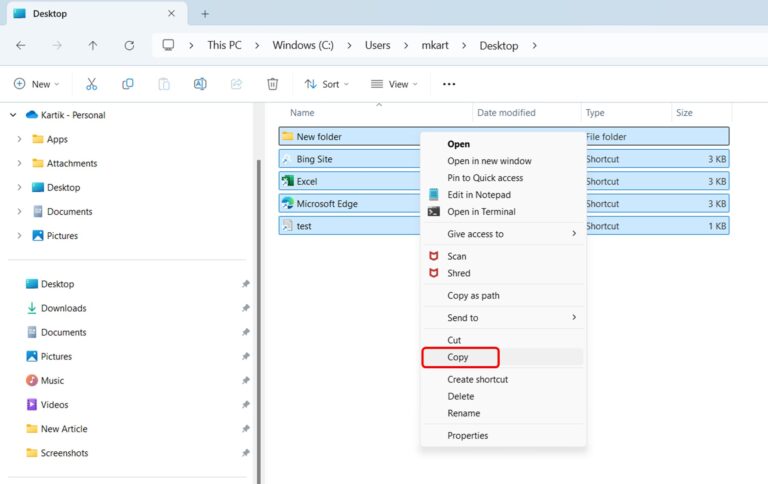
- Select all items (Ctrl + A), Right click and in the context menu that apears click Show more options

- In the new context menu that appears click on copy
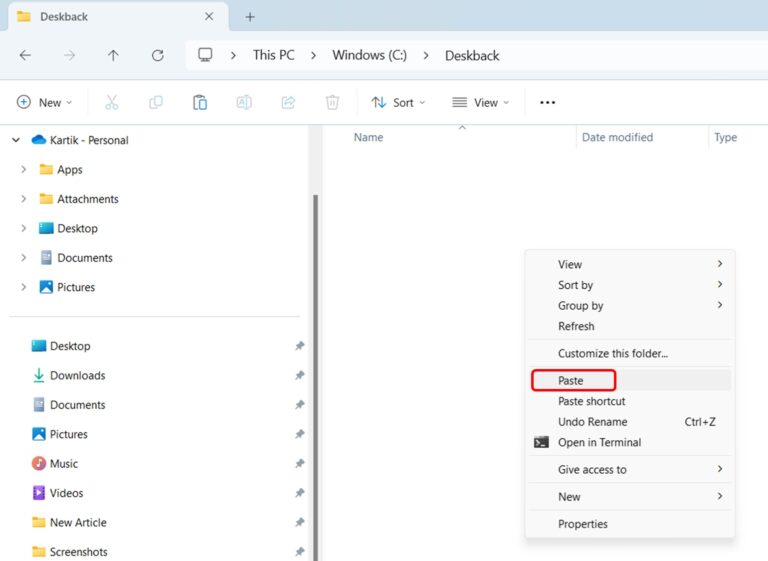
- Navigate to a backup location of your choice. Right click on the open space in file explorer. In the context menu that appears click on Show more options
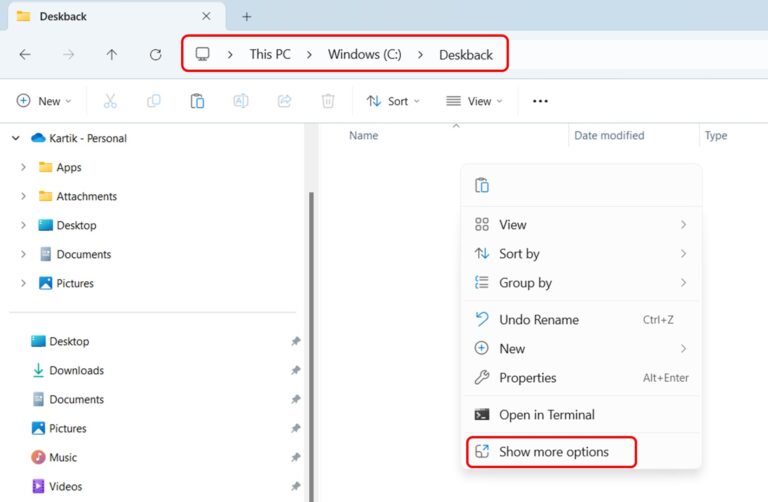
- In the new context menu that appears click on paste
Grouping Shortcuts into Folder:
Grouping shortcuts into folders is another effective management strategy. Users can create themed folders (e.g., “Work Tools,” “Entertainment,” “Utilities”) and move relevant shortcuts into these folders. This approach keeps the desktop tidy while still allowing for easy access to all shortcuts.
- Right-click on an empty area of the desktop. Select New and click on Folder
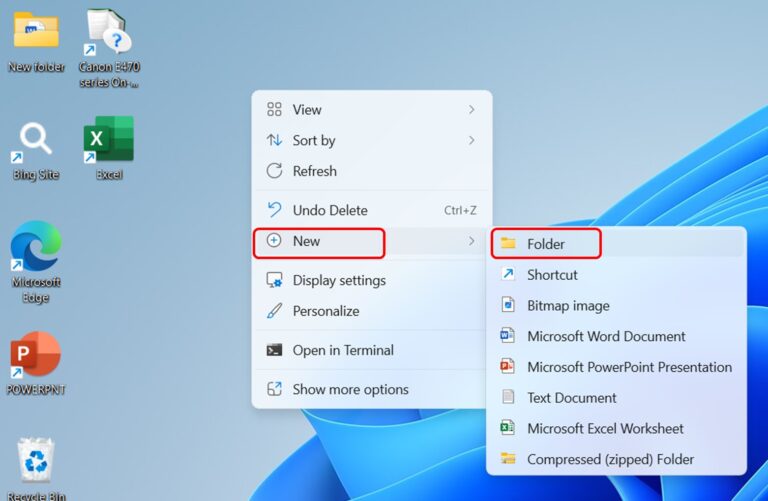
- Name the folder (e.g., “Work Apps,” “Utilities,” etc.)

- Drag and drop related shortcuts into the folder
Regular maintenance of shortcuts is essential to keep the desktop functional and up-to-date. Users should periodically review their shortcuts, removing any that are no longer needed or updating those that may have broken due to software updates or file relocations.
For users who prefer a minimalist desktop, Windows 11 allows hiding all desktop icons. This can be done by right-clicking on the desktop, selecting “View,” and then unchecking “Show
Keyboard Shortcuts:
For power users, keyboard shortcuts can significantly enhance desktop management. For example, pressing F5 or right-clicking and selecting “Refresh” can quickly update the desktop view, which is useful after making changes or if icons become misaligned.
- Right-click on a shortcut and select “Properties”

- In the Shortcut tab, click on the “Shortcut key” field

- Ctrl + Alt has to be press by default, you can then select simultaneously press desired key (e.g., Ctrl + Alt + E)

- Click “Apply” then “OK” to save the changes

Lastly, users should consider the strategic placement of shortcuts. Frequently used items can be placed in easily accessible areas of the desktop, such as corners or edges, while less used items can be grouped or placed in less prominent positions.
By implementing these tips, Windows 11 users can maintain an organized, efficient desktop that enhances productivity and provides a pleasant user experience. Remember, the key to effective shortcut management is regular maintenance and a system that aligns with individual work habits and preferences.
Conclusion
Having desktop shortcuts is a simple yet compelling way to enhance productivity, and Windows 11 offers numerous ways to create them. You can use Shortcut Wizard, the Start Menu, the File Explorer, the web browser, and whatnot to make all possible kinds of shortcuts. And since Windows is so versatile, this guide must also justify that versatility. I have explained all the ways in a highly detailed manner. Strategically place and manage shortcuts to streamline your Windows 11 workflow.
By mastering the creation, customization, and management of shortcuts in Windows 11, users are not just saving time – they’re crafting a more responsive, personalized, and efficient computing environment.
If you want to understand what is Windows 11 startup folder and how to manage the Windows 11 startup applications you can checkout my Essential guide on Windows 11 Startup Folder
Frequently Asked Questions (FAQs)
Yes, almost anything! You can create shortcuts for programs, files, folders, websites, and system functions.
Absolutely, you can customize the icon of any desktop shortcut to suit your preferences. Right-click on the shortcut and select Properties. In the Properties window, navigate to the Shortcut tab and click on Change Icon. Choose from a list of default icons, or browse your computer to select a custom icon of your choice.
Deleting a shortcut from your desktop is simple. Right-click on the shortcut you want to remove and select Delete. It does not delete the original file, program, or folder the shortcut points to. The original content remains safe and accessible in its original location.
Yes, you can create shortcuts to network locations, such as shared folders, network drives, or even cloud storage locations like OneDrive or Google Drive.
If you delete the original file, the shortcut will no longer function because it points to a file that no longer exists. When you attempt to open the shortcut, you’ll receive an error message indicating that the item has been moved or deleted.