Windows 11 was released on October 8, 2020. It’s the successor of Windows 10 and can be purchased and downloaded from Microsoft’s website. It brings freshness to the old Windows interface and makes it look new and exciting.
There are many new features and changes in Windows 11; the most noticeable change is the new Start menu, which is very different from the traditional Start menu. The new Start menu is a mix of the old Start menu and the Windows 8 Start screen and is meant to be more user-friendly and customizable.
Another new feature is the Action Center, a notification hub that collects all your notifications in one place. It’s similar to the Notification Center in iOS and Android.
The Windows 11 taskbar has also been revamped to include a new task view that lets you see all your open windows in one place. You can also create virtual desktops to organize your work.
Windows 11 Safe Mode offers a more intuitive and streamlined user interface, enhancing the user’s navigation experience in the recovery environment.
Windows 11 also includes a new web browser called Microsoft Edge. Edge is fundamentally different from Internet Explorer and is designed to be a modern and sleek web browser.
The power of Windows 11, sleek UI and easy-to-use interface will help you maximize productivity and gain optimum utility in your workflow. In this blog post, I will share some of the Windows 11 tips and tricks that you should know. These Windows 11 tips and tricks will help make your computing experience easier and more enjoyable. So without further ado, let’s get started!
Table of Contents
How To Record Screen in Windows 11
Windows 11 has several new features, one of which is the ability to record your screen. This is an excellent feature for anyone who wants to create tutorials or show off their gaming skills. Here’s how to record your screen in Windows 11.
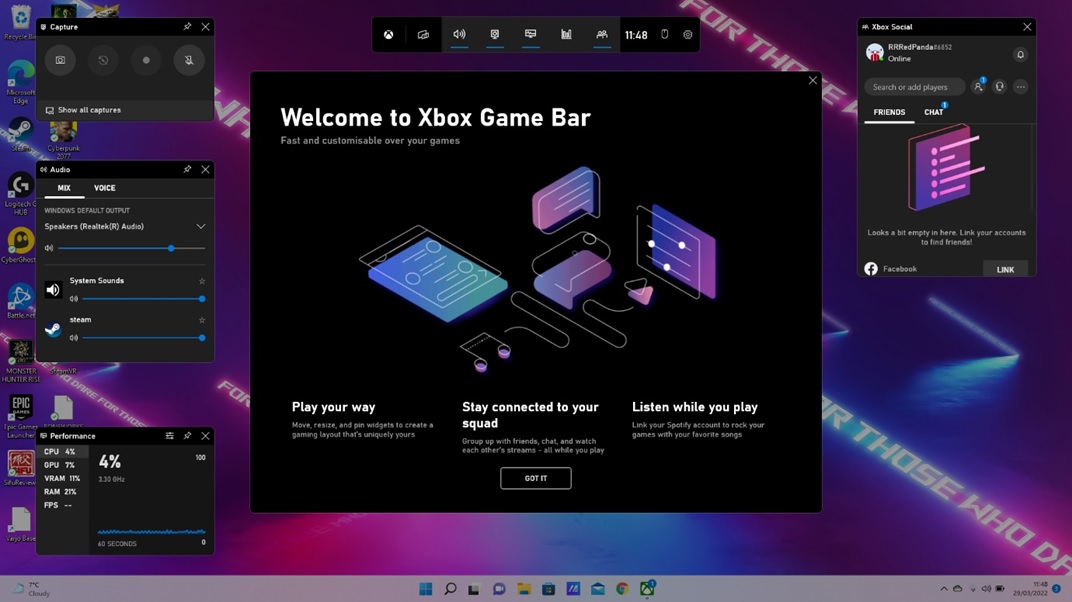
To record your screen in Windows 11, you first need to open the Game Bar. To do this, press the Windows key + G. Once the Game Bar appears, click the “Record” button.
Once you’ve clicked the “Record” button, you can choose which monitor you want to record. You can also choose whether you want to record the sound of your microphone and/or your system. Once you’ve selected that, click the “Start Recording” button.
Your screen will now be recorded. To stop recording, press the Windows key + G again and then click the “Stop recording” button. Your recorded video will be saved in the Videos folder in your Documents folder
For more options to record screen in windows 11 with detail steps refer How to Screen Record on Windows 11
How To Take Screenshot In Windows 11
If you want to take a screenshot in Windows 11, there are several ways to do it. For example, you can use the Snipping Tool, the Print Screen button, or the Windows + Shift + S key combination.
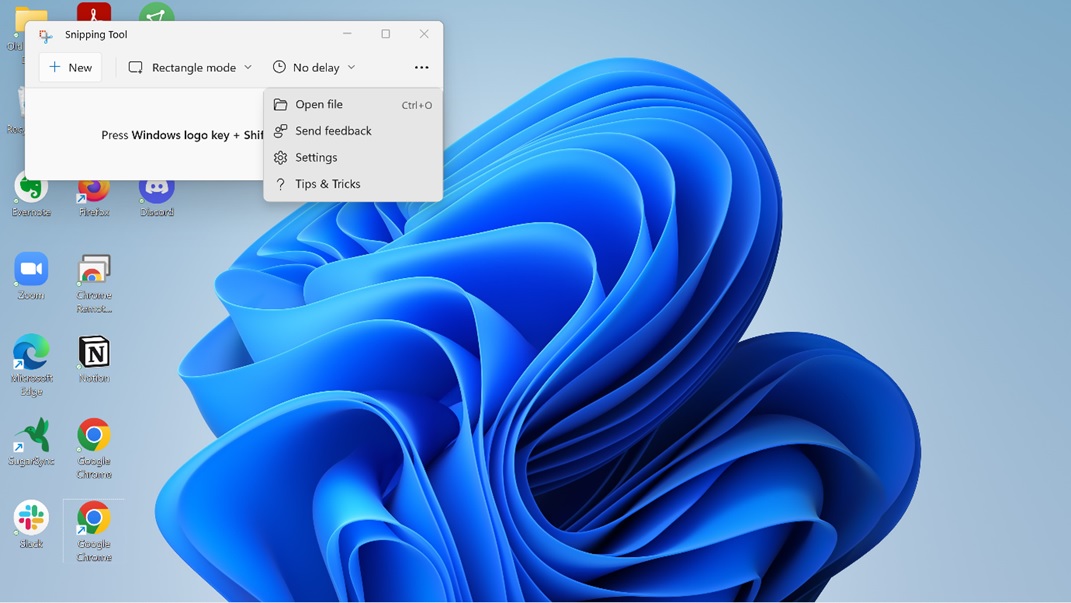
The Snipping Tool is a handy little utility that’s been included with Windows for a long time. It’s great for taking screenshots of specific areas of your screen, which you can annotate and save.
To use the Snipping Tool, open it from the Start menu and click the “New” button. You can choose between four snipping types: Freeform, Rectangle, Window, or Full Screen. Once you’ve chosen a snip type, you can use the mouse to select the area of your screen you want to capture.
The Print Screen button lets you quickly and easily take a screenshot of the entire screen. Just press the Print Screen button on your keyboard, and your screenshot will be saved to your clipboard. You can then paste it into an image editor like Paint or Photoshop and save it as a file.
The Windows + Shift + S key combination is a new feature in Windows 11 that lets you take a screenshot of a specific area of your screen and save it directly as a file without having to paste it into an image editor first.
To use this key combination, press the Windows key + Shift + S key simultaneously. Your screen will dim, and you can select the area of your screen you want to capture. Once you’ve selected the area, release the keys, and your screenshot will be saved as a file.
Whether you use the Snipping Tool, the Print Screen button, or the Windows + Shift + S keyboard shortcut, taking screenshots in Windows 11 is a breeze. Try one of these methods the next time you want to capture something on your screen.
For more options with detailed steps to take screenshot in windows 11 refer How to Take Screenshot in Windows 11
How To Install Android Apps on Windows 11
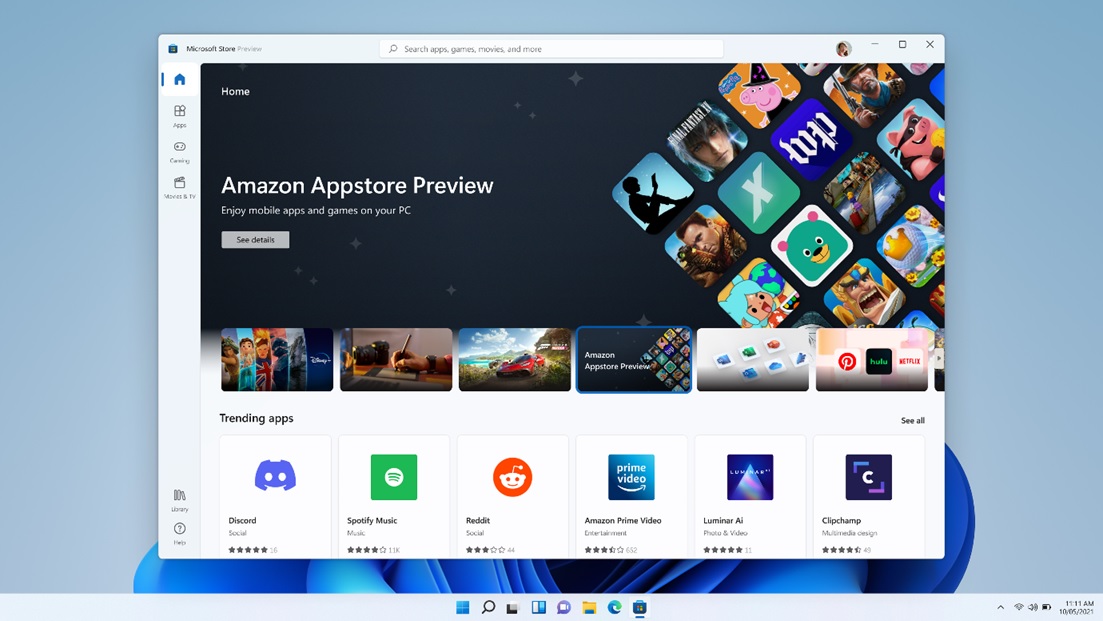
It’s now possible to install Android apps on Windows 11. This is made possible by the new Cross-Platform App Store, which was introduced with the Windows 11 operating system. With the Cross-Platform App Store, users can easily install Android apps on their Windows 11 devices.
First, you must go to the Cross-Platform App Store and sign in with your Microsoft account. Once you sign in, you’ll see the list of available apps. Next, select the app you want to install and click the “Install” button.
Next, you must launch the Android app on your Windows 11 device. To do this, go to the Start menu and click the “All Apps” button. Next, scroll down until you find the Android app you want to launch. Once you find it, click the “Launch” button.
And that’s it! You’ve successfully installed an Android app on your Windows 11 device.
If the android applications are installed, but you do not want them anymore, you can refer to How to Uninstall Apps and Programs on Windows 11.
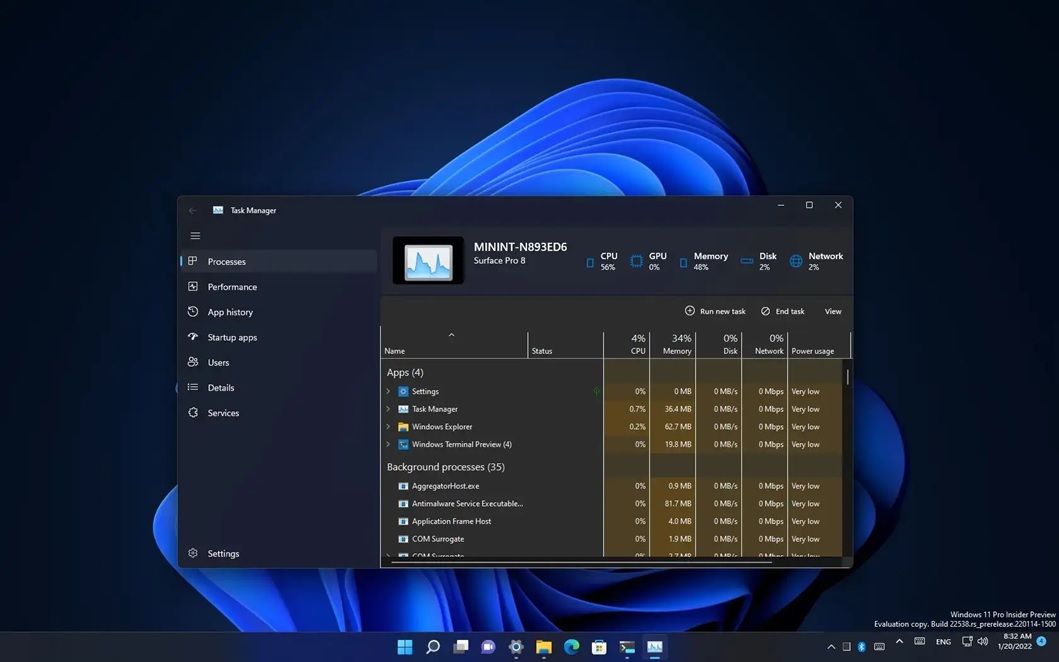
How To Open Task Manager in Windows 11
There are several ways to open Task Manager in Windows 11.
The easiest way to access Task Manager in Windows is through keyboard shortcuts. Press Ctrl+Alt Del and click “Task manager.”
Another way to access the task manager is by right-clicking on your Start button and then clicking “Task Manager”.
If you’re using a tablet or touchscreen device, you can swipe inward from the right edge of the screen and then tap Search. Type “Task Manager” in the search box and tap or click on the Task Manager result.
For more detailed steps and more options for opening Task Manager please refer How to Open Task Manager in Windows 11
With Task Manager open, you can see a list of running programs and processes. If one isn’t responding properly or otherwise causing problems for your system operation, then just select it from this window to close the task that might be holding things up!
How To Change Time Format in Windows 11
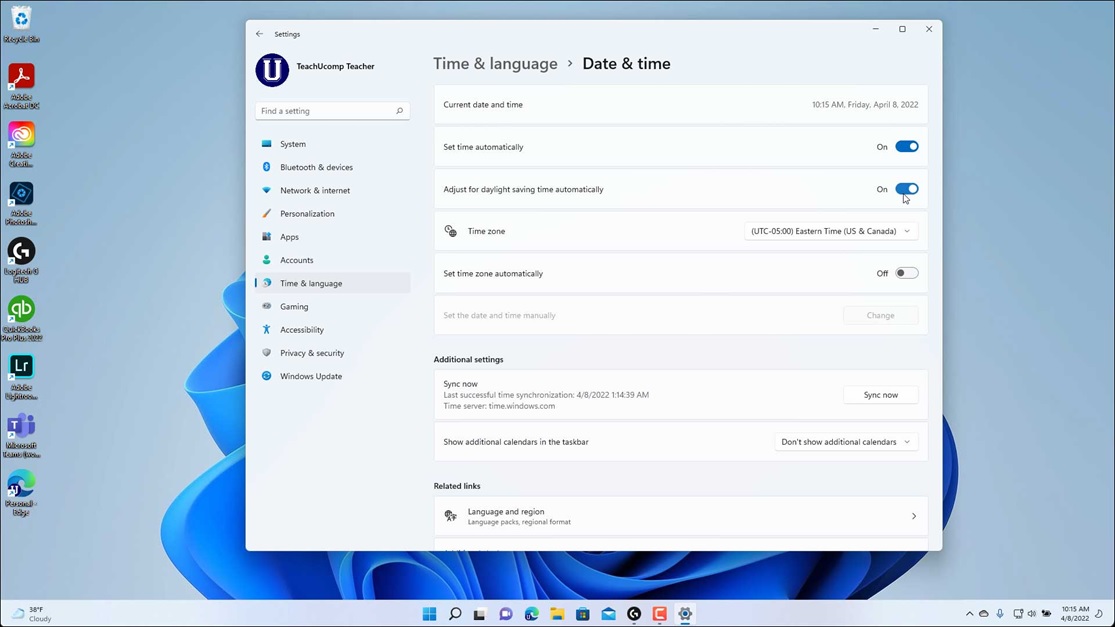
Windows 11 has a new and improved way to change the time format! Here’s how:
- Right-click on the clock in the taskbar and select “Adjust date/time.”
- In the window that appears, select the “Change date and time formats” link under the “Formats” heading.
- In the “Date and Time Formats” window, select the desired format under the “Short Date” or “Long Date” heading.
- Click the “OK” button to save your changes.
That’s it! Now you know how to change the time format in Windows 11.
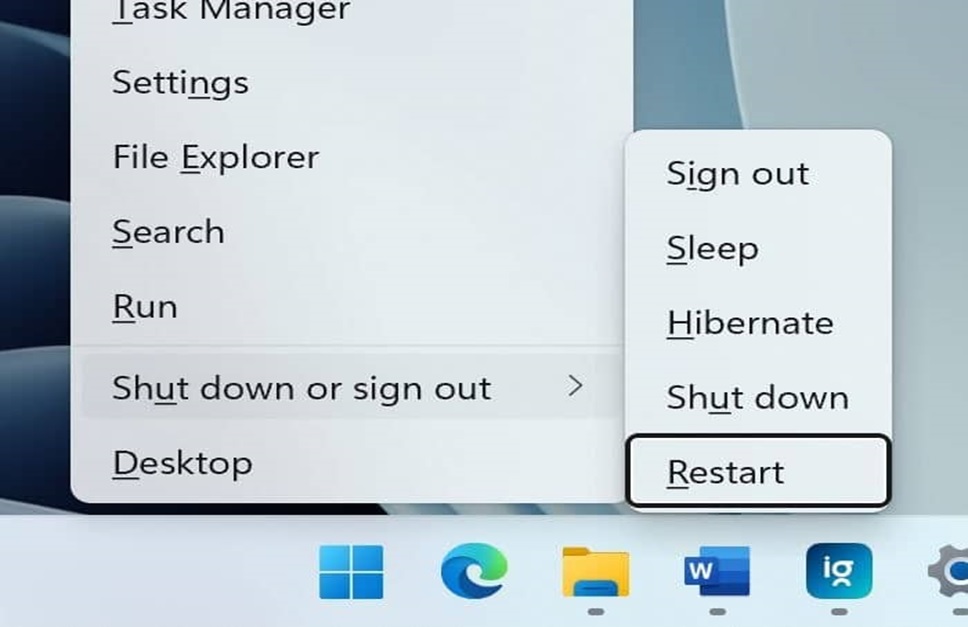
How To Shut Down Laptop With Keyboard in Windows 11
If you’re using a Windows laptop, there are two ways to shut it down using only the keyboard. The first method is to press the Windows Key + D to go to your windows desktop and then press the Alt + F4 keys simultaneously. This will display the “Shutdown Windows” dialog box. Select “Shutdown” from the drop-down menu and press Enter.
The second method is to press the Windows key and the X keys at the same time. This will bring up the main user menu. Select Shutdown from the menu and press Enter. In the same menu select Restart if you want to restart Windows 11.
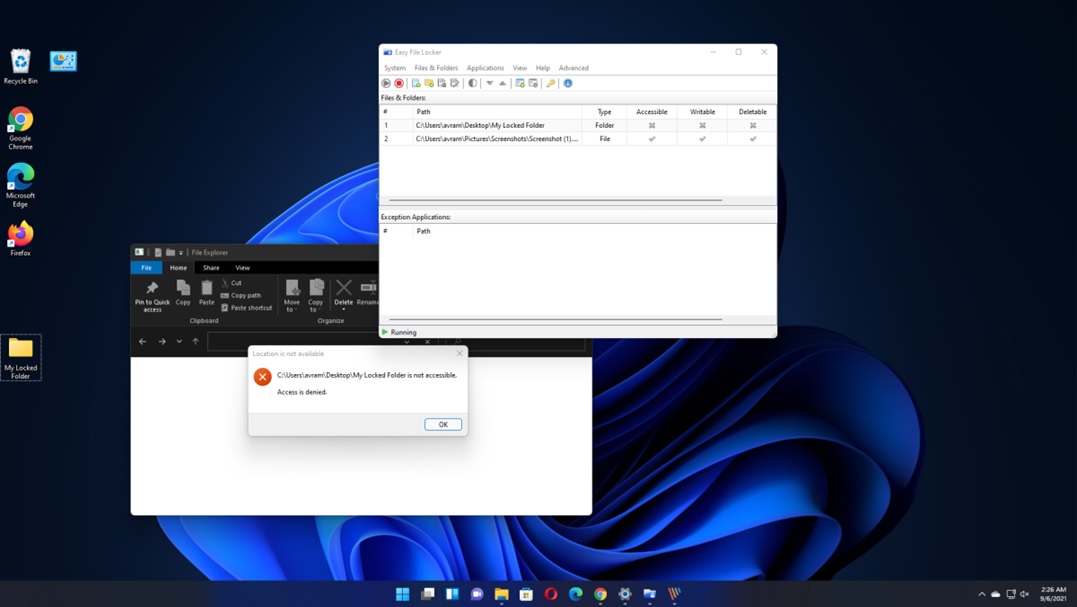
How to lock folders in Windows 11
Locking a folder in Windows 11 is a great way to protect your private data from prying eyes. There are two different ways you can lock a folder in Windows 11. The first way is to use the built-in security features of the operating system. The second way is to use a third-party application that lets you lock your folder with a password.
The first way to lock a folder in Windows 11 is to use the built-in security features. To do this, right-click on the folder you want to lock and select the “Properties” option. When the Properties window appears, select the Security tab. On this tab, you can set a password for the folder. When you’ve added the password, click the Apply button and the OK button.
The second way to lock a folder in Windows 11 is to use a third-party application. There are many different apps you can use to lock a folder. One of the most popular applications is Folder Lock. Folder Lock is a program that allows you to add a password to any folder on your computer. Once you add the password, the folder will be locked, and no one can access it without the password.
To use Folder Lock, you must first download the program from the Internet. After downloading the program, install it on your computer. After you install the program, launch it and select the “Lock Folder” option. When the “Lock Folder” window appears, select the folder you want to lock and click the “Lock” button.
If you want to add a password to the folder, enter the password in the “Password” field and click the “OK” button. If you don’t want to add a password to the folder, click the “Cancel” button. Once you click the “OK” button, the folder will be locked, and no one can access it without the password.
How To Stop Auto Update In Windows 11
Below are the steps for how to stop the automatic update in Windows 11 to determine when your computer is updated.
- Click on the Start menu and then select Settings.
- In Settings, click Windows Update.
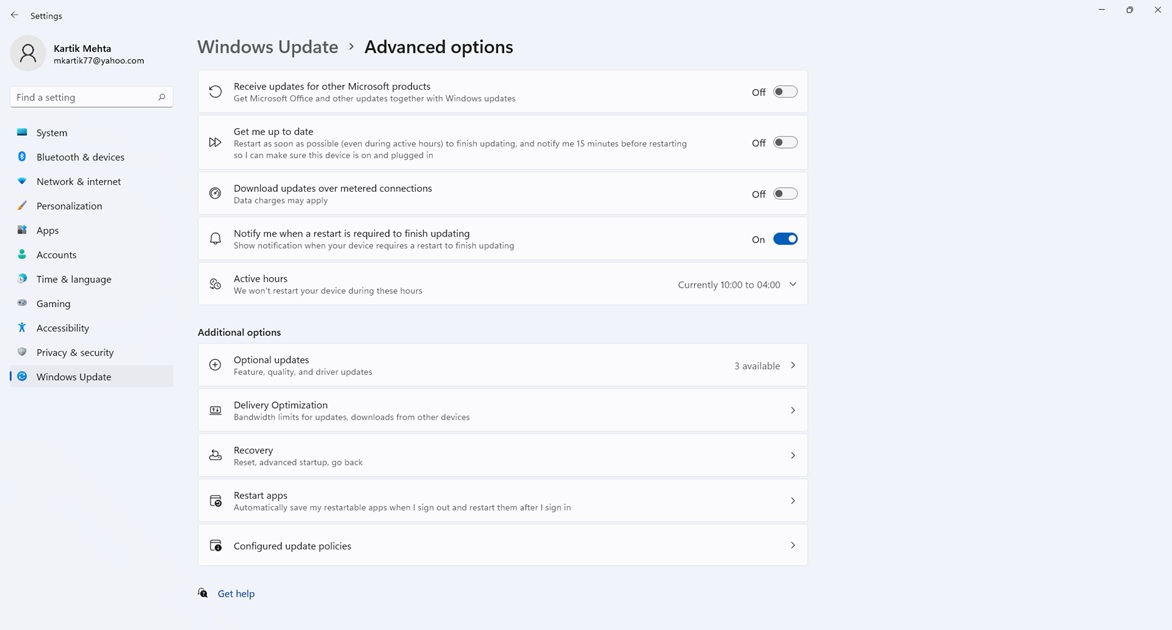
- Under Windows Update, select Advanced Options.
- You can enable the option “Notify me when a restart is required to finish updating”
That’s it! You’ll be notified when an update is available, and you can decide when to install it.
For more options with detailed steps to stop auto update in windows 11 refer How to Stop Windows 11 Update
How To Turn on Bluetooth in Windows 11
If you have a laptop or desktop computer with a Bluetooth adapter, you can turn on Bluetooth in Windows 11 to make it discoverable by other devices. Here’s how:
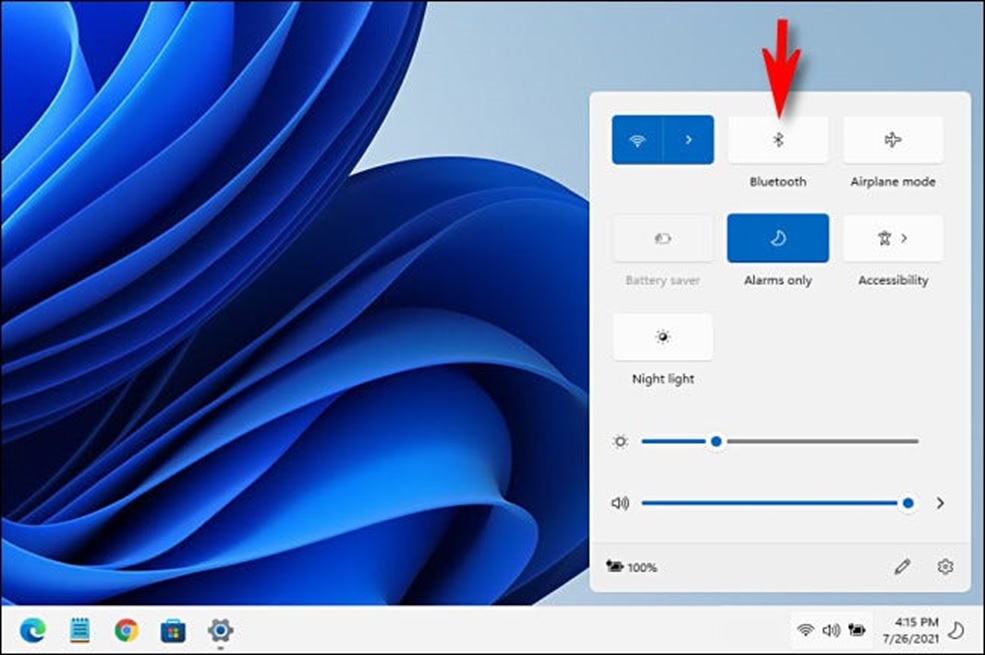
- Go to Start > Settings > Devices.
- Click the Bluetooth & Other Devices tab on the left.
- Make sure Bluetooth is turned on. If it’s not, click the switch to turn it on.
- Your computer is now discoverable by other Bluetooth devices.
If you’re having trouble turning on Bluetooth, it’s probably because your device doesn’t have a Bluetooth adapter. You can buy a Bluetooth adapter for your computer if you want to use Bluetooth.
How To Clear Cache In Windows 11
It’s effortless to clear the cache in Windows 11. First, you need to follow a few simple steps.
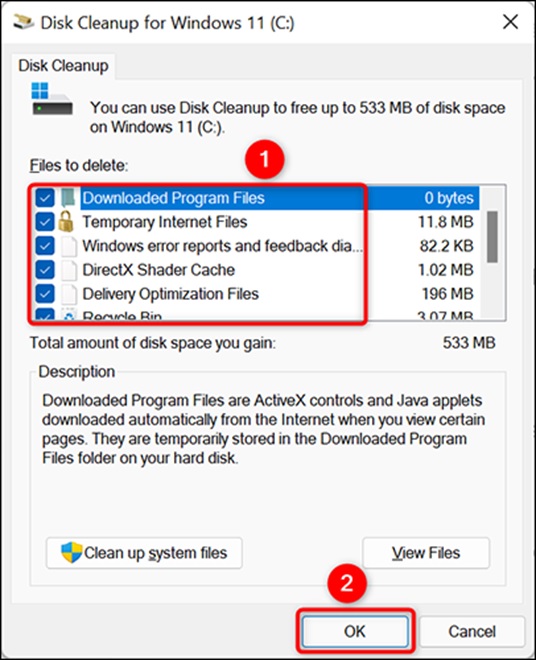
- Open the Start menu and search for “Disk Cleanup.”
- Select the drive you want to clean up and click “OK.”
- In the new window, check the “Temporary Internet Files” and “Recycle Bin” checkboxes.
- Click on “OK” and then on “Delete files.”
- Confirm the action and wait for Windows to clean the selected drive.
How To Find Product Key in Windows 11
If you need to find your product key for Windows 11, there are several ways you can do it. One way is to search in the registry.
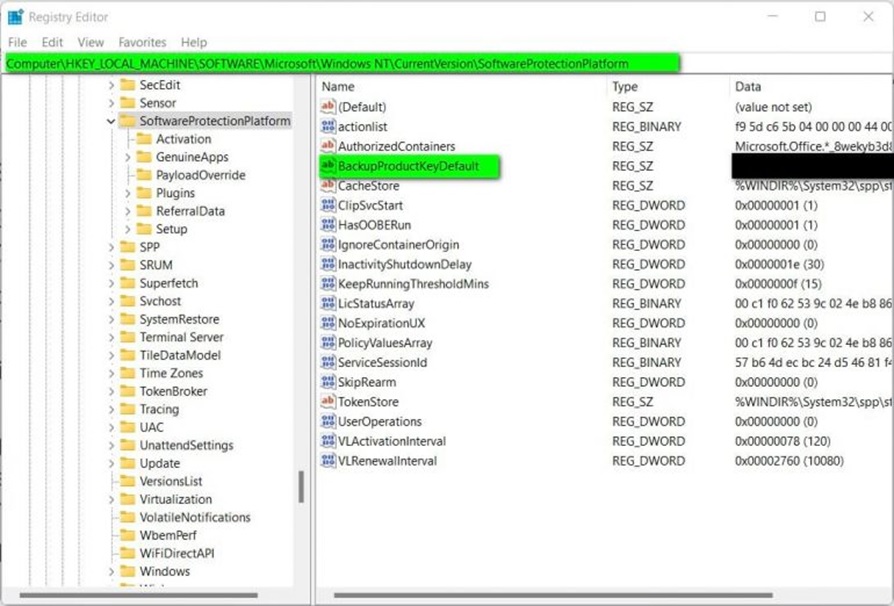
To do this, go to Start > Run and type “regedit” Once you’re in the registry editor, navigate to HKEY_LOCAL MACHINE \SOFTWARE\Microsoft\Windows\CurrentVersion\ProductId. The product key should be listed in the right window.
Alternatively, you can use a third-party program like ProduKey. Download the program, run it, and it’ll show you your product key.
How To Check Your System Health in Windows 11?
You can use several methods to check the health of your system in Windows 11 as given below
One method is to use the built-in Windows Defender feature. To do this, visit the Windows Defender Security Centre and click on the “Device Health” option. From here, you can get an overview of your device’s health and identify any problems that need to be fixed.
Another way to monitor the state of your system is to use the Windows Performance Monitor. To do this, launch the Performance Monitor by pressing the Windows key + R and typing “perfmon.” Double-click on the “System” option after selecting the “Data Collector Sets” option in the Performance Monitor. From here, you can examine several performance counters showing your system’s performance.
Finally, you can also use the Resource Monitor to check the health of your system. You can start the Resource Monitor by pressing the Windows key + R and typing “resmon.” Next, open the Resource Monitor, then select the “CPU” tab and, finally, the “Processes” tab. Here you’ll get a list of all the programs currently running on your system and how much of your CPU they’re taking up. If you find a process using a lot of your CPU, you should check it more closely to see if it’s causing any problems.
You can refer How to Check CPU Temperature in Windows 11, If you want to monitor CPU temperature to maintain peak performance and extending the life of your hardware
